Create the first decision table and decision table task
For detailed information on decision tables, read here: Decision Tables
The first decision table task we create will deal with a client's accident history. In our fictional insurance company, we do not give policies to clients who have had more than six accidents in the past twelve months. This decision table will deal with the number of accidents, and the corresponding task will direct the flow based on the evaluation from the decision table.
You can see in your flow editor window that only inputs are present. The keyword inputs appears above the list of inputs on the left. To start entering tasks, we first need to use CTRL + SPACE to bring up the “Insert” dropdown and insert the tasks keyword.
NOTE: Tasks cannot be added if the tasks keyword is not present.
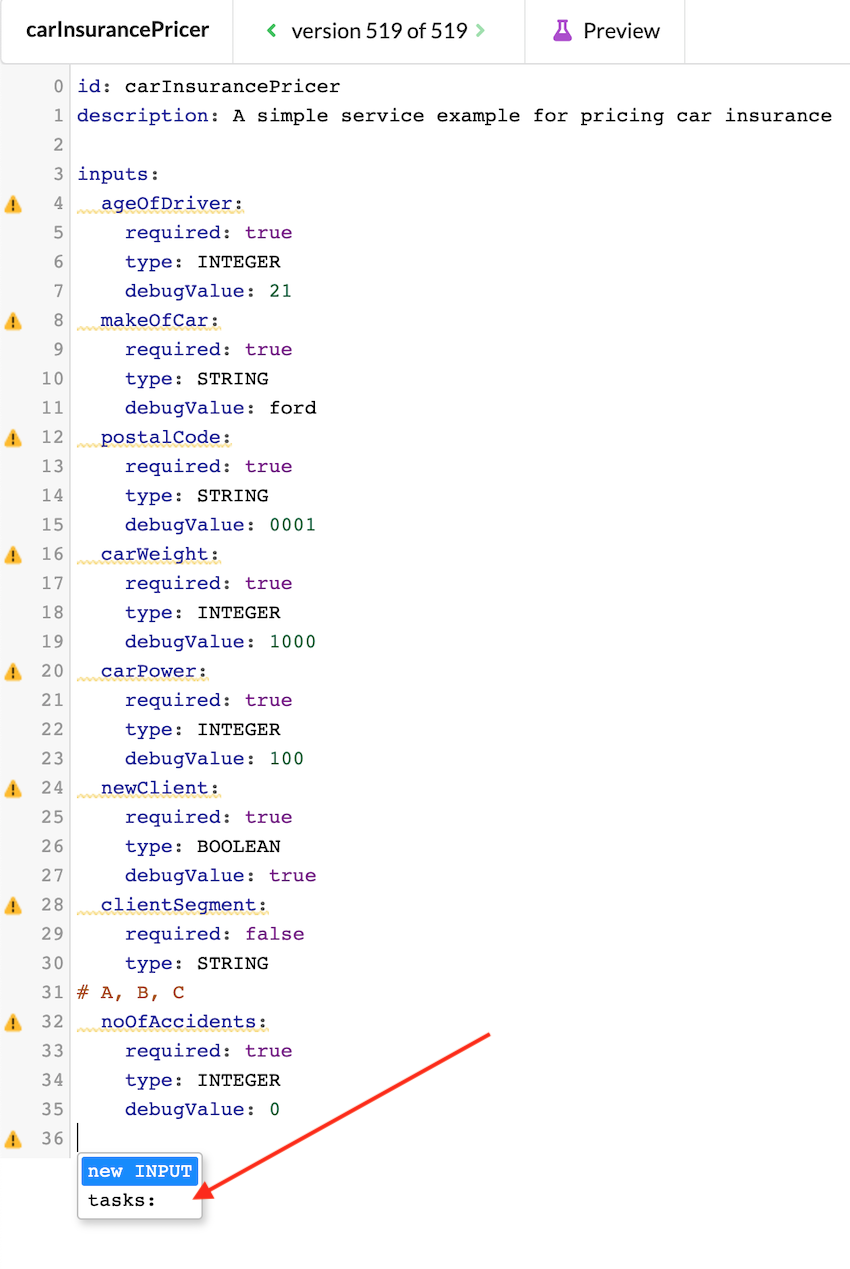
Now that the tasks keyword is in place, we can add tasks. Select “New DT task”.
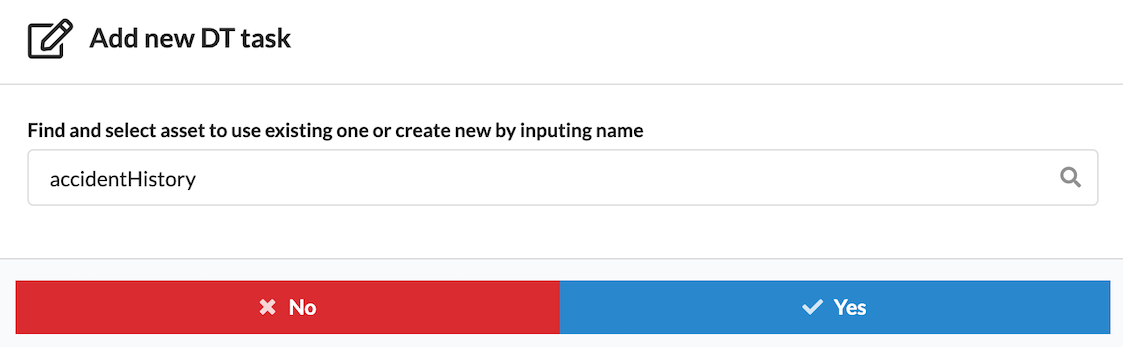
A modal window will appear. In the search field, you can either search for an existing table by typing in a name, or you can write your own, unique name, and it will be created for you.
Because there is no existing table yet, create a new one with the ID “accidentHistory”. Then, select “Yes”.
Now, your flow editor will look like this:
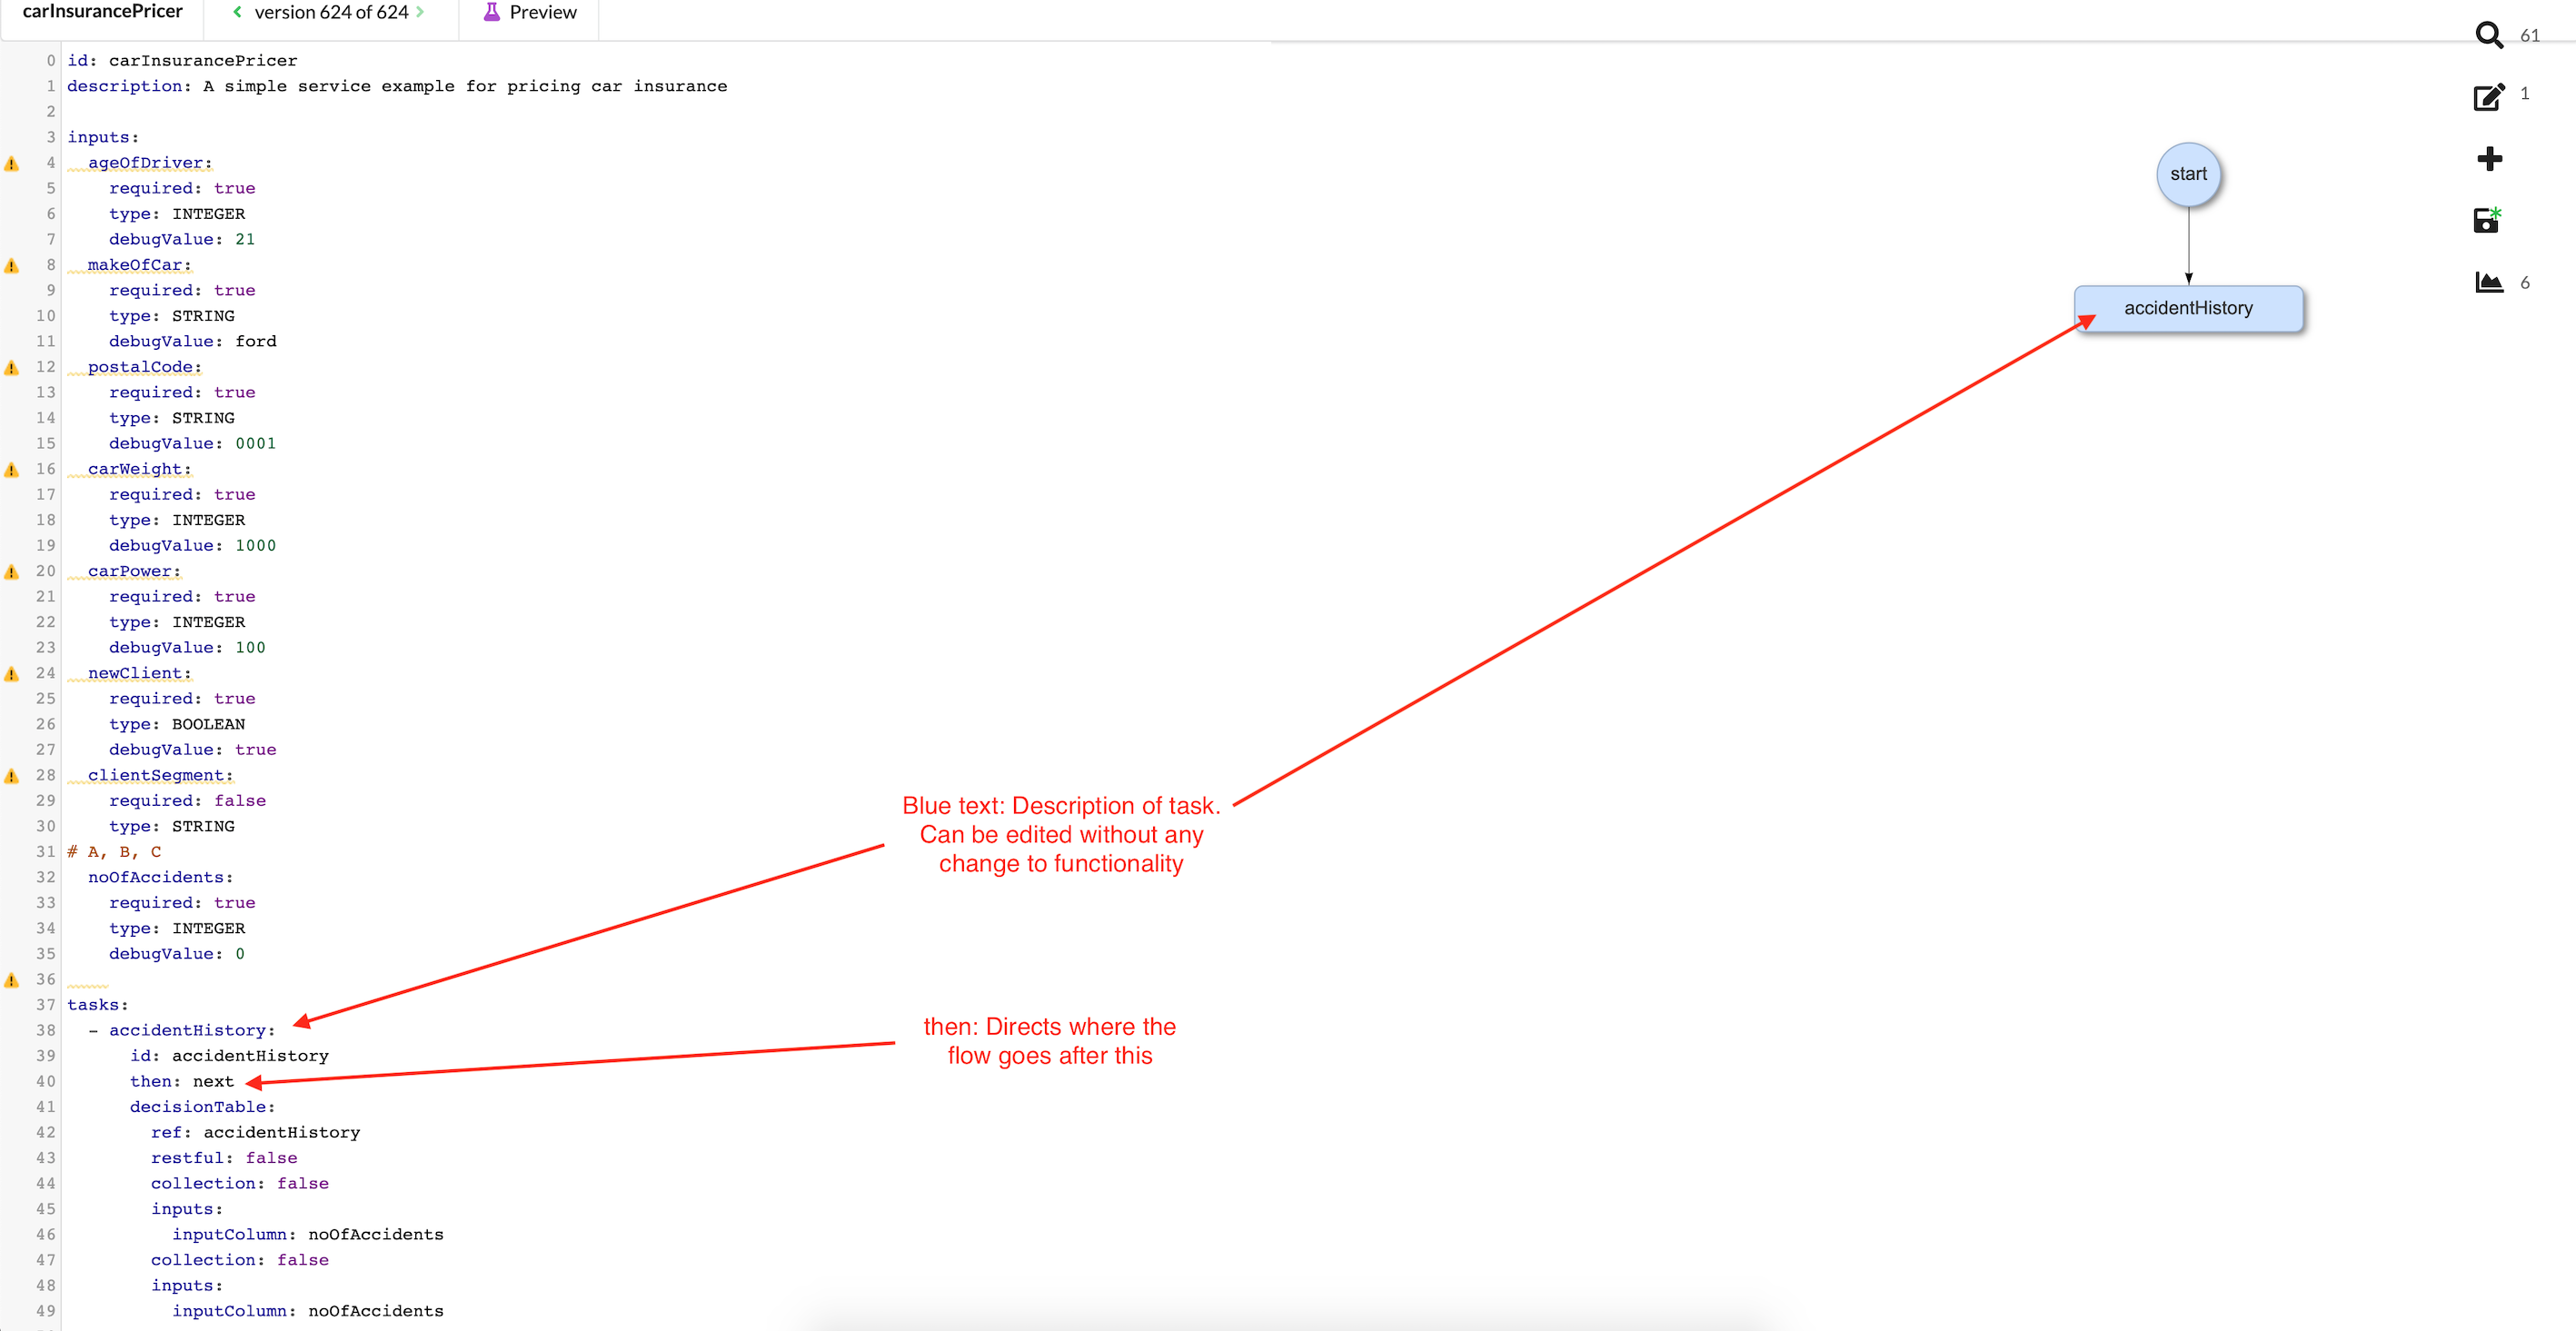
Now you are free to change the description of your task (the blue text above the task body) to be more readable. Feel free to put spaces between words or write any other description which is logical for you and will make the flow diagram easier to read.
Editing the decision table behind the decision table task
As of now, we have a decision table task with a basically blank decision table behind it. Let's edit this new table now. Double click on the “accident History” bubble in the flow diagram on the right to bring up our new decision table. This is what it you will see:
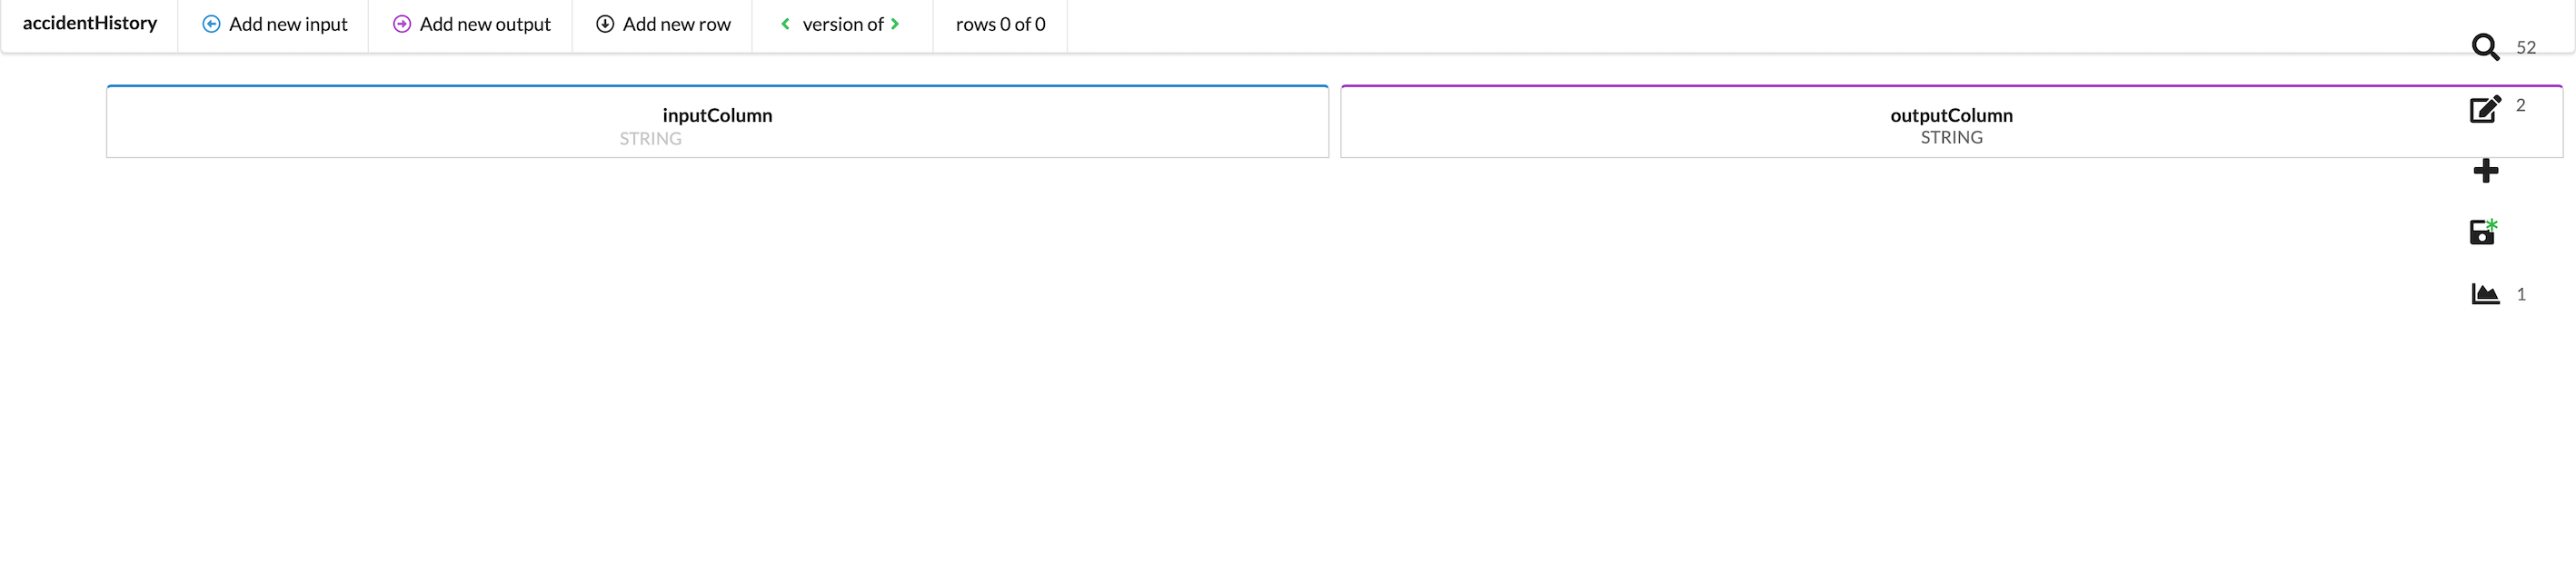
We know that this decision table will evaluate the client's number of accidents in the past twelve months against our company policy of rejecting any client with six or more accidents. To set that up, we will need to edit our input column to specify the number of accidents, and we need to edit our output column to produce some result in connection with the input number of accidents.
Thinking it through, we want a table that represents the following idea:
- If a client has more than six accidents, the client will be rejected for the reason that the “Client has too many accidents.”
- If a client has fewer than six accidents, the client will be accepted for the reason that “Everything is ok with the client”.
Building on this idea, it means that our table will need three columns:
- One input column that handles the number of accidents
- One output column that returns either TRUE or FALSE to show if the client is accepted or rejected based on the number of accidents
- One output column that returns the reason for the acceptance or rejection
- Two rows: One row contains the “accepted” output whereas the second row contains the “rejected” output.
Follow the steps below to set up the table.
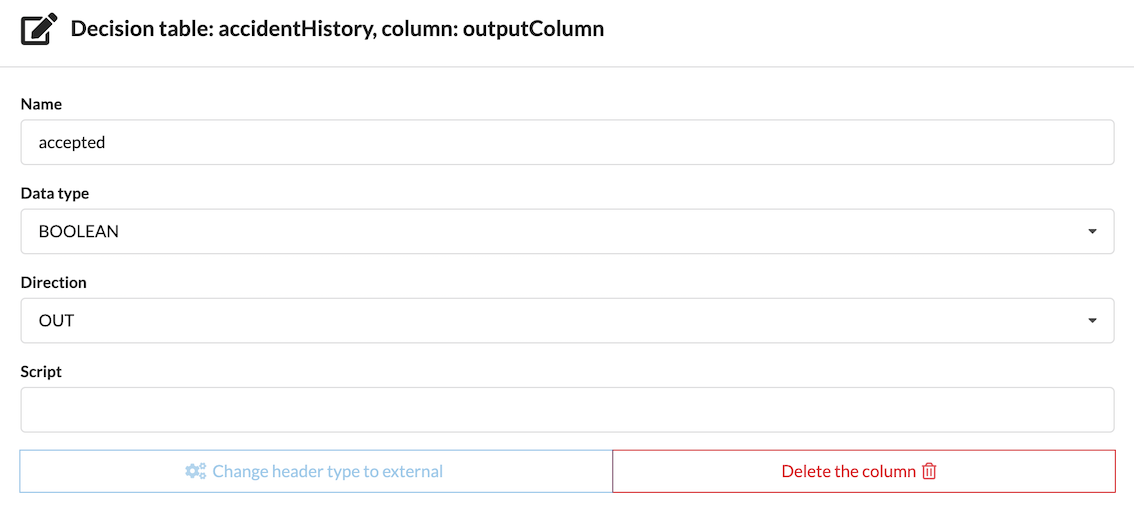
- Begin by changing the current column named “outputColumn” to “accepted”. To do this, click on its name (column's header) to bring up the editing modal. Change its data type to BOOLEAN. Click anywhere outside the modal to return to the table.
- Add a new output column to handle our second output. Click “add new output” at the top of the screen.
- The column will appear with red text stating “Header is not defined”. As before, click on the header and, via the modal window, name this header “reason”. Change the data type to STRING.
- Change inputColumn's data type to INTEGER.
- Be sure to save changes.
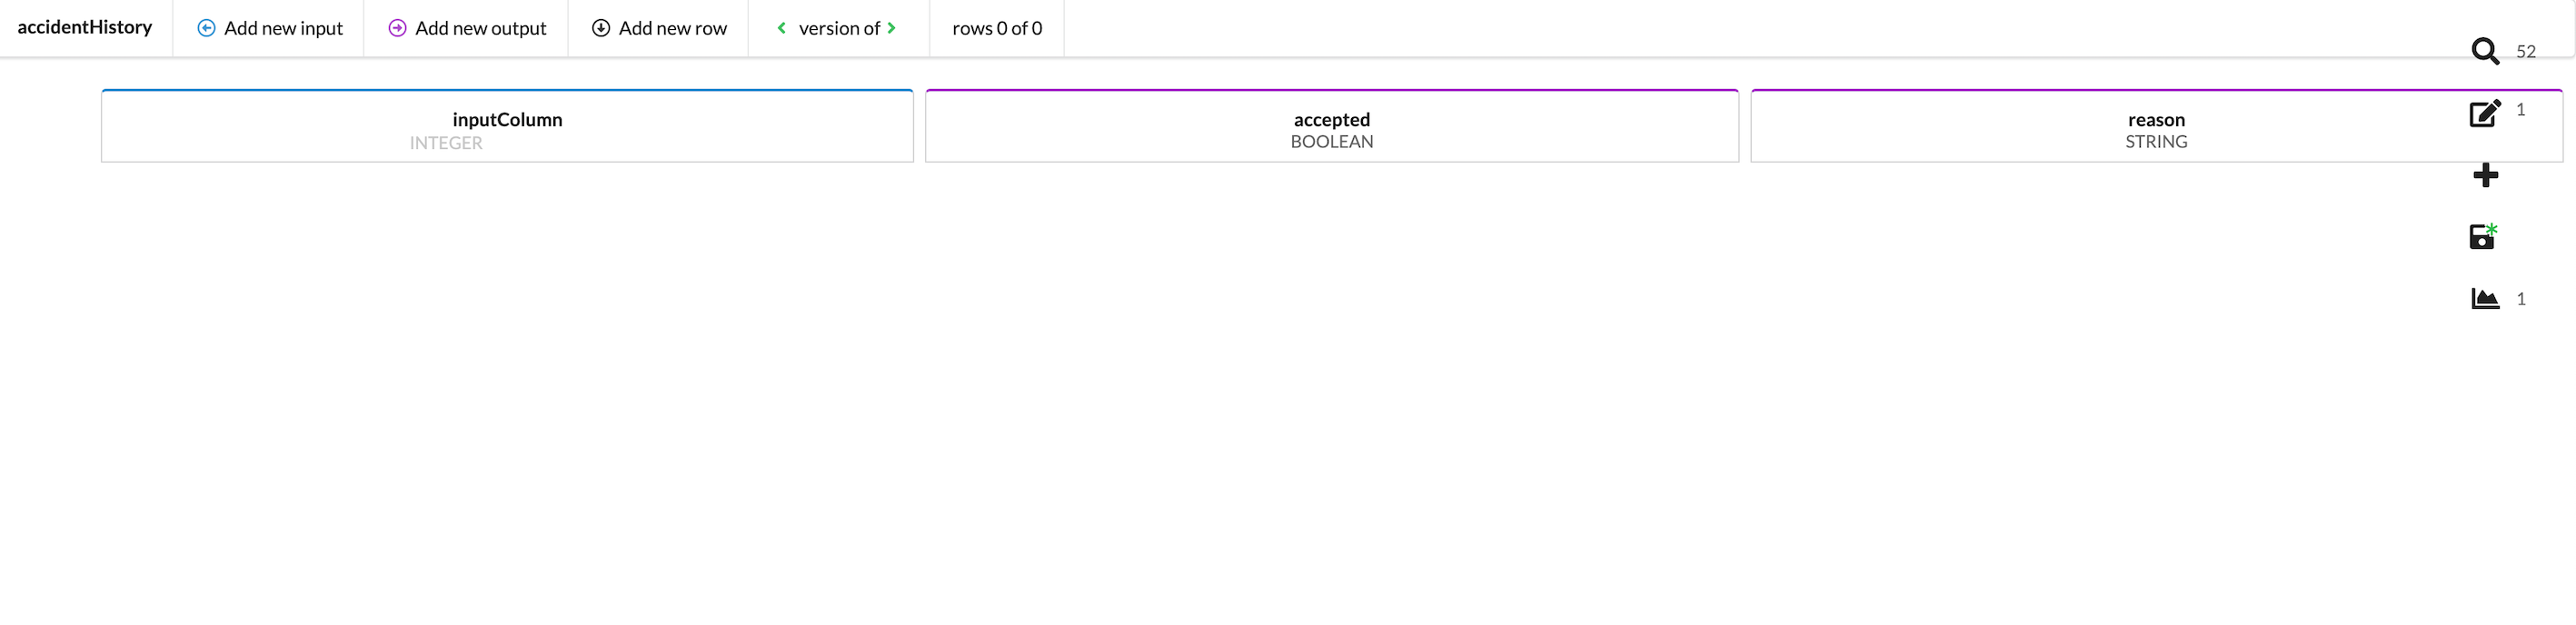
Your table should now look like this:
- Add the two rows needed to handle the two possible outcomes. Click “add new row” at the top of the screen to add them.
NOTE: If you need to delete a row, click on its row number.
- Working first with the input columm, click in the cell on row 0 to bring up the editing modal window.
Here, you will see the possible comparison operators you may select to work with INTEGER type. This row will serve to reject any client with more than six accidents, so as a Comparison, select “Greater than” and for New Value, enter “6”.

For this example, row 0 will handle rejecting clients, and row 1 will handle accepting them and continuing with the flow.
- Edit the two output columns. Click in row 0 of column “accepted”, and select “false” from the dropdown menu.
- Enter the reason to be given if a client is rejected by clicking in row 0 of the column “reason”. Type “Client has too many accidents”.
- Edit row 1. Click in row 1 of column “accepted” and select “true” from the dropdown menu.
- Enter the reason to be given if a client is accepted by clicking in row 1 of the column “reason”. Type “Everything is ok with the client”.
- Be sure to save changes.
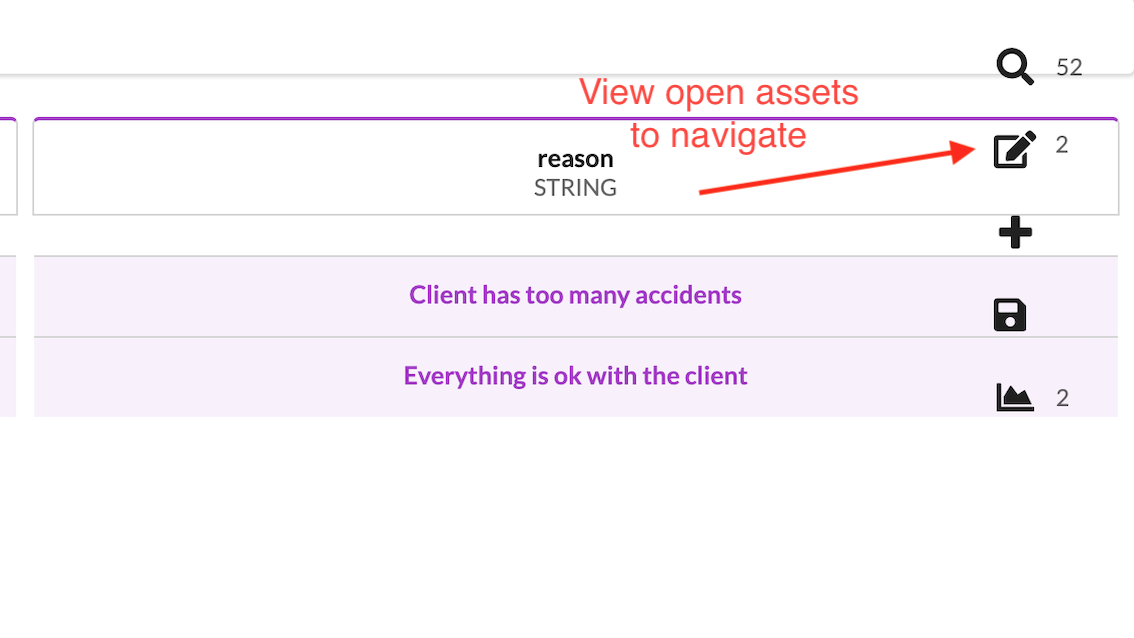
Your table should now look like this:

You will notice that row 1 under “inputColumn” displays the following message: “No value entered, so condition is always true.” For more information about this message, see Simplfying a table and catching logic holes
There is one more item on the table that needs to be edited before testing: Hit policy. First, read about Hit policy here to learn what it is.
Now, set the table's hit policy to FIRST by clicking on the table's ID in the top left corner of the editor window.
Testing the table
Start here by reading about testing a decision table.
In terms of the accidentHistory decision table, test it out by entering values as shown in the above example. Make sure that, if any number greater than 6 is entered, the client is rejected and the appropriate message is displayed. An example of a test is below: In inputColumn, a value of 7 was entered and the table matched the predicted outcome: Client is not accepted due to too many accidents.

Save the decision table and navigate back to the flow editor using the right side menu. Here, you can search and/or view open assets.

Before continuing, we need to link an input we specified under the keyword inputs to this task. Recall that we created an input called “noOfAccidents”, which is of type INTEGER and is REQUIRED. This input is referring to the integer that the decision table “accidentHistory” will take in under its first column, “inputColumn”. If “noOfAccidents” is greater than 6, the client will be declined.
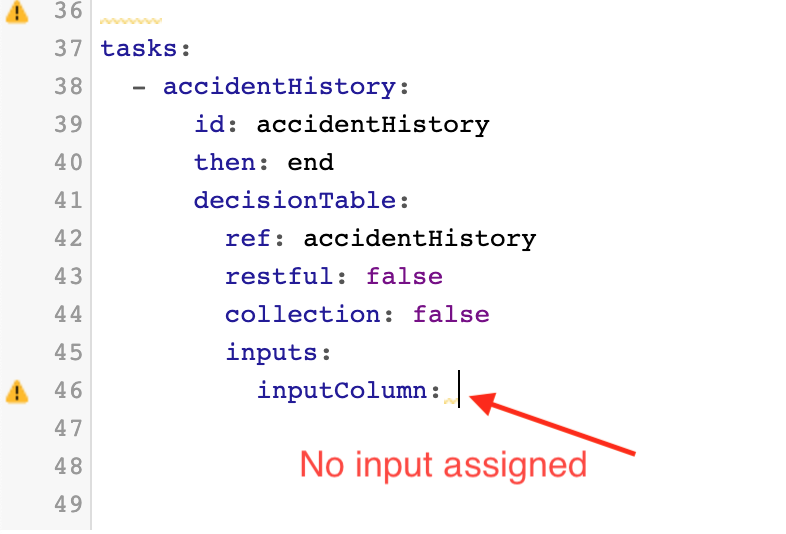
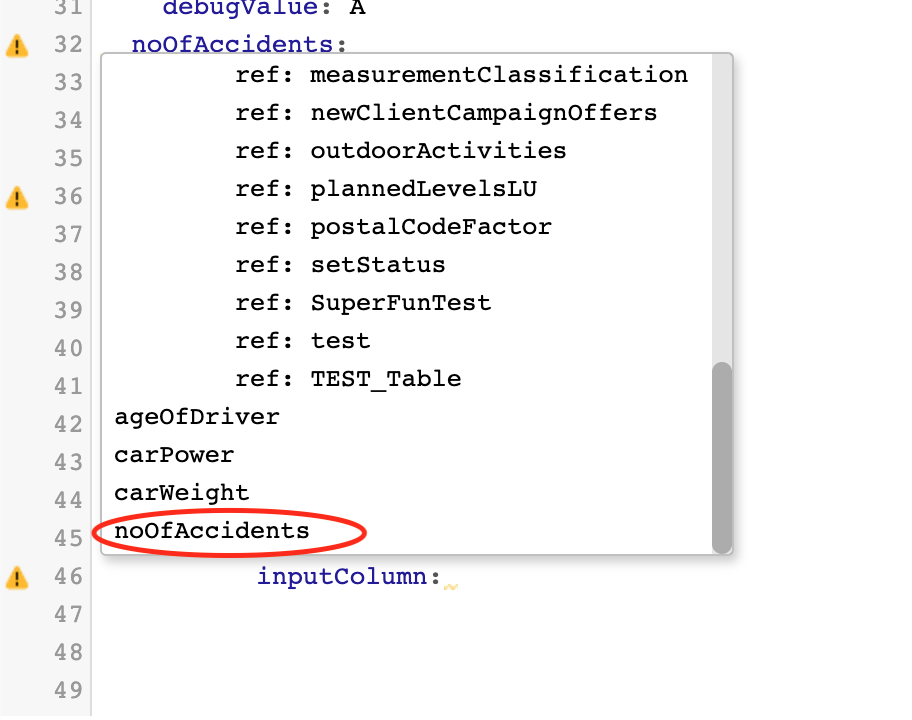
To link this input to the task, position your cursor on the line where the arrow is shown:
Hit CTRL + SPACE to bring up a dropdown of all available inputs. Select “noOfAccidents”.
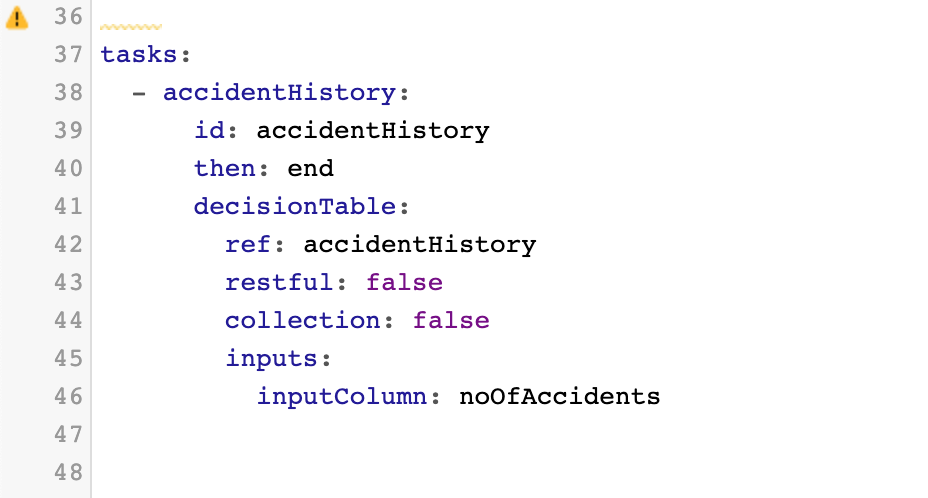
Now, your task should look like the following:
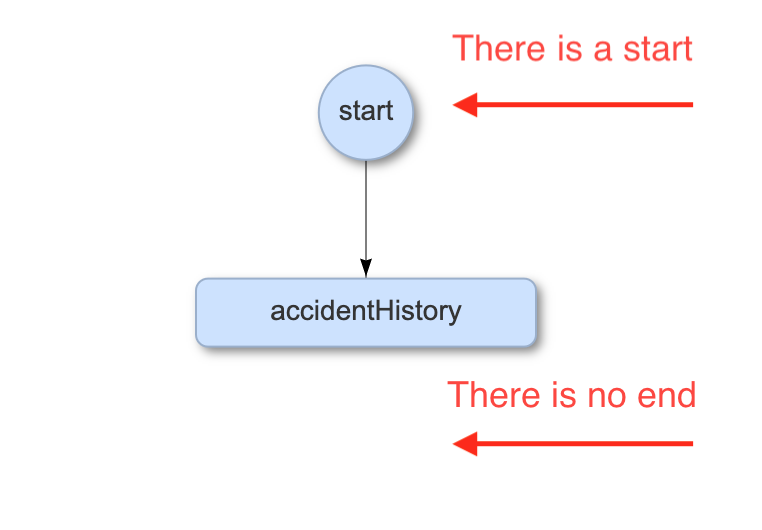
We want to save our progress so far on this flow, but in its current state, there is no “end”, and therefore, this flow will not compile. theWrench does not save assets if they are in a broken or non-compiling state, so before we save and move on, we need to give our flow an end. To do this, we need to edit the decision table task.
The keyword to look at is then. This keyword serves to direct where the flow goes after this task.

then has three possible values:
next: (DEFAULT VALUE). Draws an arrow on the flow diagram between this task and the next task. It does not link the tasks functionally.end: Directs the flow to end after this task.- another asset ID: Directs the flow from this task to the task specified by its ID.
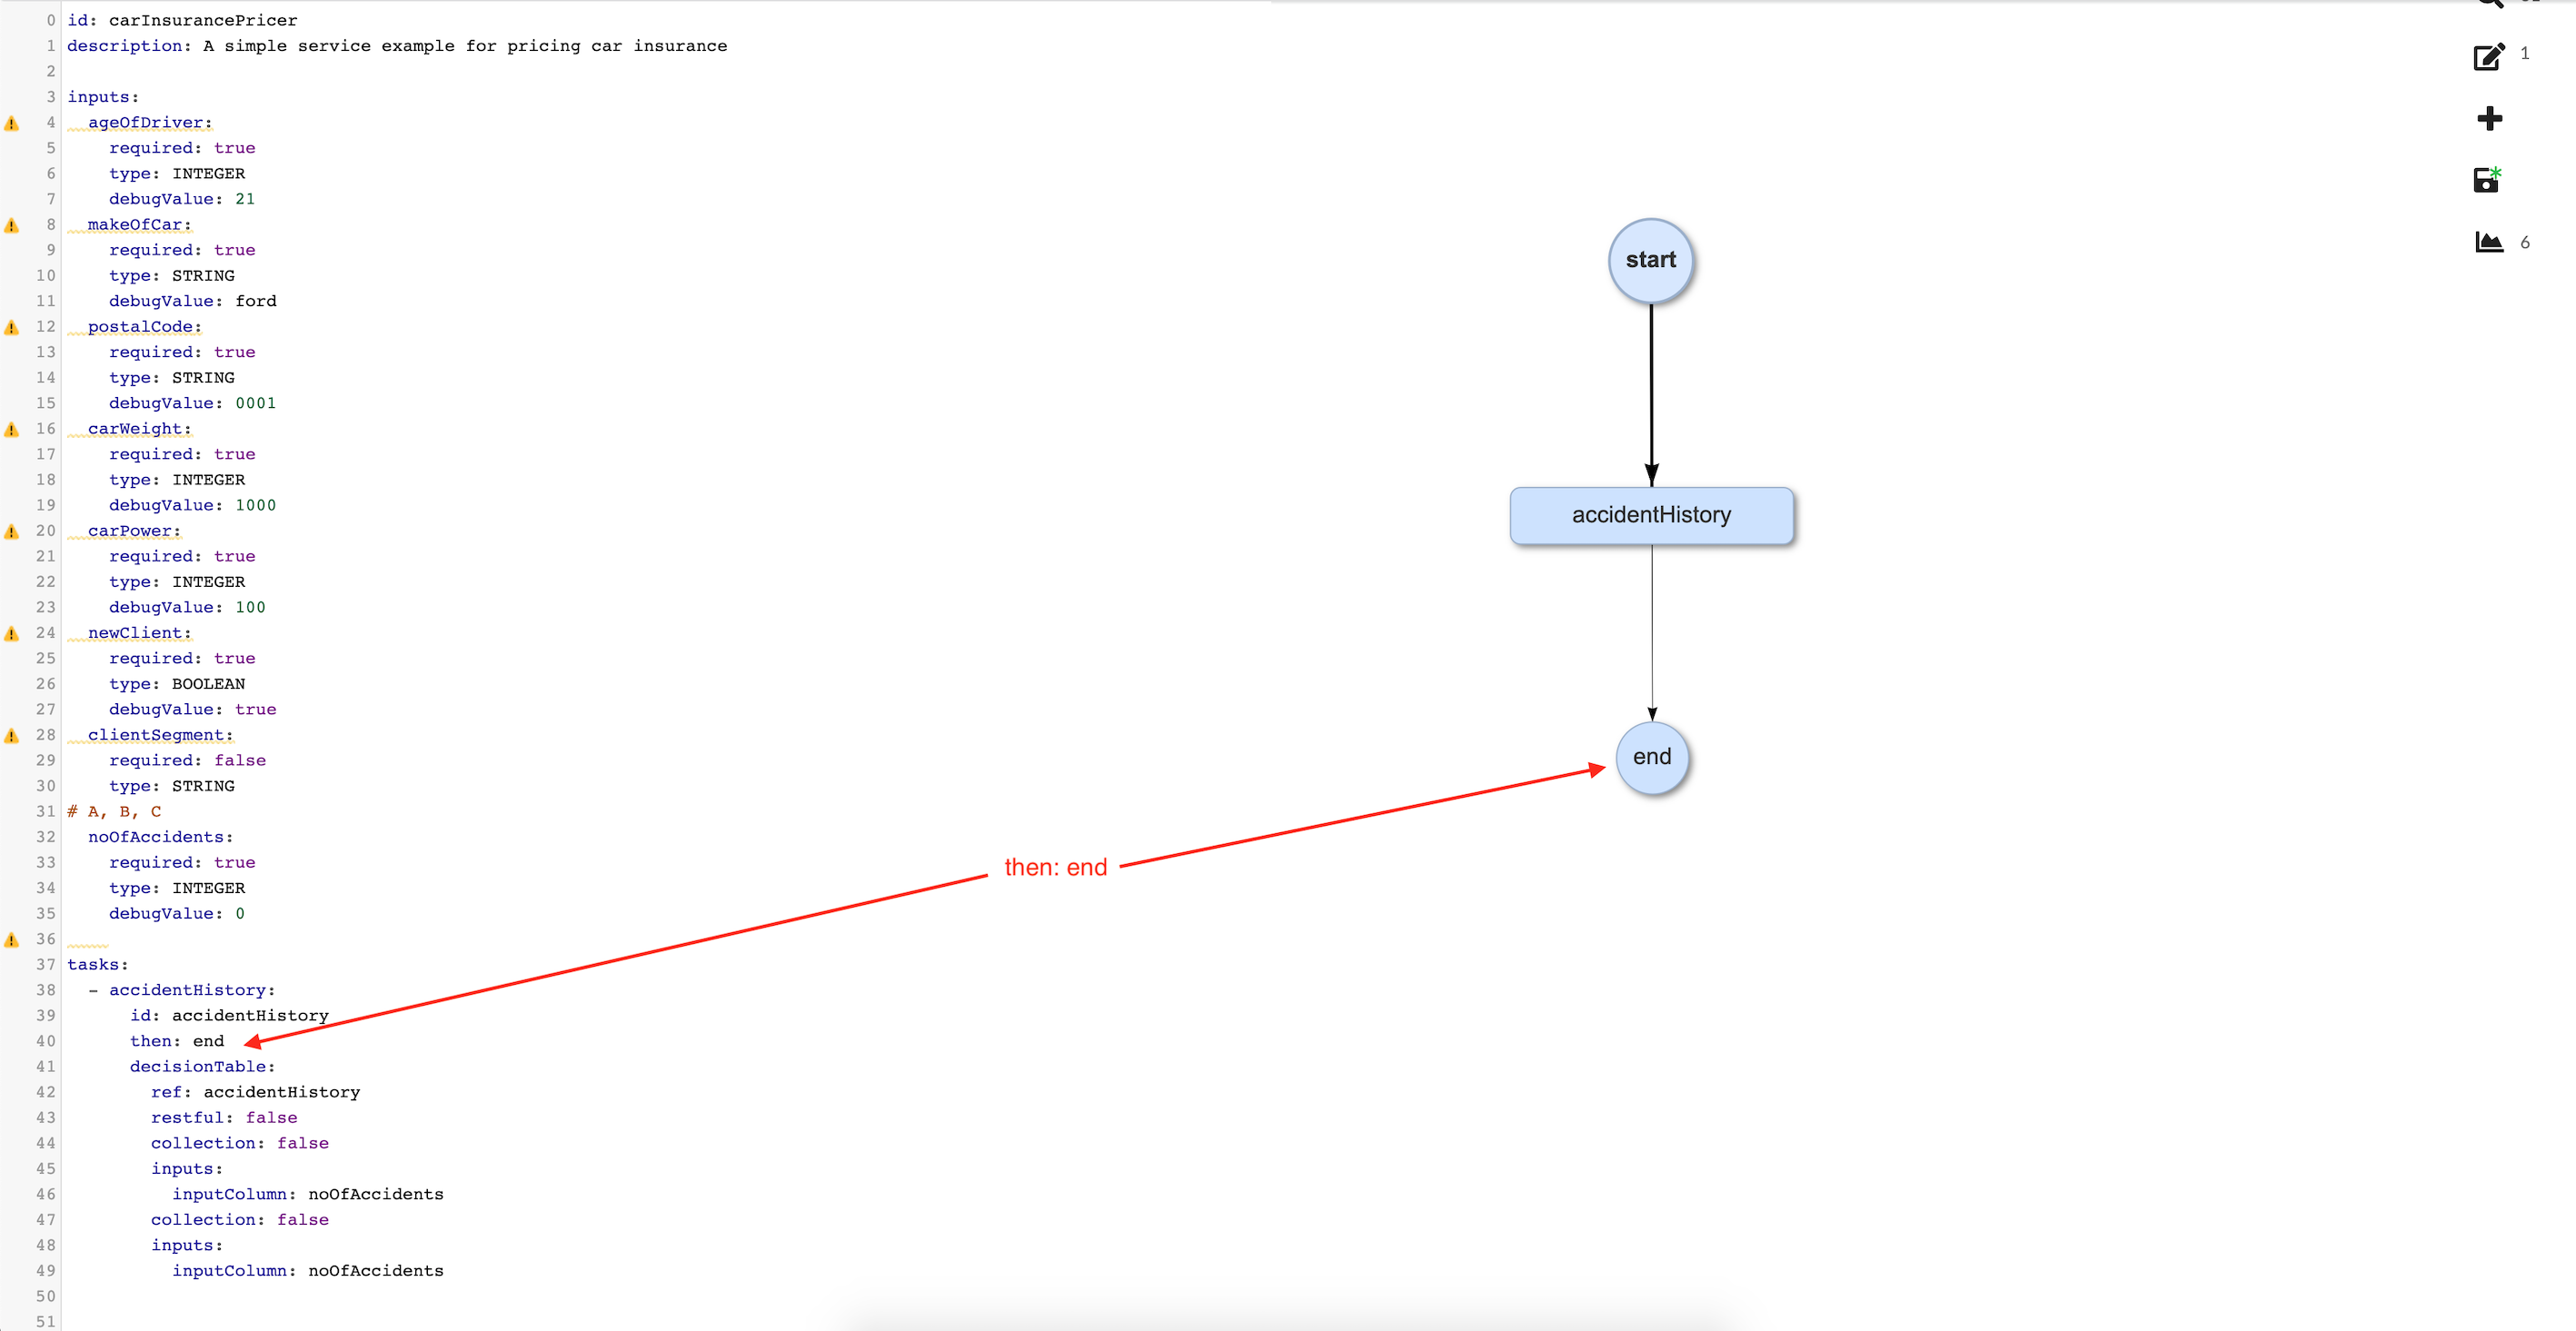
In your decision table task, change the value to then: end. You should now see the following:
Save your changes and move to the next step.