Create the first switch task
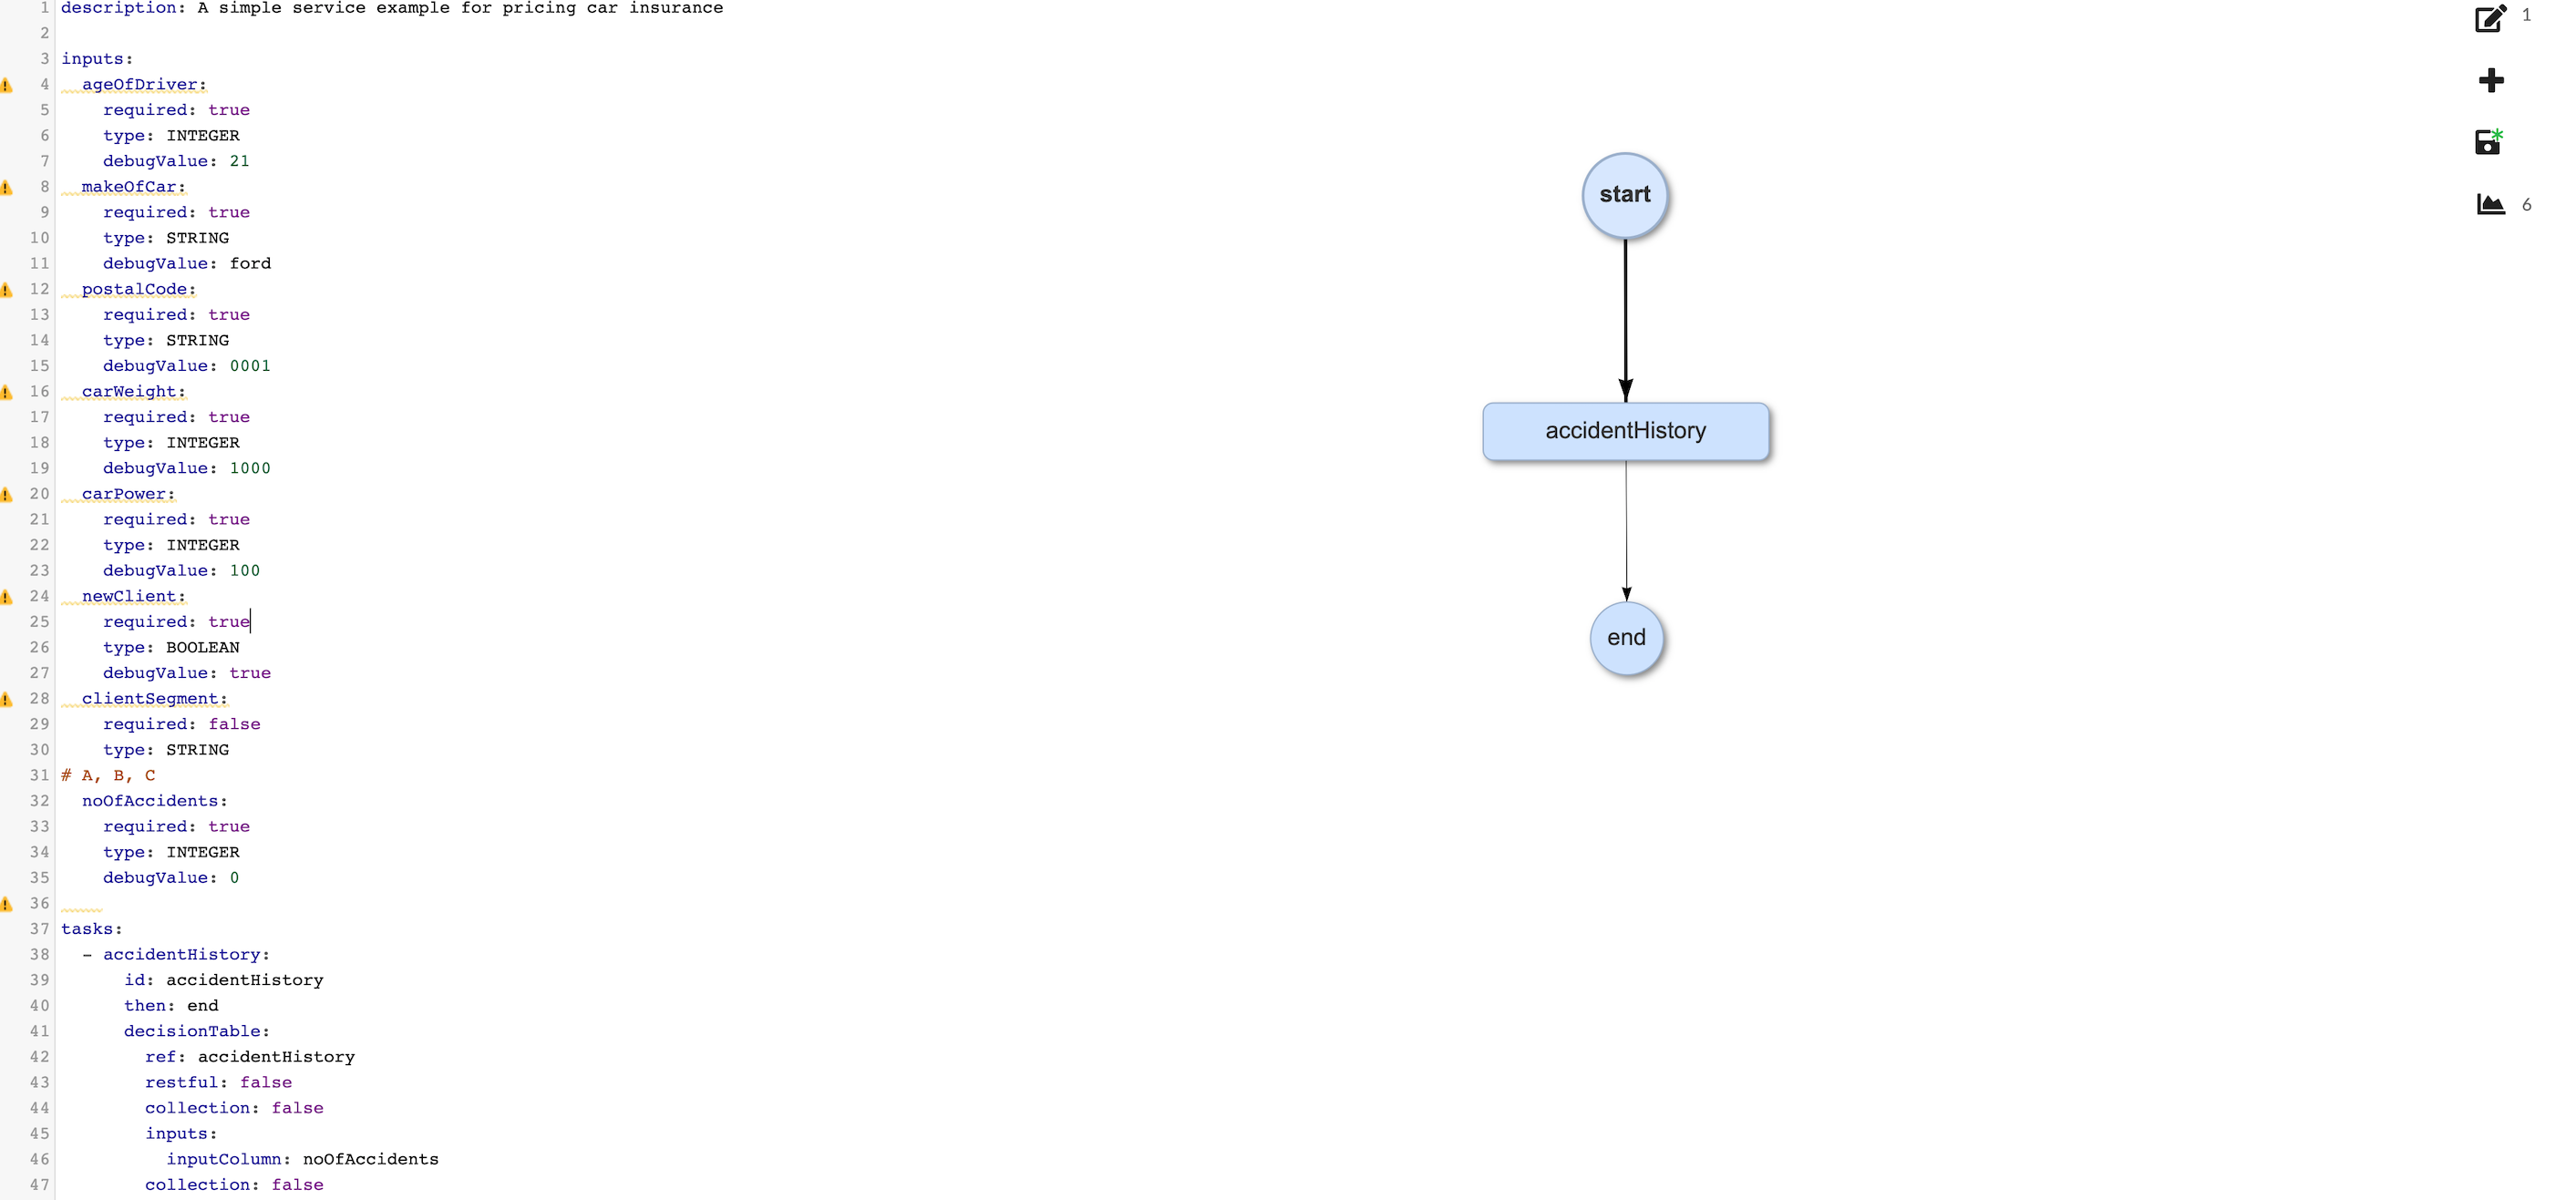
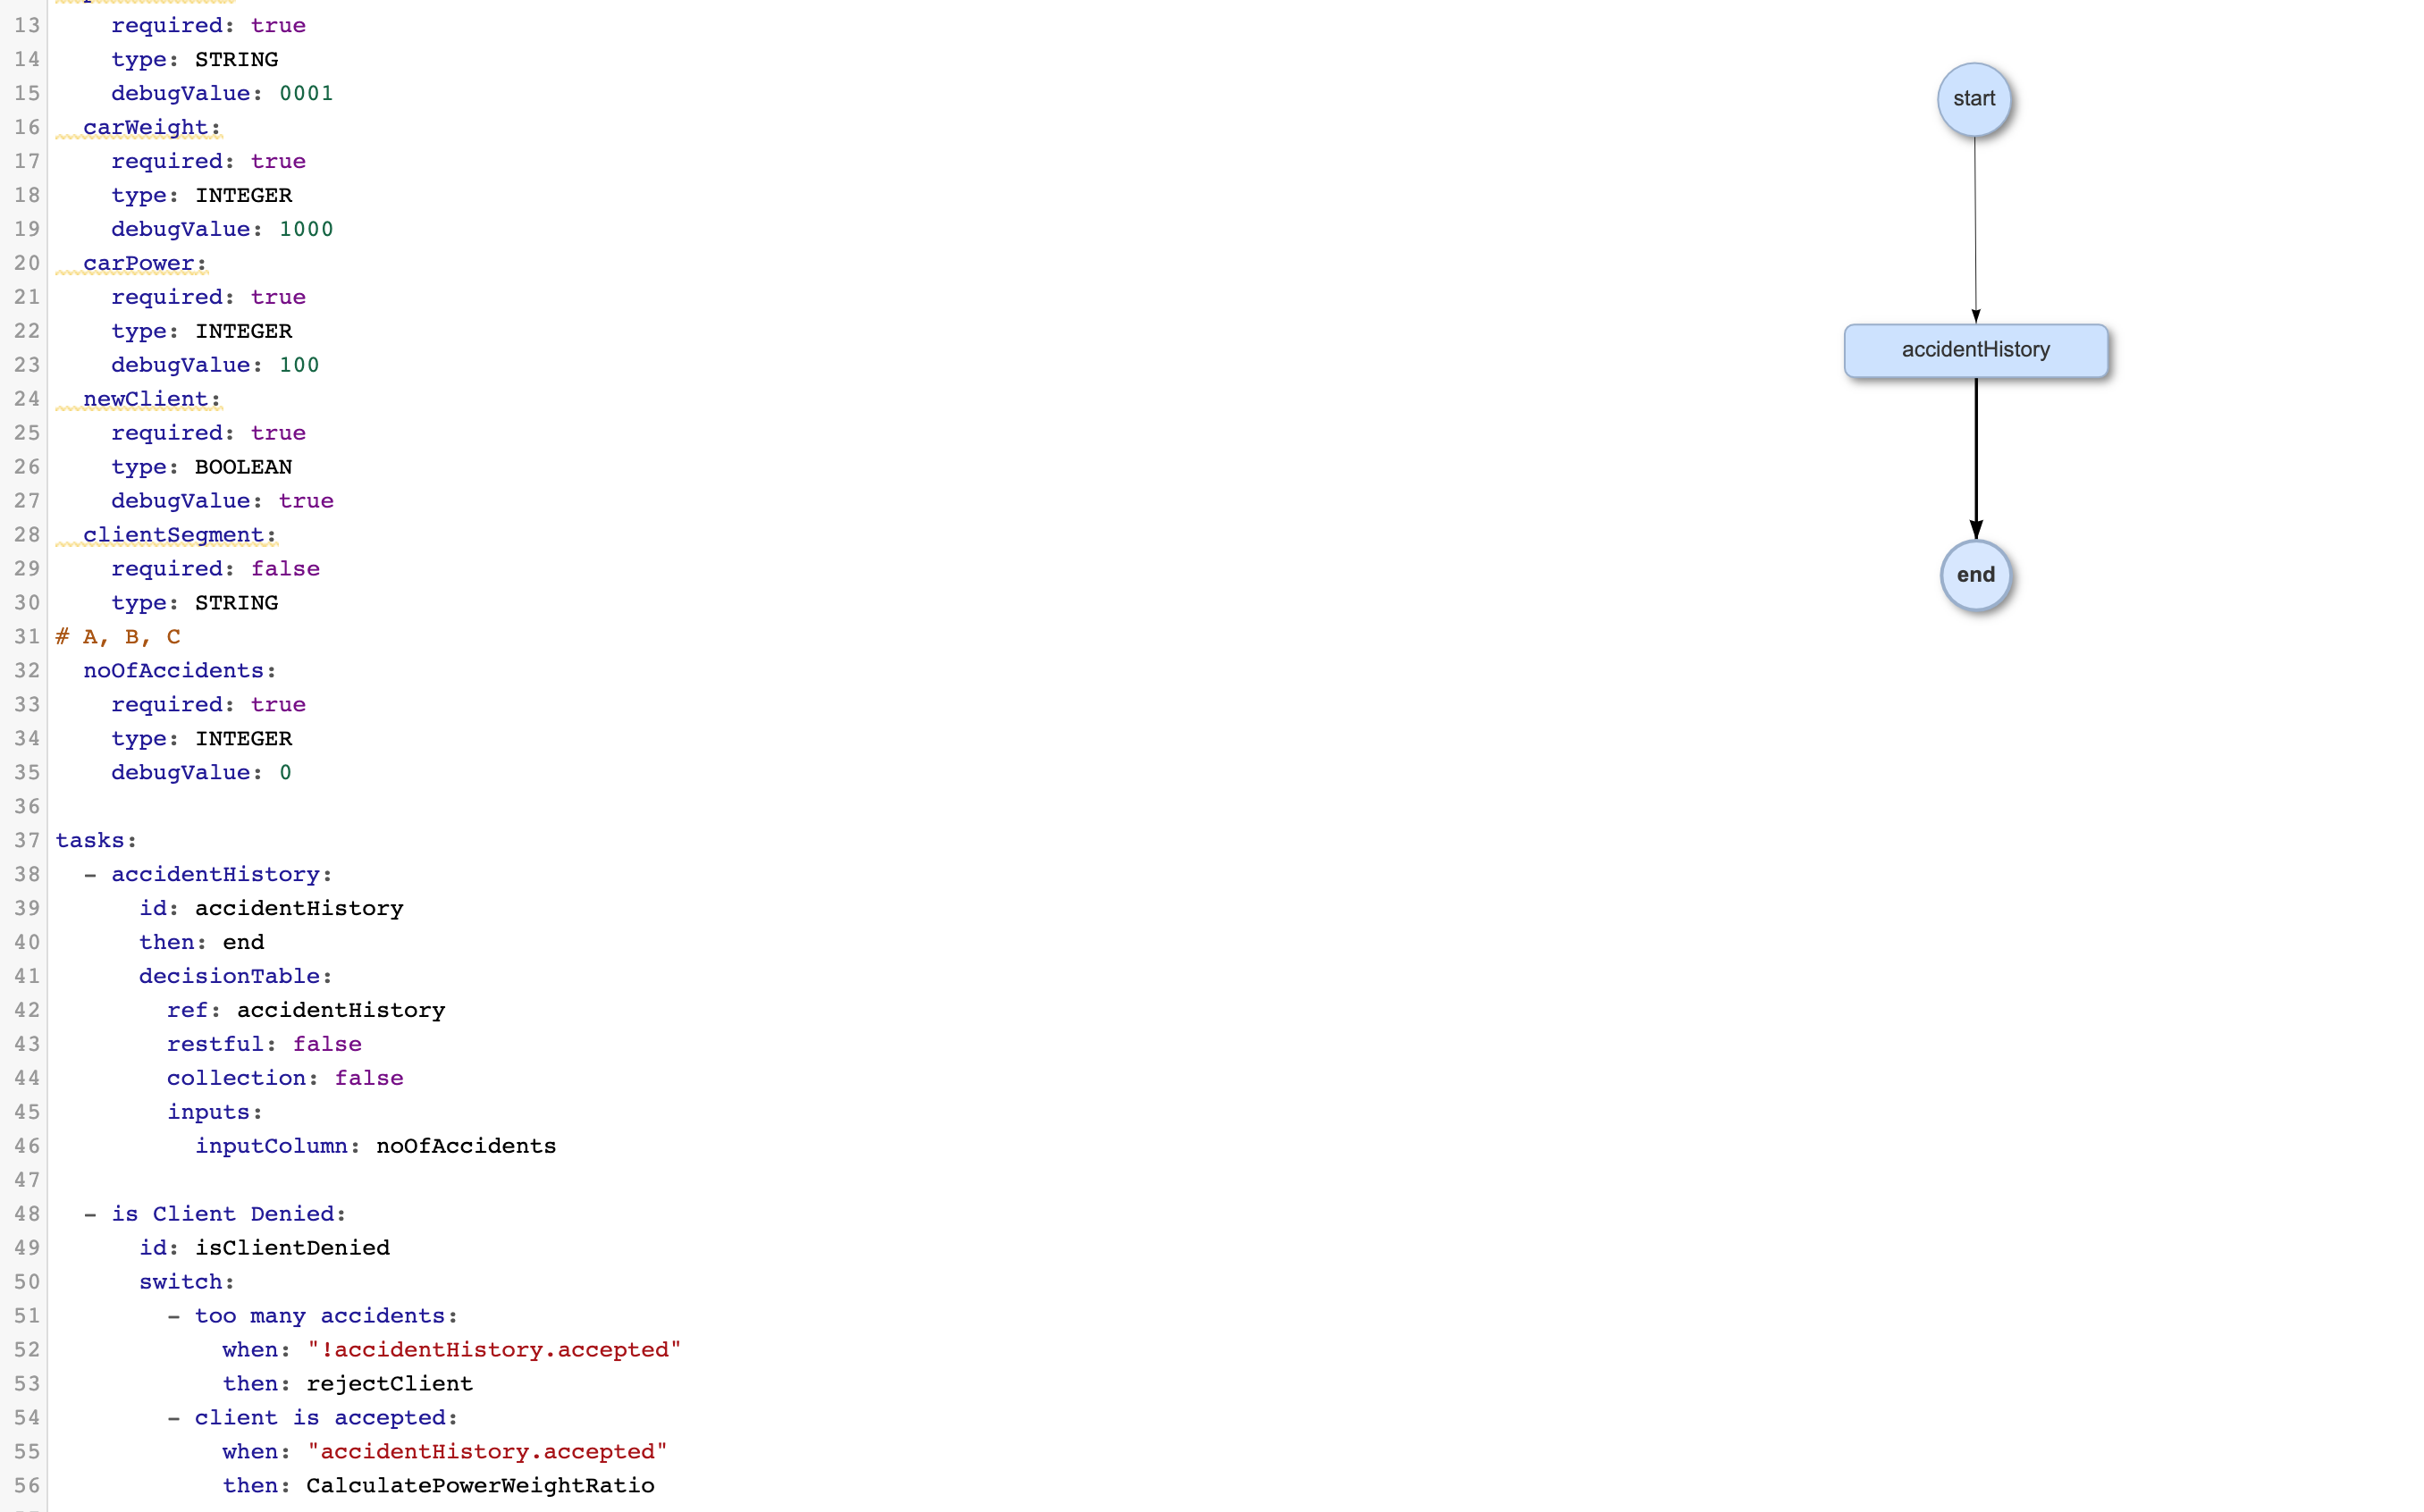
At this point, our example microservice looks like this:
Now that we have a decision table task that will determine whether a client is accepted or rejected, we need to direct the flow to the next step, but our decision table task gives us two possible outcomes to deal with: accepting a client or rejecting a client. This is where a switch task comes in. This switch task will direct the flow either to continue with the pricing process or to go directly to the end without offering a product, based on the number of accidents a client has had in the past twelve months. It makes sense that this task should come at the beginning of the flow, because there is no reason to continue determining a pricing offer if a client is to be rejected because of a risky accident history.
More information on switch tasks
To handle this, we are going to create the following complementary set: a switch task and a service task:
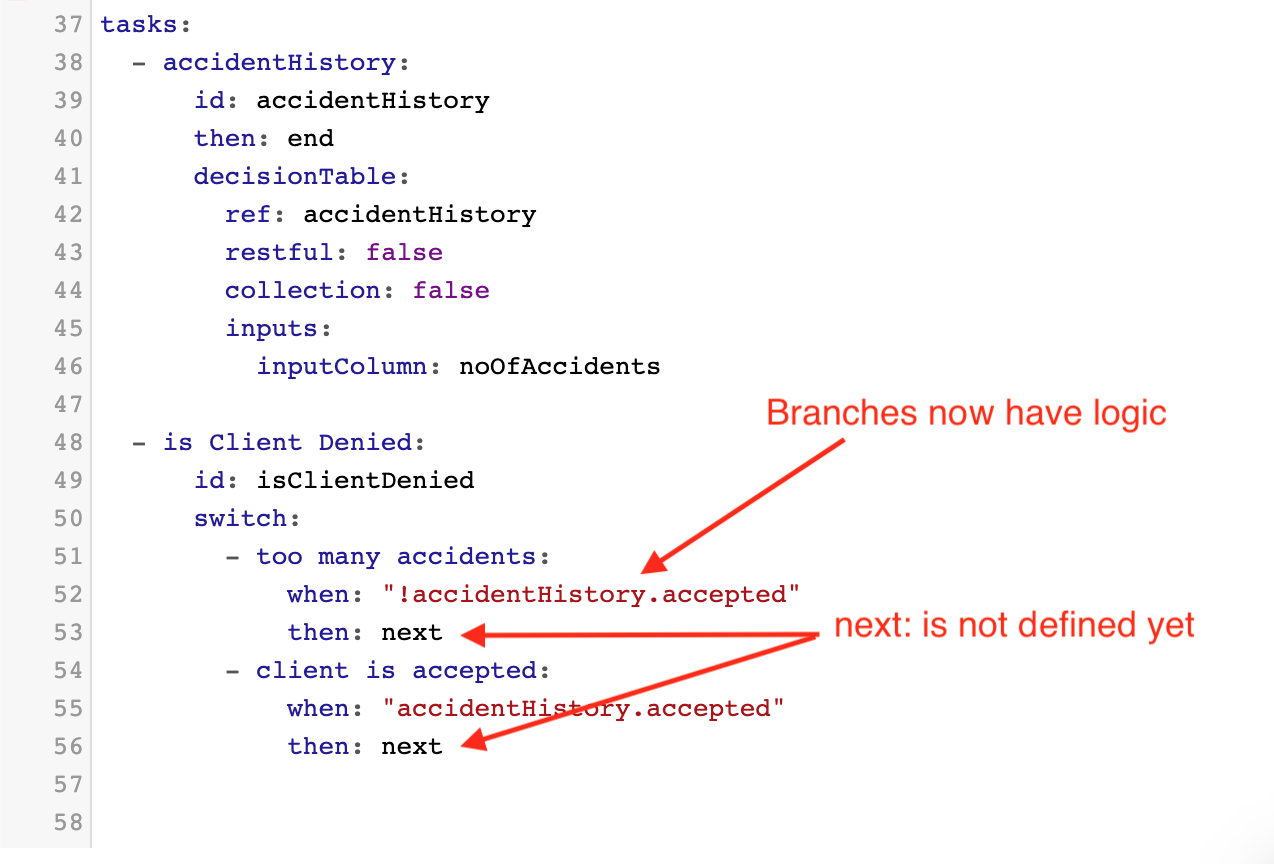
It is helpful to break down what is happening here.
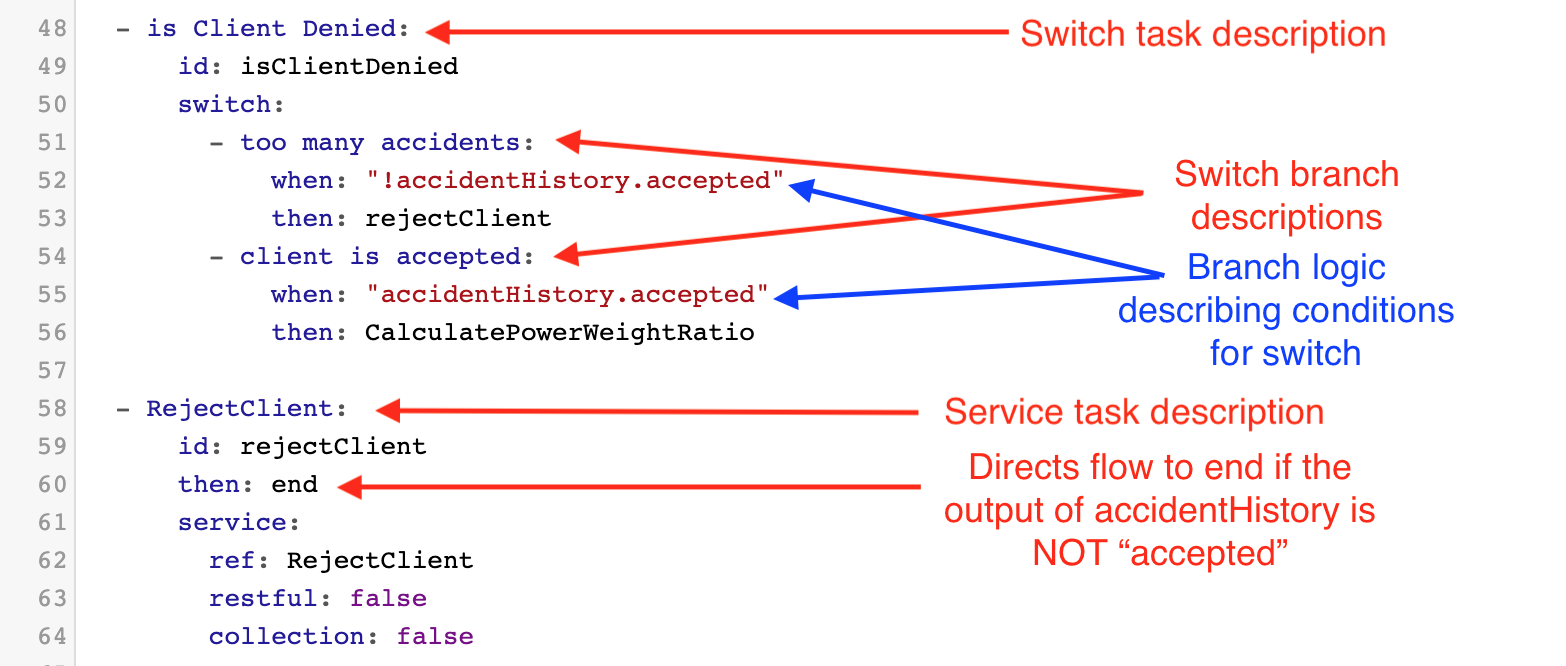
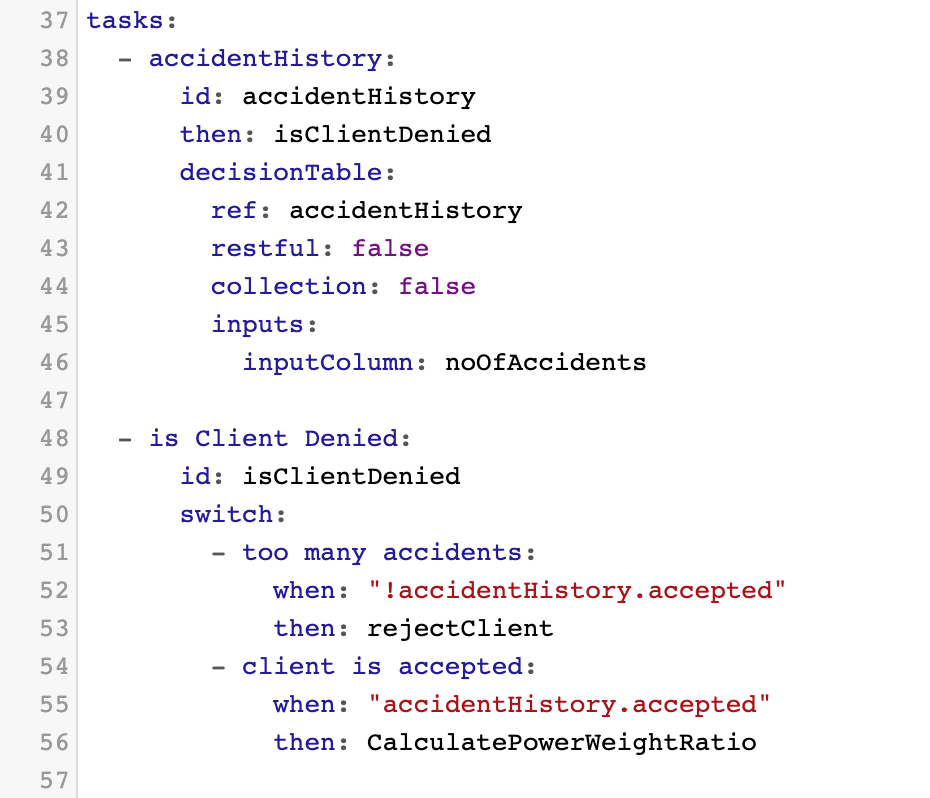
- On line 49, we see the switch task with the ID isClientDenied. This task has two branches: “too many accidents” and “client is accepted”.
- The task determines which branch to take based on the output of the decision table we created earlier: accidentHistory. Further clarification:
when: !accidentHistory.accepted
then: rejectClient
This says that “When the ouput of the table accidentHistory is NOT “accepted”, the next step is rejectClient. Recall that “accepted” was our second output column's ID. (Exclamation point is the “NOT” operator, which negates a value or tells you what the value is NOT. For example, true = true, but !true = false.). - When accidentHistory outputs TRUE, then a client is accepted, and the flow moves on to the next task: calculatePowerWeightRatio (we will create this soon).
- On line 59, we see the service task of ID rejectClient. This task is linked to the preceeding switch task and serves to direct the flow to the end. More information on service tasks
To create this next section of the microservice, we will follow these steps:
- Insert a new switch task under our first decision table task.
- Give it the ID: isClientDenied. Give it a logical description to increase readability.
- Give switch branches descriptions:
- too many accidents
- client is accepted
- Edit what happens with
when/thenin the switch branches - Create a service task with ID rejectClient to direct the flow to end if client is rejected based on the output of the accidentHistory decision table
Create the switch task
- Hit
CTRL + SPACEon an empty line under the accidentHistory DT task. - Select
new SWITCH taskand give it the ID isClientDenied.
You will see the following:
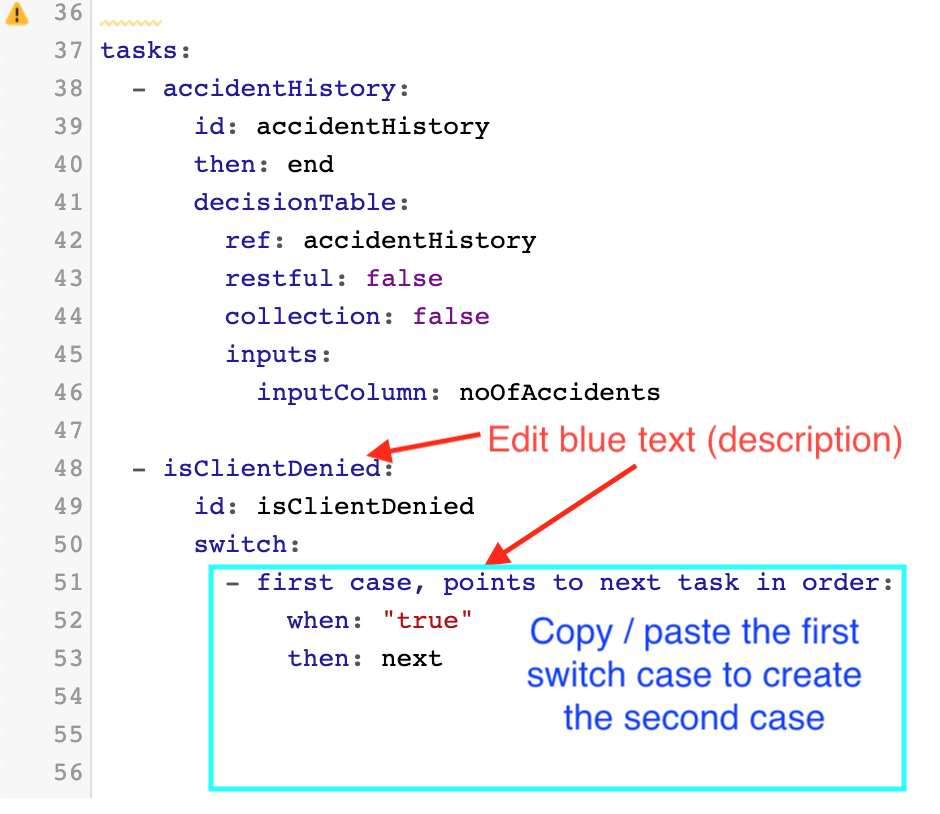
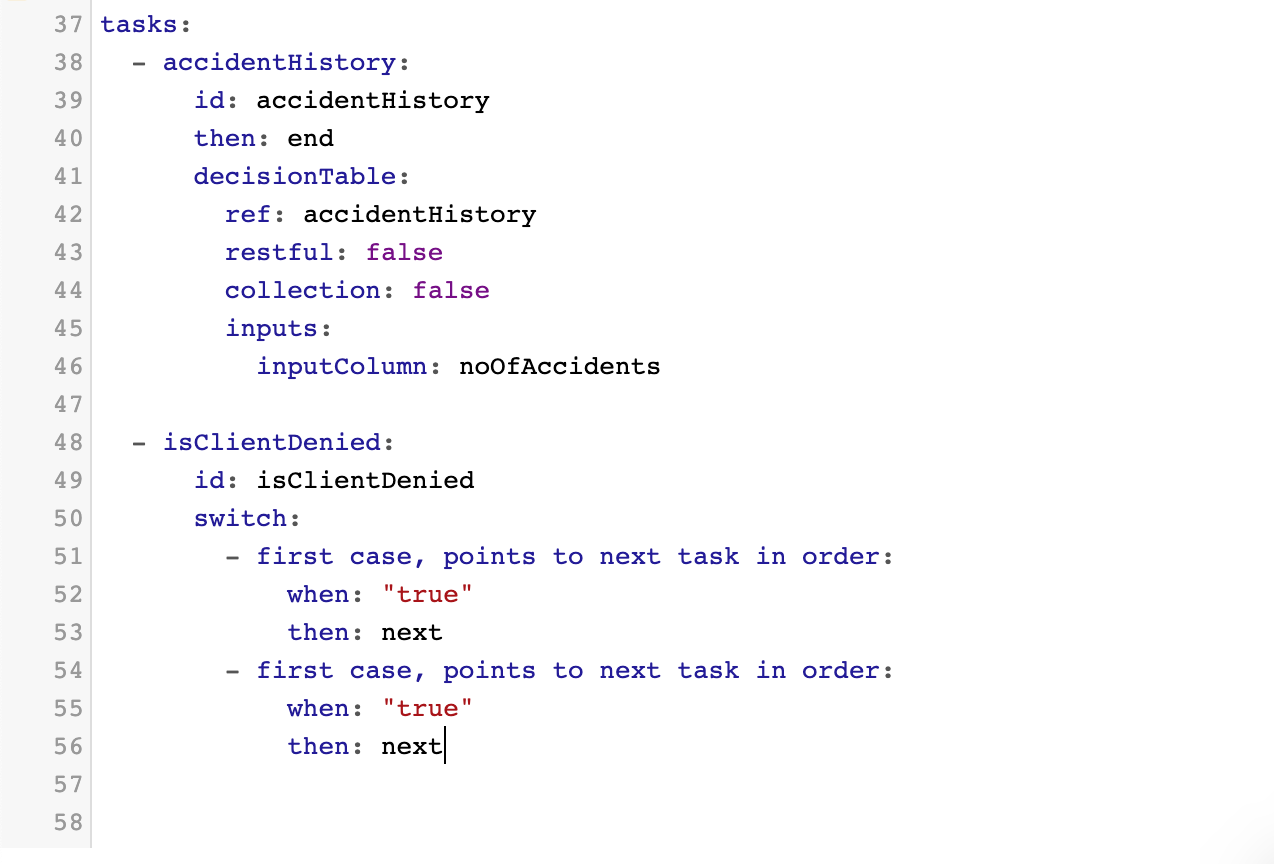
- Add the second branch to the switch by copy/pasting the first case. Now you will see this:
-
Add spaces around the switch task description to enhance readability. (isClientDenied changes to is Client Denied)
-
Edit the branch descriptions:
- first case = too many accidents
- second case = client is accepted

- Next, we will write the logic into the switch cases. We need to create the two outcomes: acceptance or rejection. These outcomes are based on the outputs of accidentHistory decision table, so we need to use this in our logic.
To link a decision table to its output for the purpose of writing logic, connect the decision table and the desired output with a full stop. For example, if we have a decision table called “myDecisionTable” and it has an output column called “outputColumn”, we can link them together like this: myDecisionTable.outputColumn.
For the first switch case, write when: "!accidentHistory.accepted". This will handle the case when the output of accidentHistory is NOT accepted.
For the second switch case, write when: "accidentHistory.accepted" This will handle the case when the output of accidentHistory IS accepted.
- Tell the task where to go from here by editing
next:. It makes sense that, in the first case, if client is NOT accepted, then he/she should be rejected and the flow should end. We need to create a task for this purpose. Afternext:writerejectClient. This will be our first service task.
Also, we need to handle the cases where the client IS accepted, and the flow continues until the end and culminates in a pricing offer. In the second case, after next: write calculatePowerWeightRatio. This is a service task we will create later.
You should now see the following:
Note that the switch task does not appear on the flow diagram yet (it will appear as a diamond shape). The connecting tasks must first be created, which you will learn to do on the next page. You will also learn how to test the flow.