Basic Functionalties
What's on this page?
Basic navigation
When you first log into the Wrench, you will see this screen:
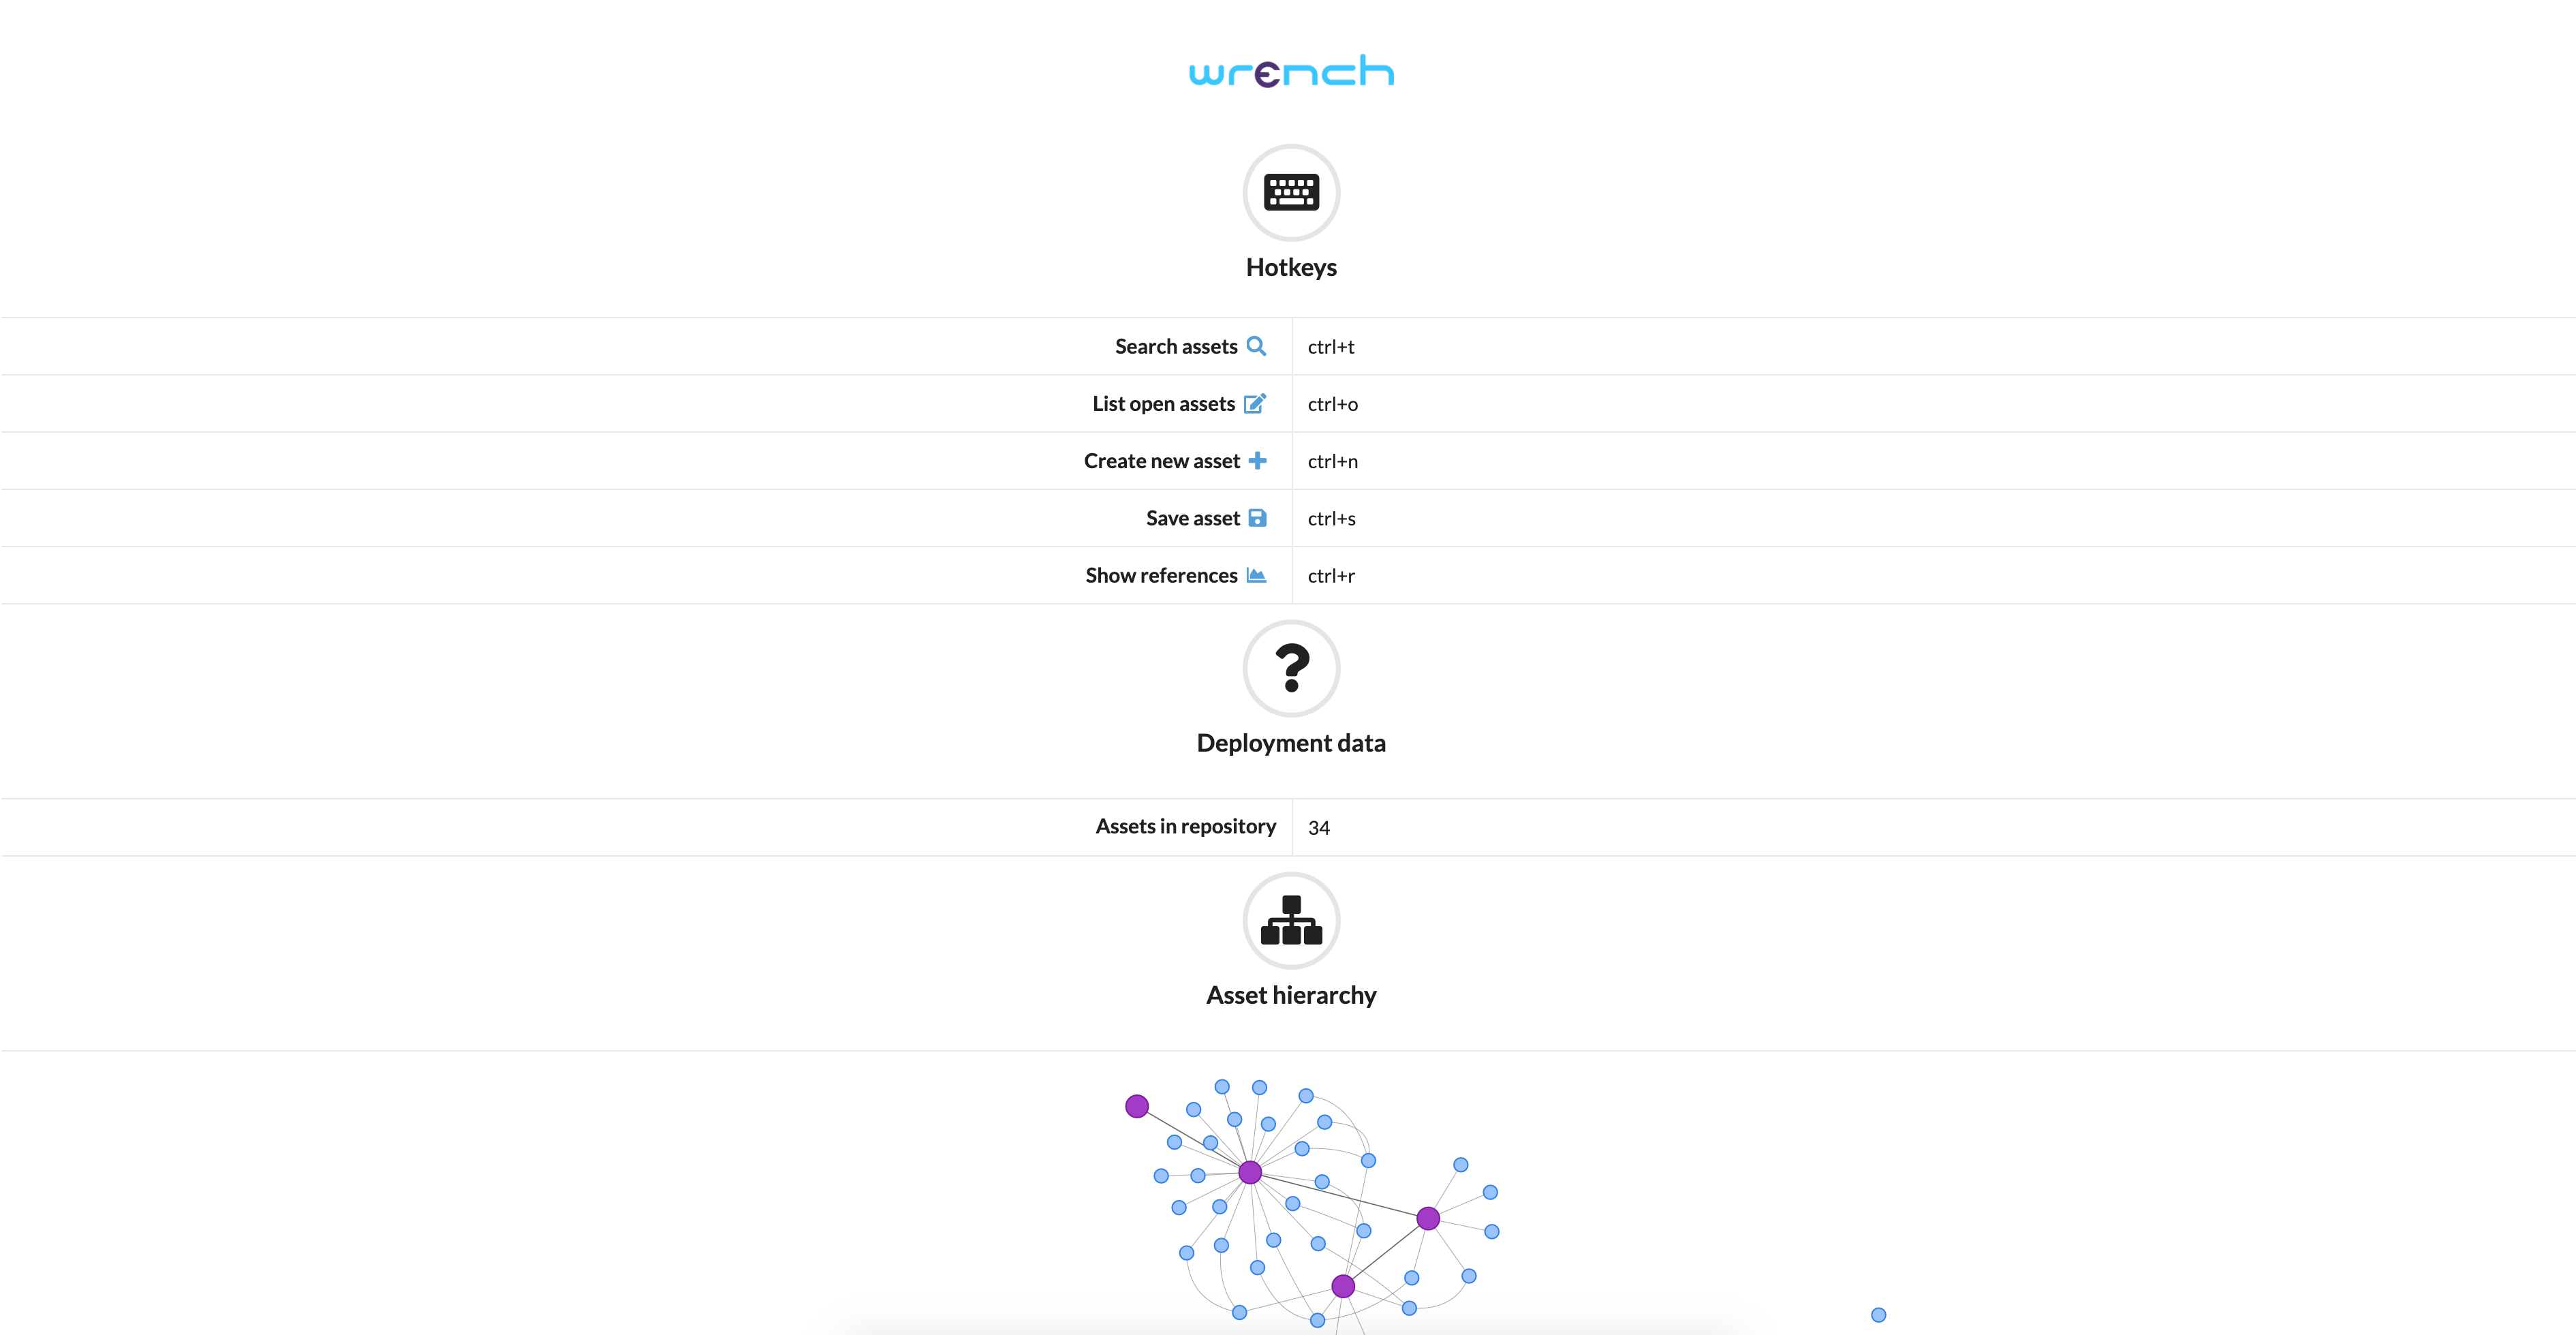
Here, you can see the main keyboard hotkeys, start a new Wrench session, create a new asset, view the total number of assets in your repository, and peruse the asset heirarchy below.
To begin your session, either search assets or create a new asset. Note: From this screen, it is currently not possible to view open assets, save assets, or use the Show References option.
The search menu and search filter keywords
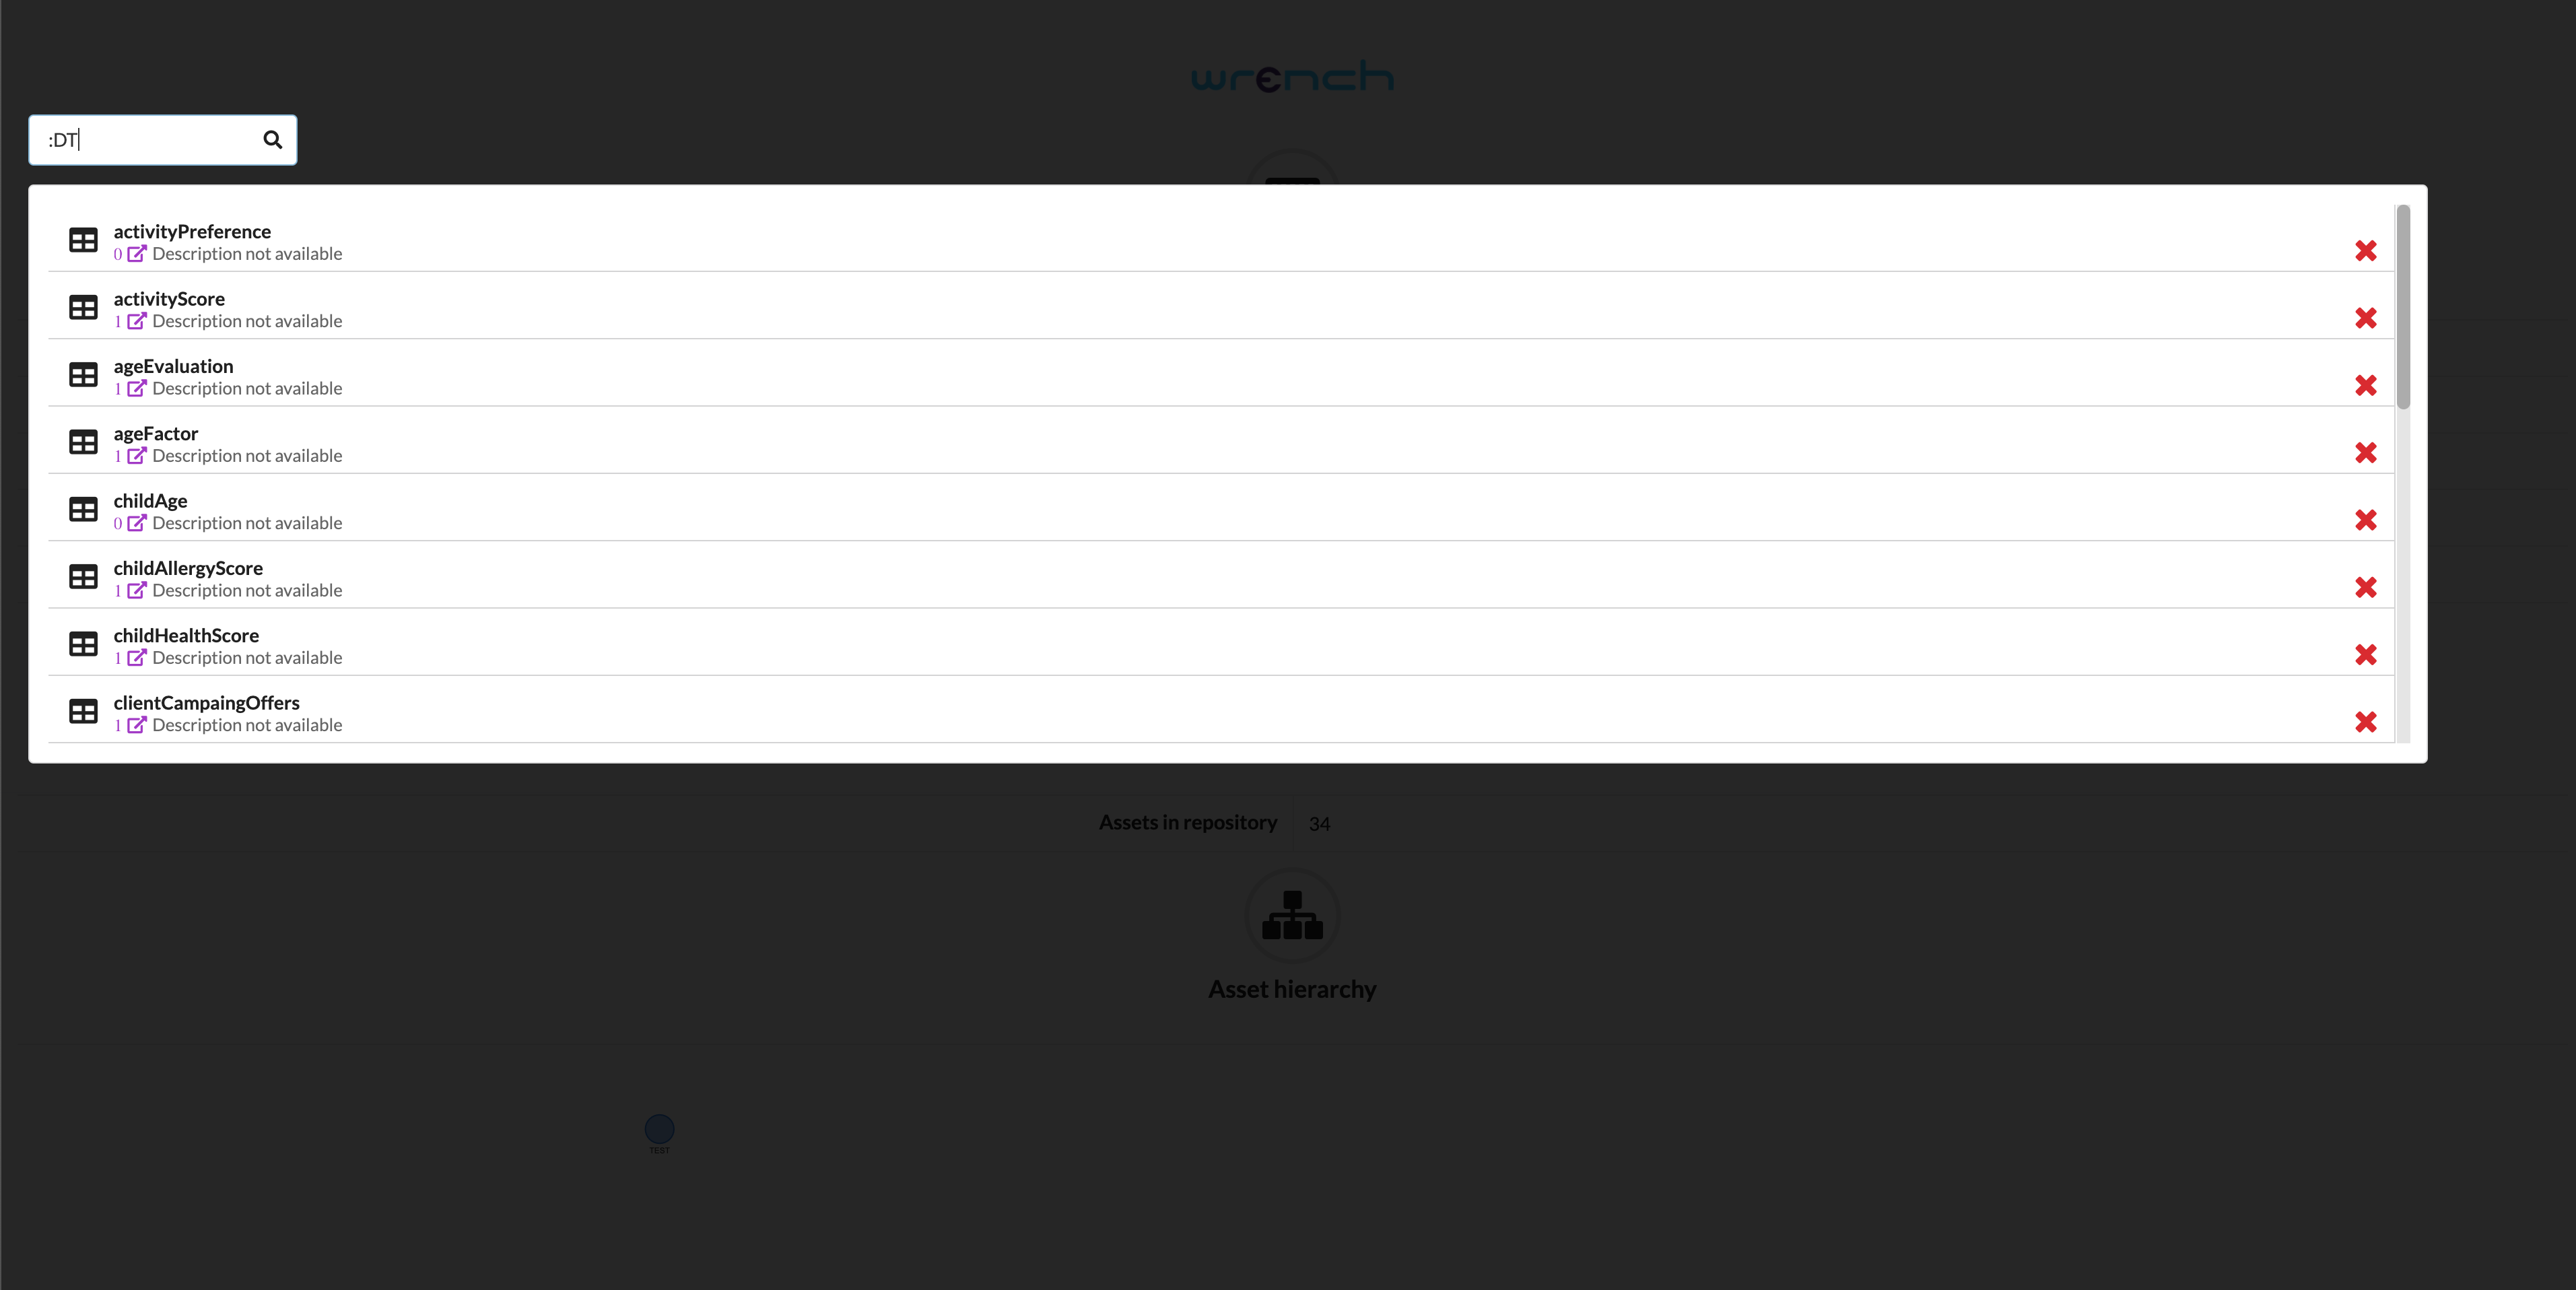
Upon clicking the search icon from the starting page, you will be presented with a modal window where the total number of each type of resource is visible.
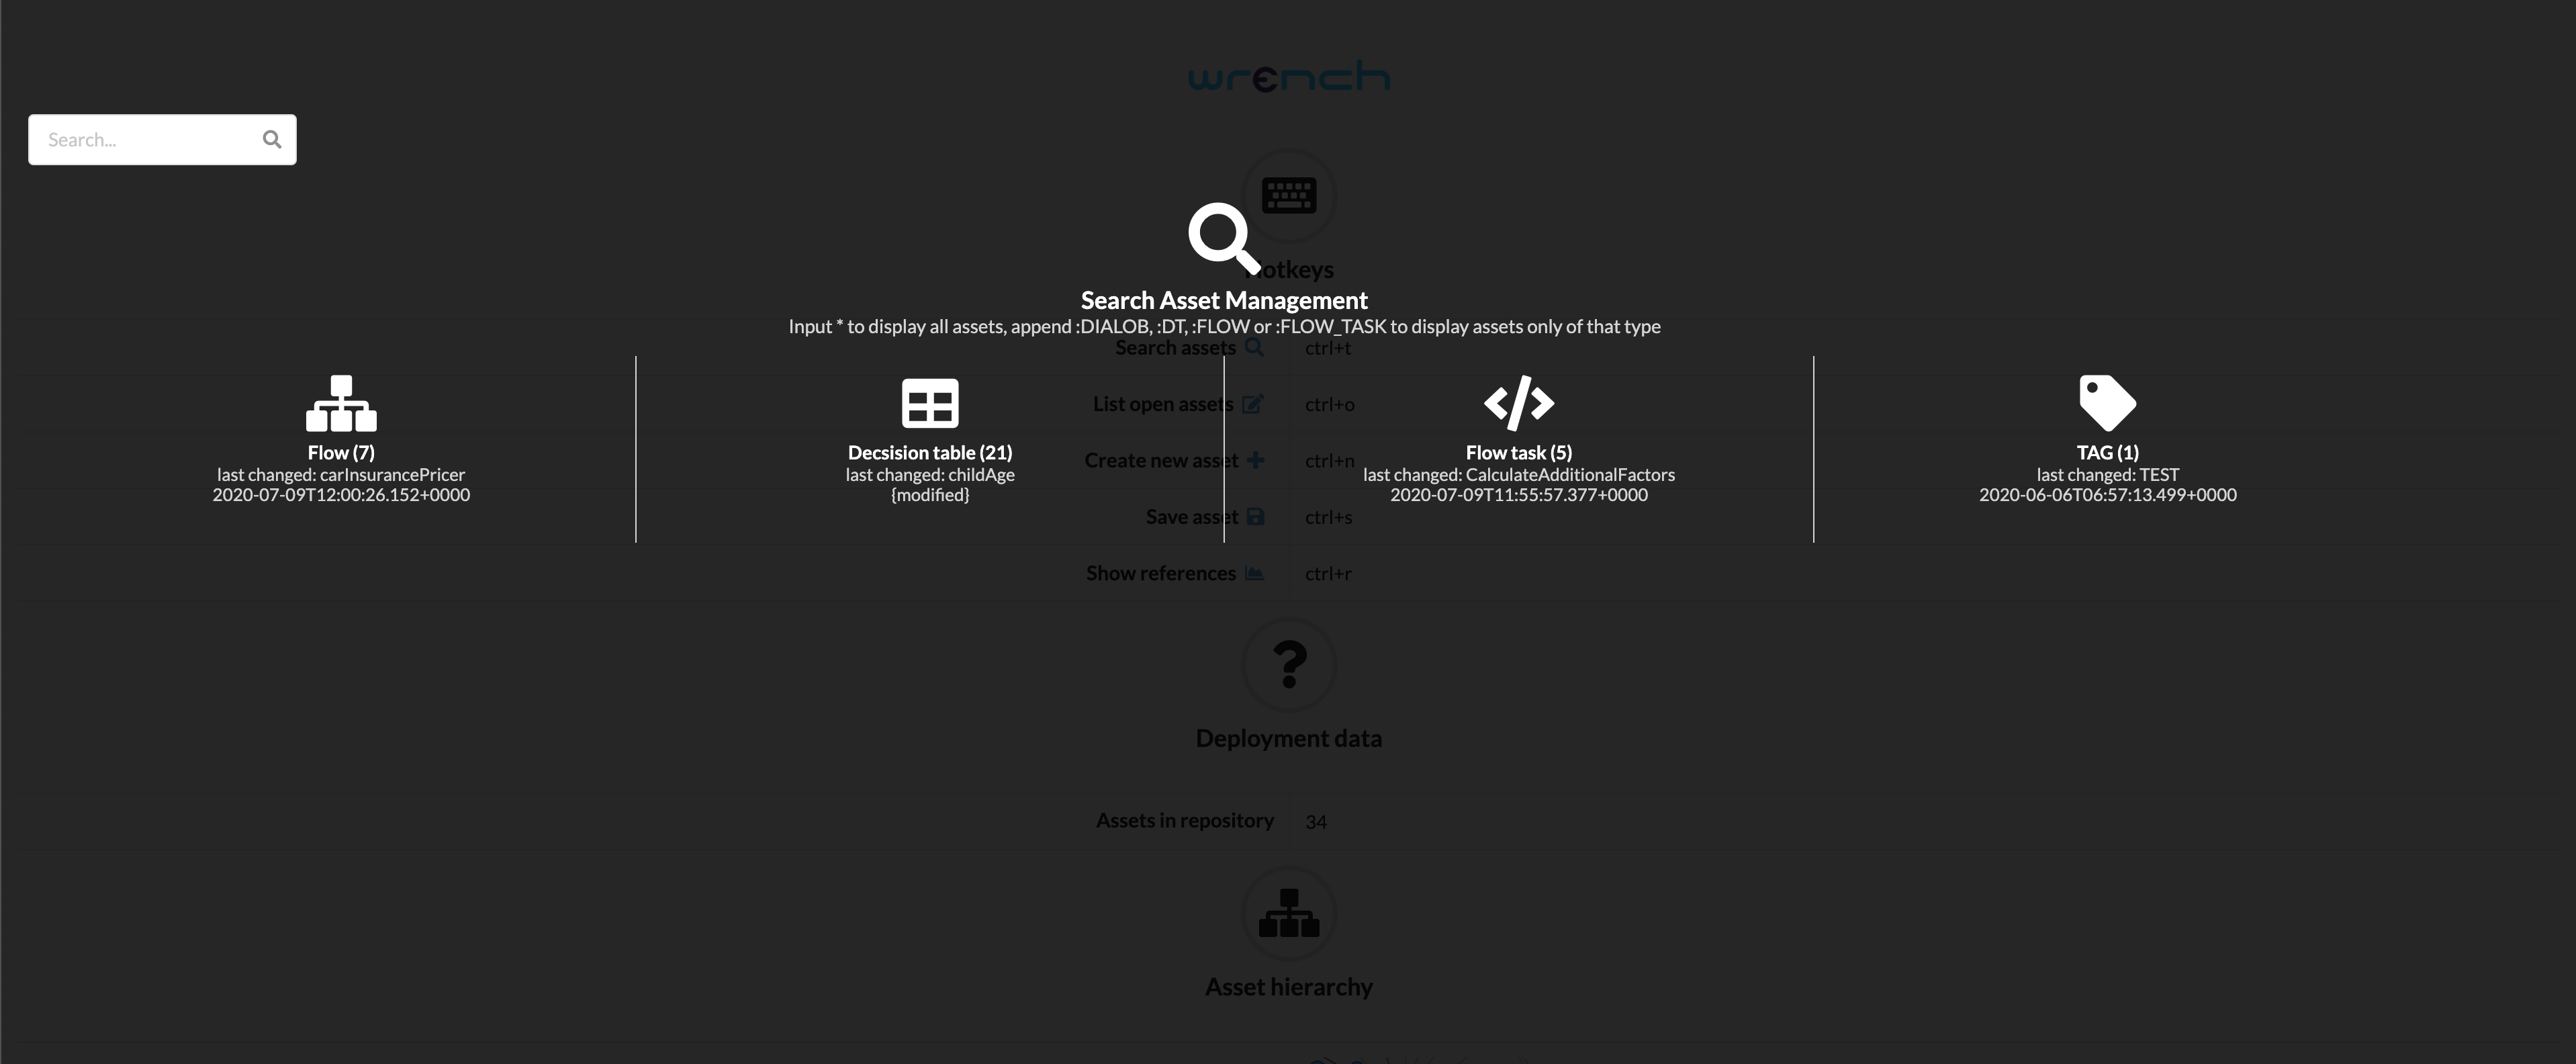
Search keywords:
Searches can be done either alphabetically by name or by filtering by type. Filtering is done by typing in one of the following key words, prefaced by a colon, into the search bar.
:DT: Will return results of type Decision Table
:FLOW: Will return results of type Flow
:FLOW_TASK: Will return results of type Flow Task
Only assets of that specified type will appear in search results. The following example demonstrates a search filter that will return only Decision Table type results.
For more detailed information about the Wrench's Asset Elements (Flow, Flow Task, Decision Table, and Tag), please see the Working with the Wrench section.
Navigating the flow editor
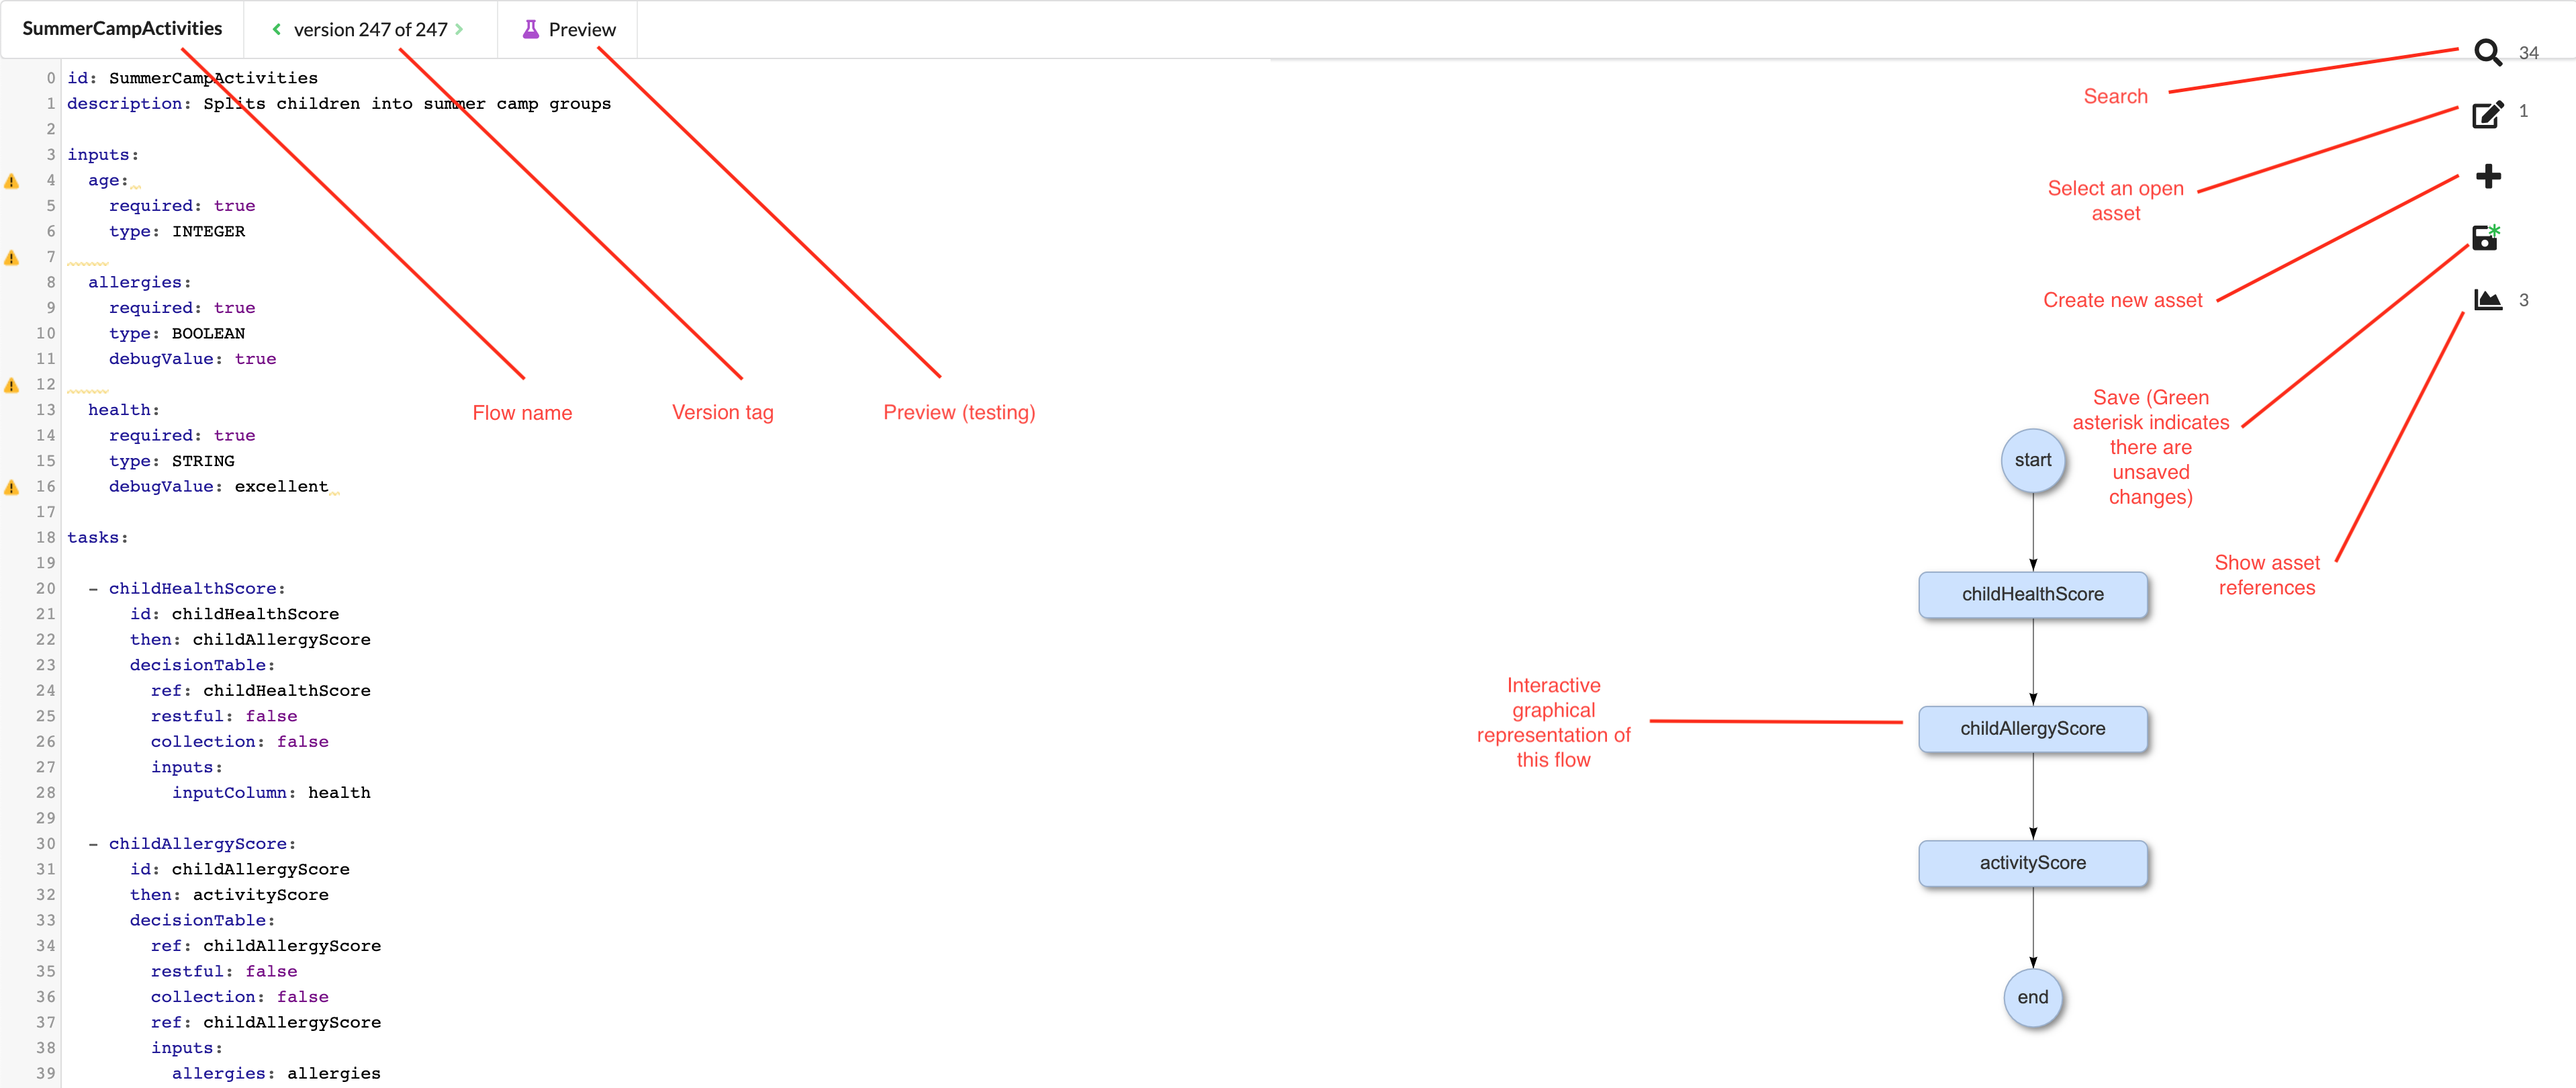
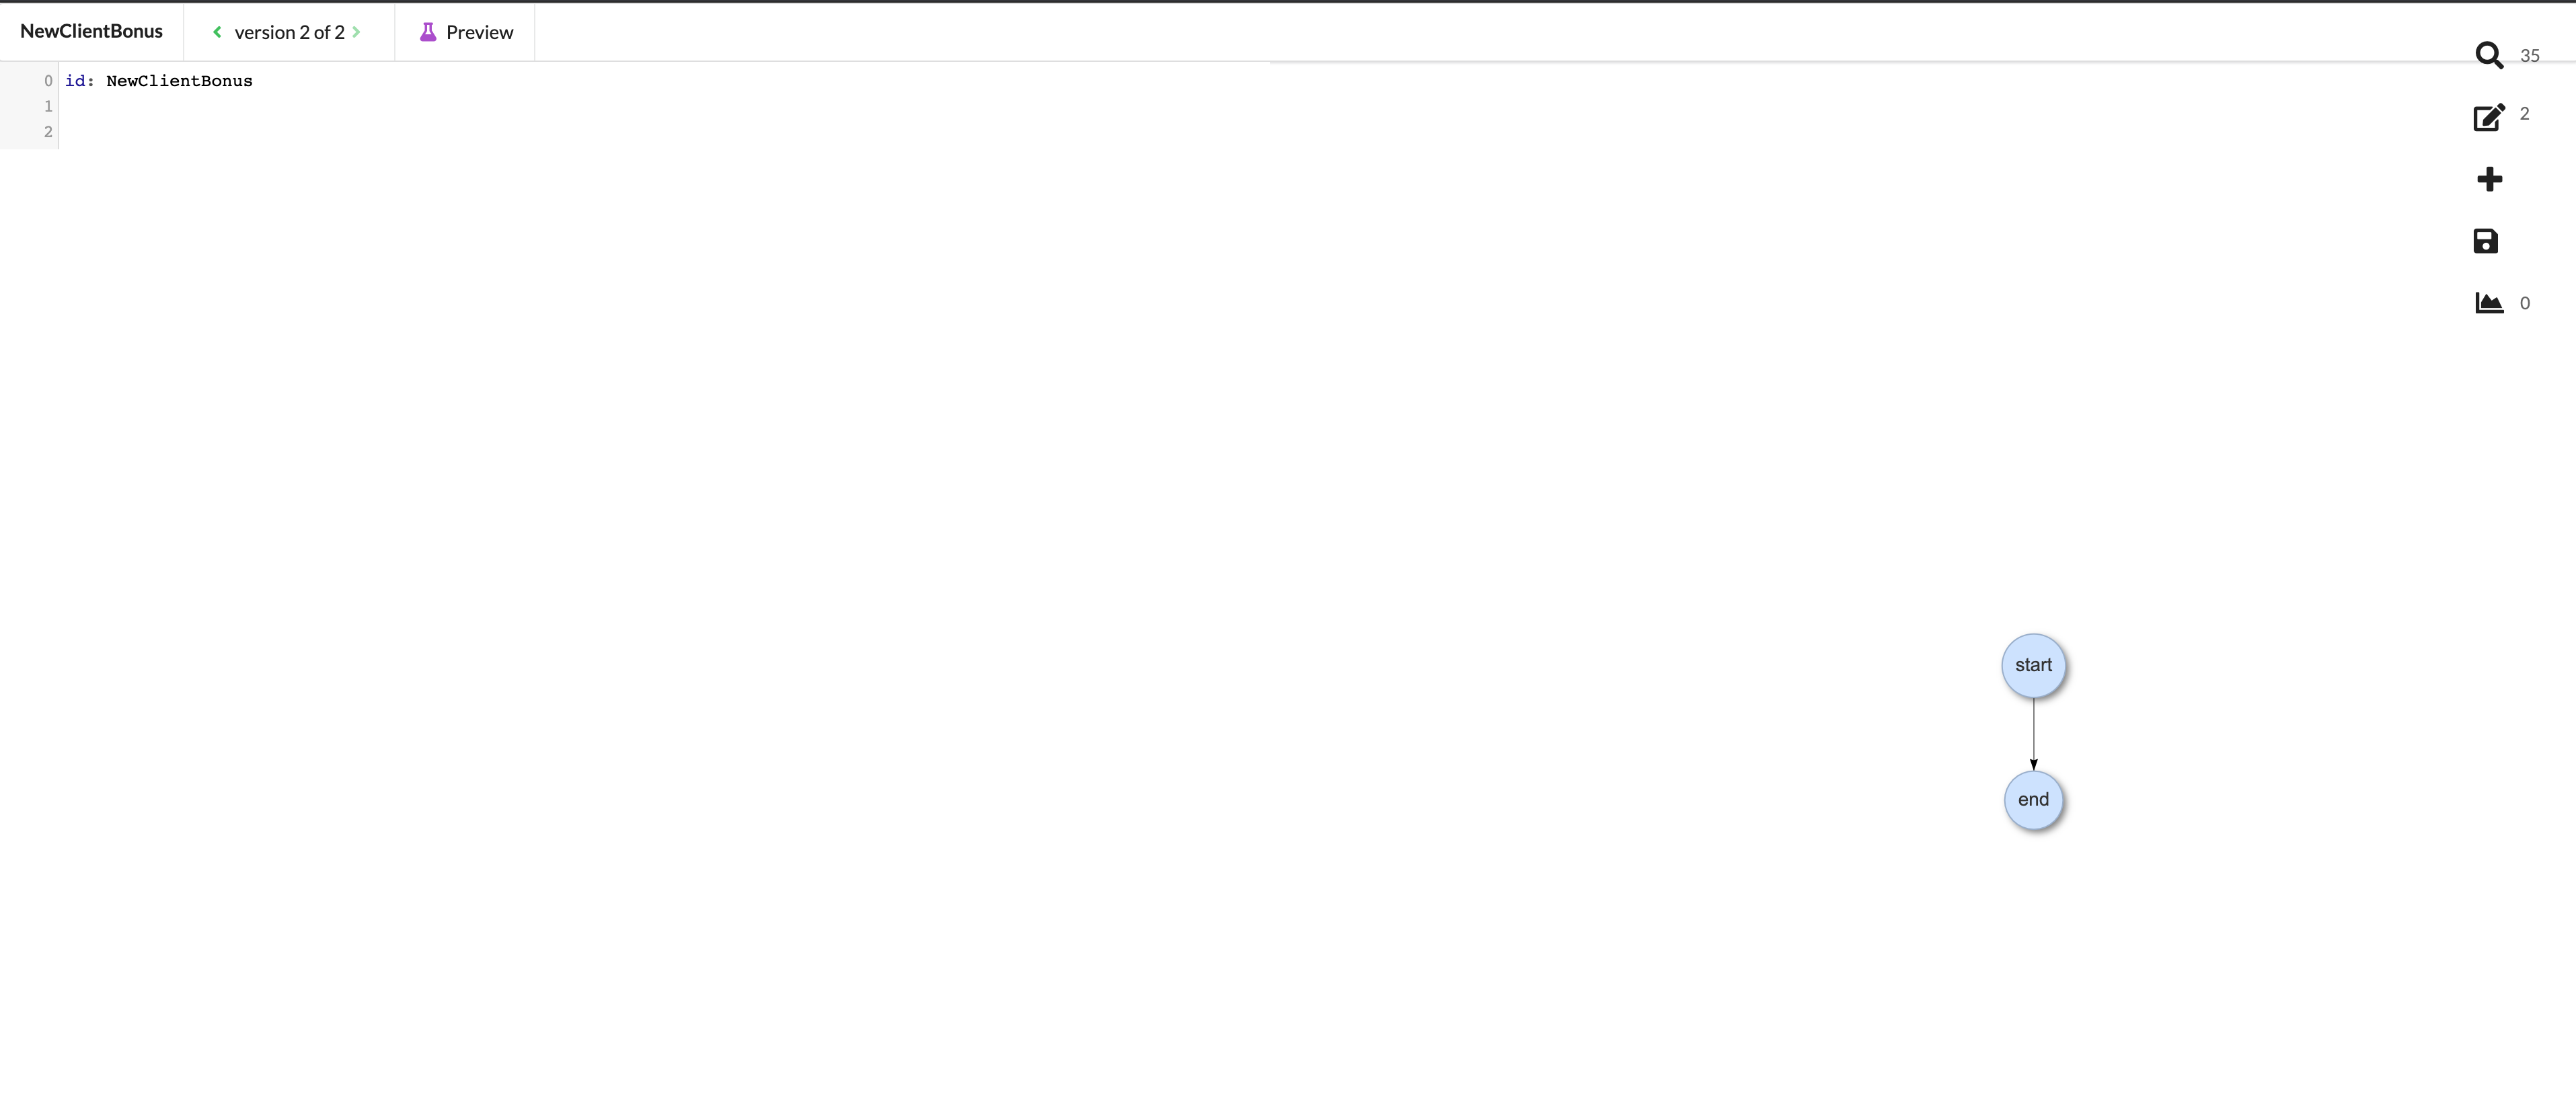
Upon opening an existing flow, you will be directed to the flow editor screen. Functionalities are grouped along the top left of the screen as well as a vertical row of icons on the right side.
In the top left of the screen is the flow name. Next is the version tag number. All previous version tags can be scrolled through until the beginning, but only the current version is editable. The third item on the top of the screen is the preview function. This will enable you to test your flow and view the final outputs.
On the right side of the screen, you will find basic functionalities in this order from top to bottom: Search, Select Asset, Create New Asset, Save, Show Asset References.
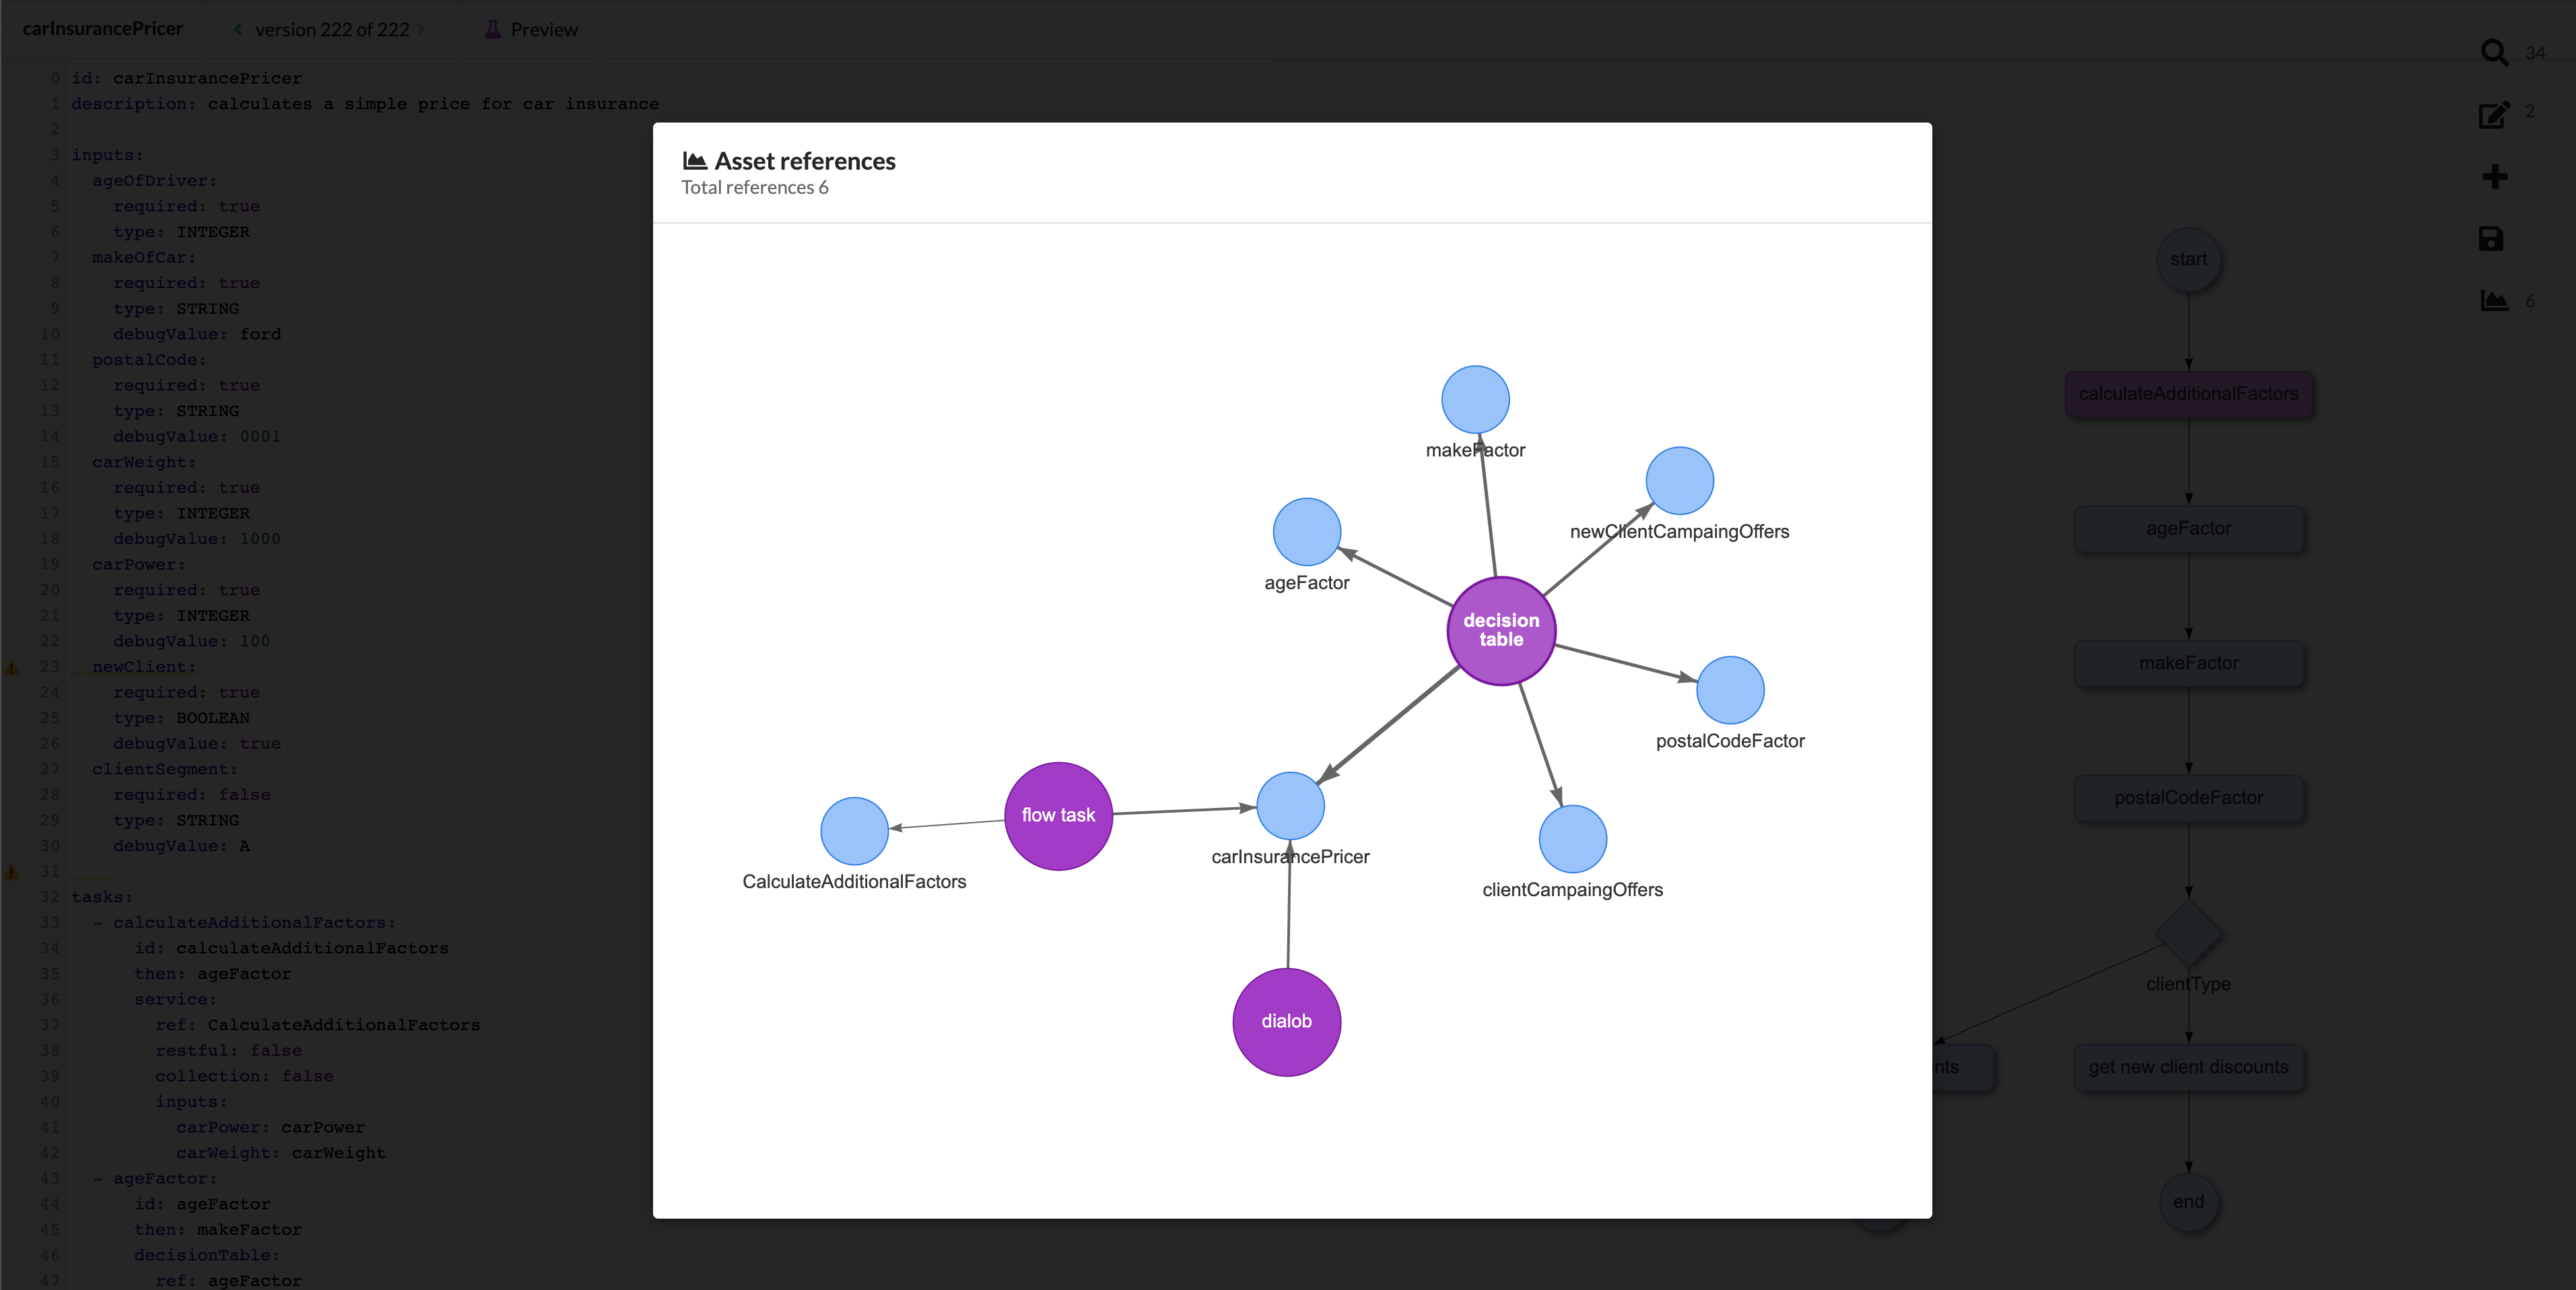
Showing asset references
This graphic shows the relationships and links between assets. When an asset is clicked, the lines connecting it with its dependencies will appear as bold, black lines. In this way, you can visually track resources and get a global picture of the flow's elements as a whole.
Moving around between assets
For the majority of theWrench Composer navigation to move between assets as you work, you will be using Search and Select Asset, the top two functionalities on the upper right side of the screen. NOTE: The browser “back” button is currently not supported.
![]()
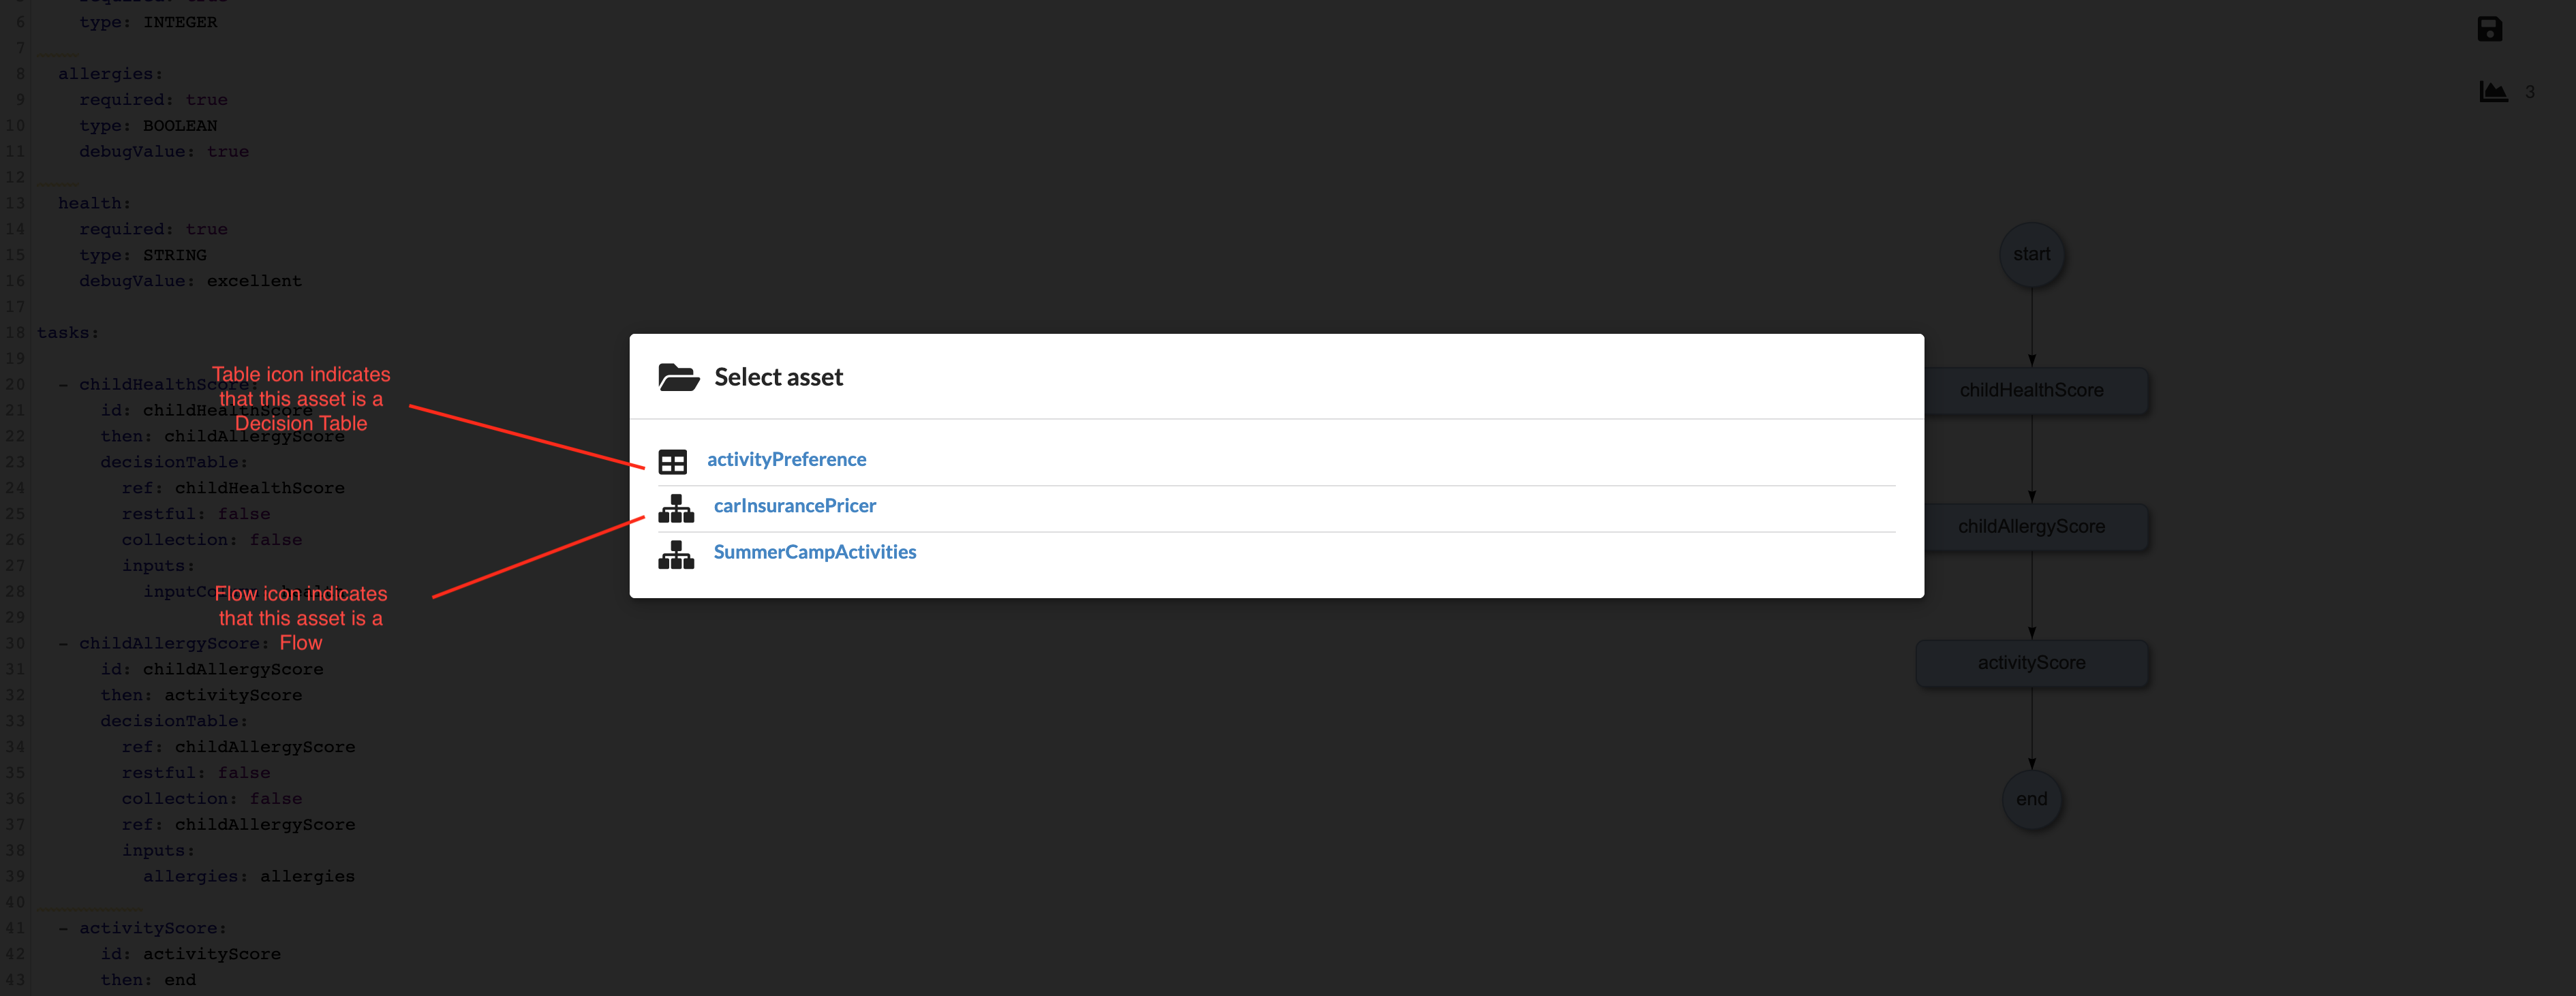
The Wrench allows you to view one asset at a time. To flip through each open asset, you need to go through the Select Asset window (the second icon from the top in the right-side menu).
Click the Select Asset option to bring up a modal window with currently open assets.
Saving
It is recommended that you save your assets after every important change. Whenever there are unsaved changes, a green asterisk will appear on the save icon found within the right-hand toolbar.
Saving is not automatic, nor does the save button “save all” assets globally. Each resource is saved individually by the user, so before ending your Wrench session, be sure to visit each of your assets via the Open Assets function and check that all changes have been saved.
![]()
Creating version tags
Every time you save an asset, Wrench creates a new version tag. These tags can be scrolled through by clicking the arrows on either side of the version. In this way, there is always a complete history of changes, from the current time to when it was first created.
When you create a new flow or decision table, you will see that the versions begin with version 2 of 2. This is normal, as this is caused by the background commands the Wrench uses to create the initial version.
The screenshot below details what you will see when you create a new version.
Auto-complete feature
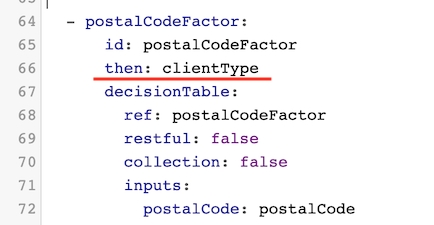
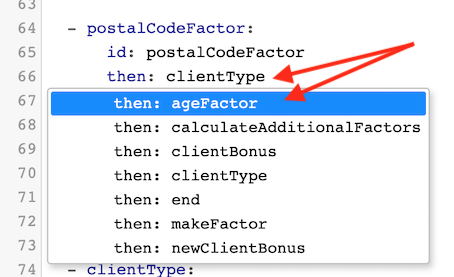
When working with a flow, you will need to manipulate simple lines of code to perform a variety of tasks; for example, creating inputs, editing names, and directing the flow tasks. When you wish to add something the code, place your cursor on the line you wish to manipulate, and hit CTRL + SPACE. This will bring up a dropdown menu of all possible options that can be added to that specific location within the code. If the selected line is not editable, the dropdown will not appear.
The screenshots below demonstrate a flow task both before and after a user has hit CTRL +SPACE on line 66.