Evaluate additional data with decision tables
We now have a basic flow, as seen in the example below, that has been tested and works in the way that we expect thusfar.
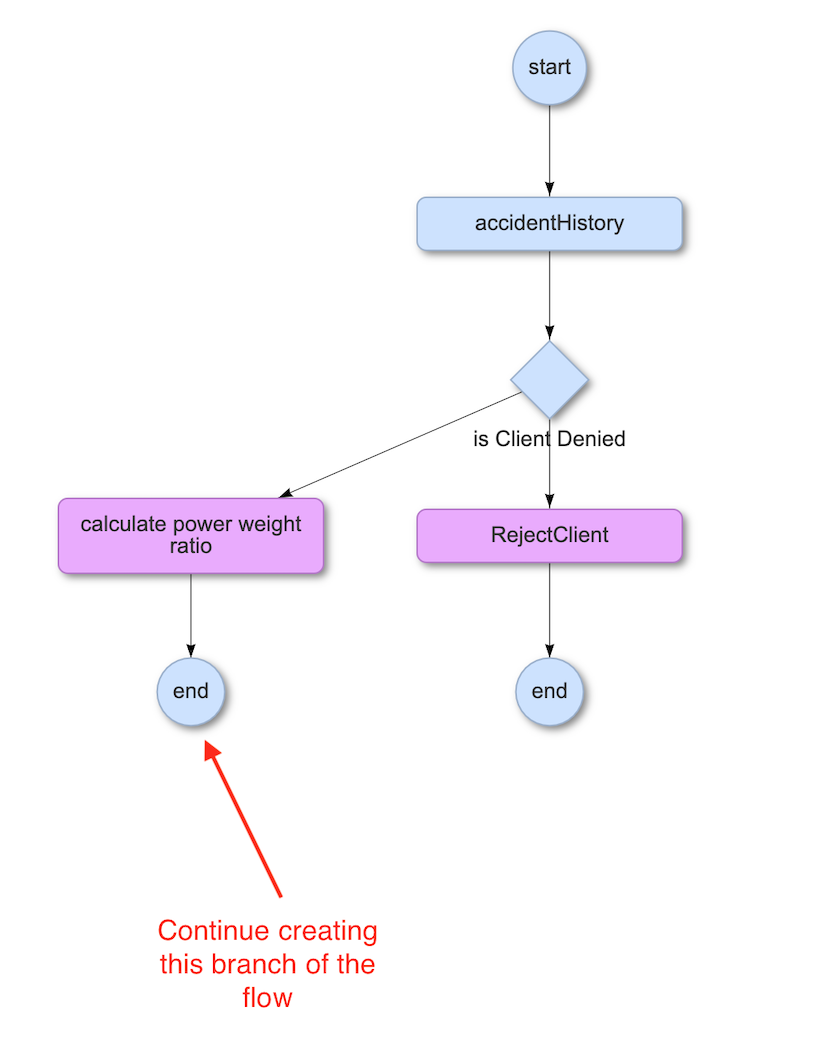
The right branch ends with the rejection of a client and no pricing offer. This branch is now completed, whereas the left branch continues collecting data on the client until the end of the flow is reached. To collect the remainder of our data, we will create several more decision tables and a final service task to evaluate the final calculation.
Recall our inputs that we created at the beginning of this process:
- ageOfDriver
- makeOfCar
- postalCode
- carWeight
- carPower
- newClient
- clientSegment
On this page, we are going to focus on the first three inputs (ageOfDriver, makeOfCar, postalCode) to create a series of decision tables and decision table tasks to handle this information. We will begin by creating our “skeleton” of decision table tasks to get the structure laid out, and then we will fill in the decision tables behind those tasks.
- Under the task “calculate power weight ratio”, create a new decision table task. Give it the ID ageFactor.
- Under ageFactor, create a new decision table task with the ID makeFactor.
- Under makeFactor, create a new decision table task with the ID postalCodeFactor.
- Refer back to the guide on creating the first decision tables
- More information on working with decision tables
You should now have the following:
- Using the screenshot above as a reference, edit the
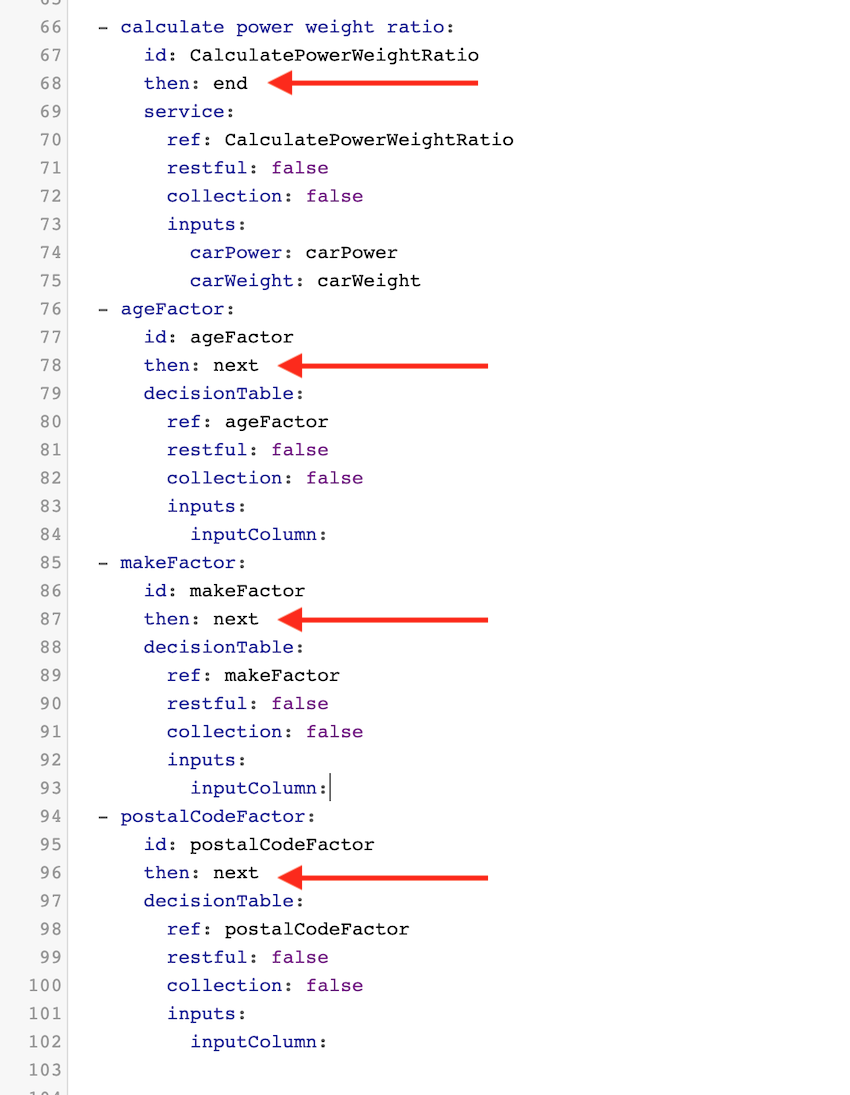
then:fields on lines 78, 87, and 96 to link the tasks together and create the task sequence by typing the ID of the next task afterthen:. (For example,then: makeFactor). Set the flow tothen: endat the decision table task postalCodeFactor. - You will recall that our flow is currently set to
then: endon line 68 at the service task calculatePowerWeightRatio. Editthen:tothen: ageFactorso the flow will continue on to ageFactor.
After saving your changes, you should see this:

At this point, we have a logical structure and sequence of tasks, but the decision tables behind the three tasks we just created are empty.
Before we begin to add functionality to these tables, we will first go over their purposes.
- ageFactor: Calculates a multiplier based on a client's age in combination with his/her vehicle's power ratio.
- makeFactor: Calculates a multipler based on the make of a vehicle.
- postalCodeFactor: Calculates a multiplier based on a client's residential address.
- Edit these three decision tables. To do this, double click on the desired decision table bubble on the flow diagram.
- Refer back to the guide on creating the first decision tables
- More information on working with decision tables
Create your decision tables according to the screenshots below:
ageFactor
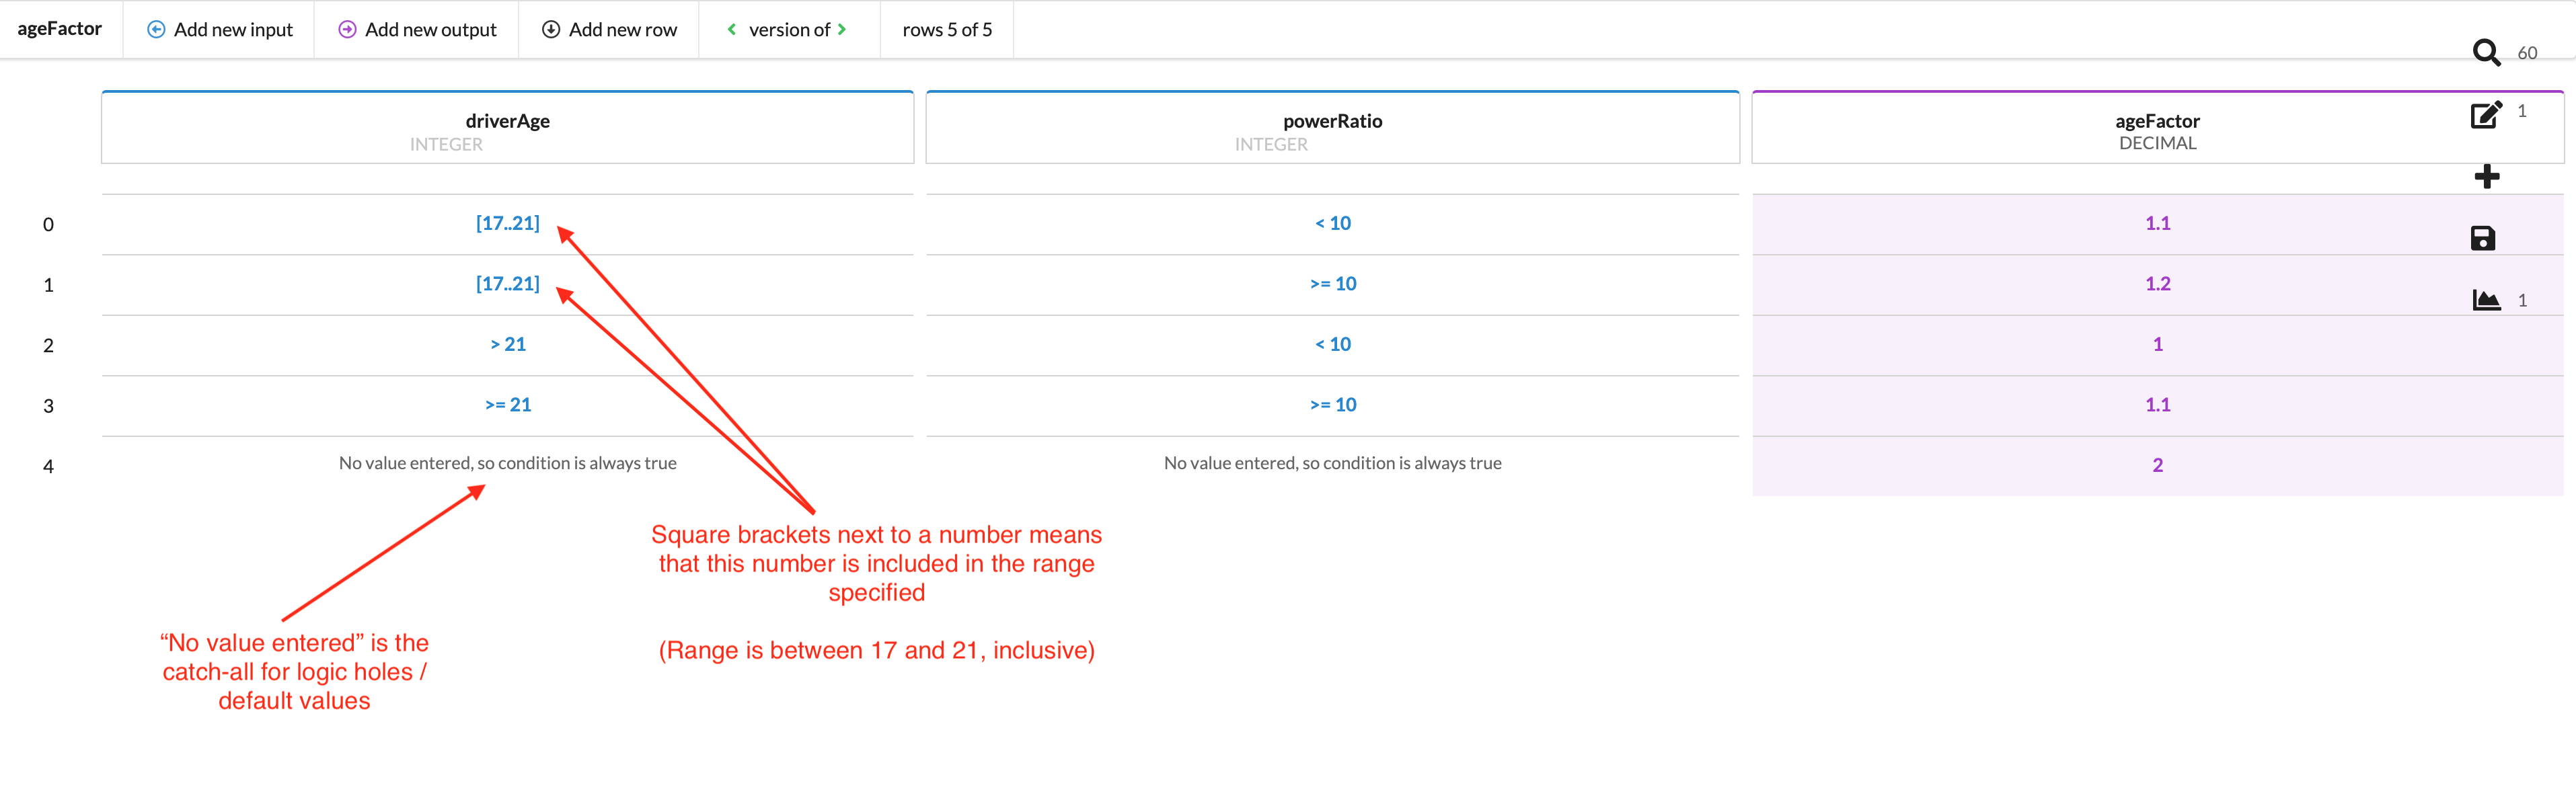
Change hit policy to FIRST
More information on hit policy
Notes:
Our fictional company breaks clients into two different age brackets:
- 17-21 (inclusive)
- greater than or equal to 21
Be sure to specify that your range of ages is inclusive of 17 and 21.
Row 4 reads “No value entered, so condition is always true”. This acts like a catch-all, which will return an ageFactor of 2, alerting us that we have a logic hole somewhere in our driverAge or powerRatio mathematical logic because none of our conditions match an input. For more information, read Simplfying a table and catching logic holes
makeFactor
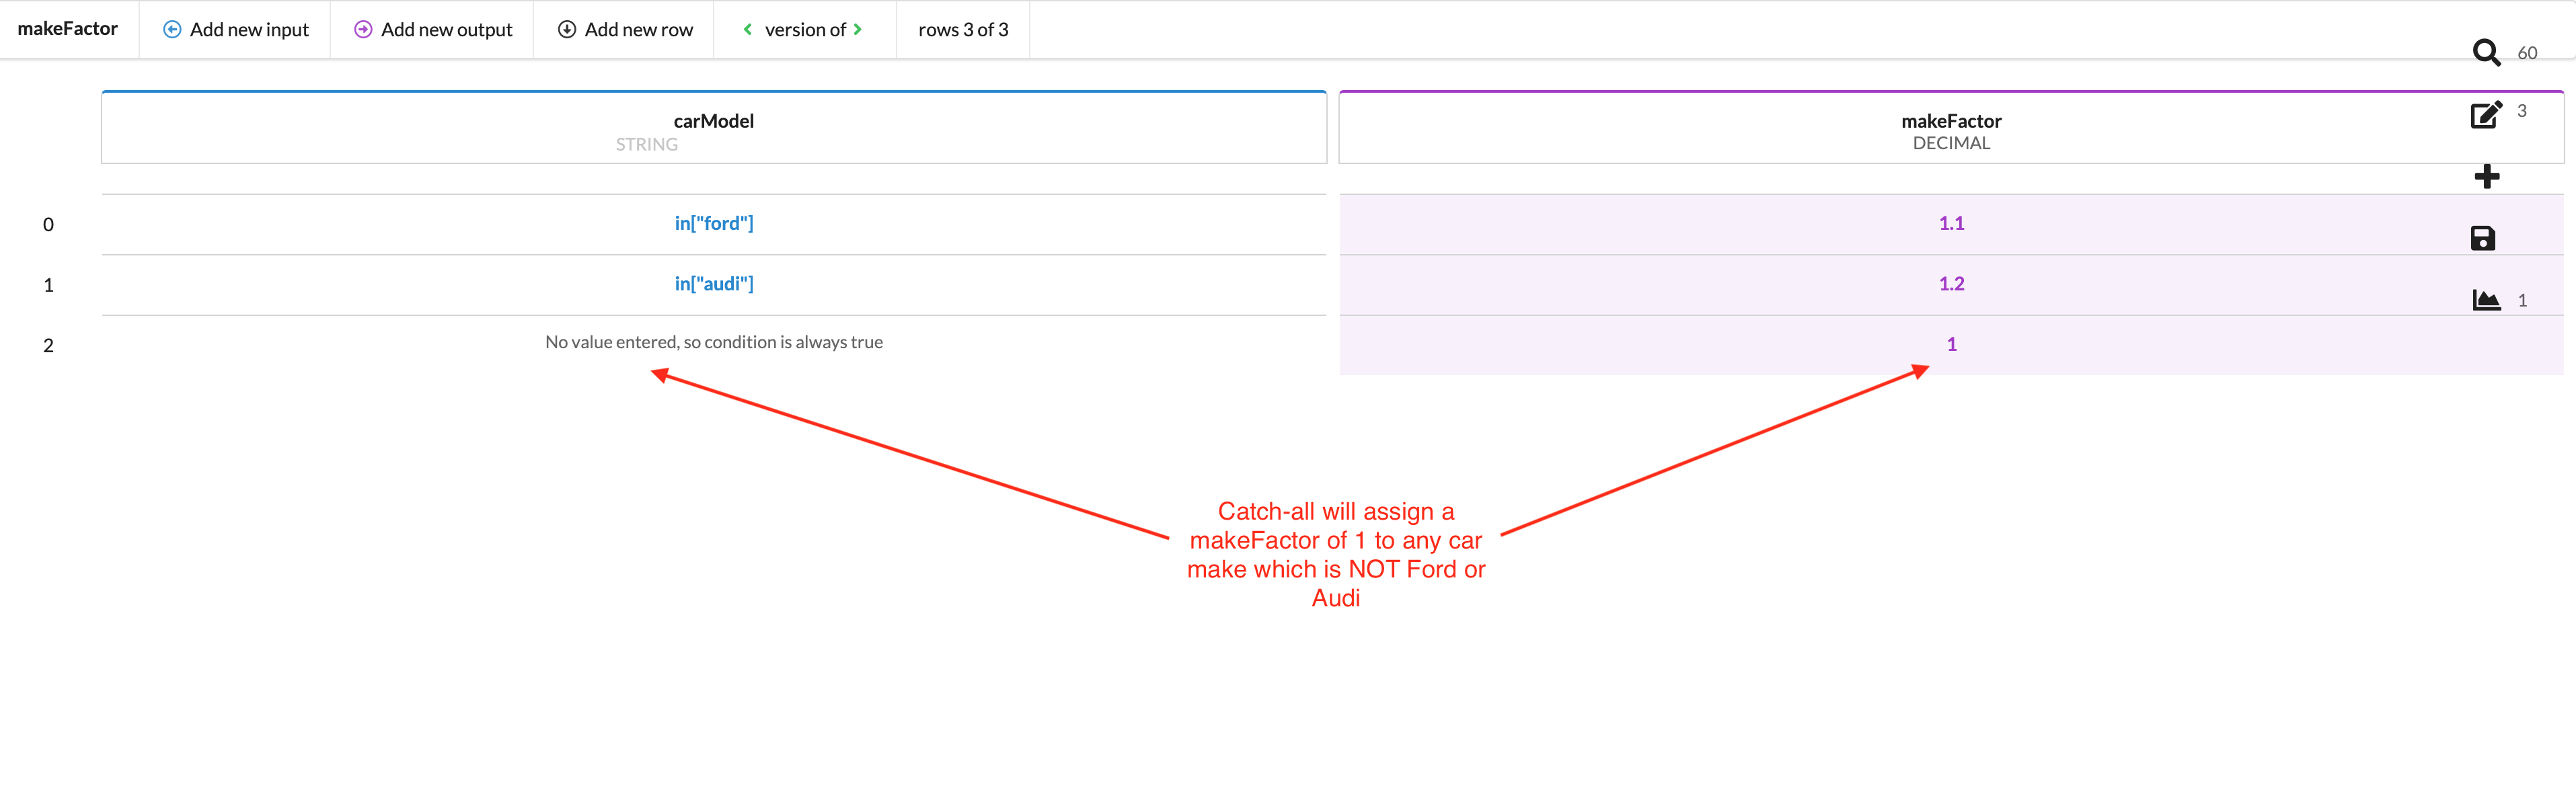
Change hit policy to FIRST
More information on hit policy
postalCodeFactor
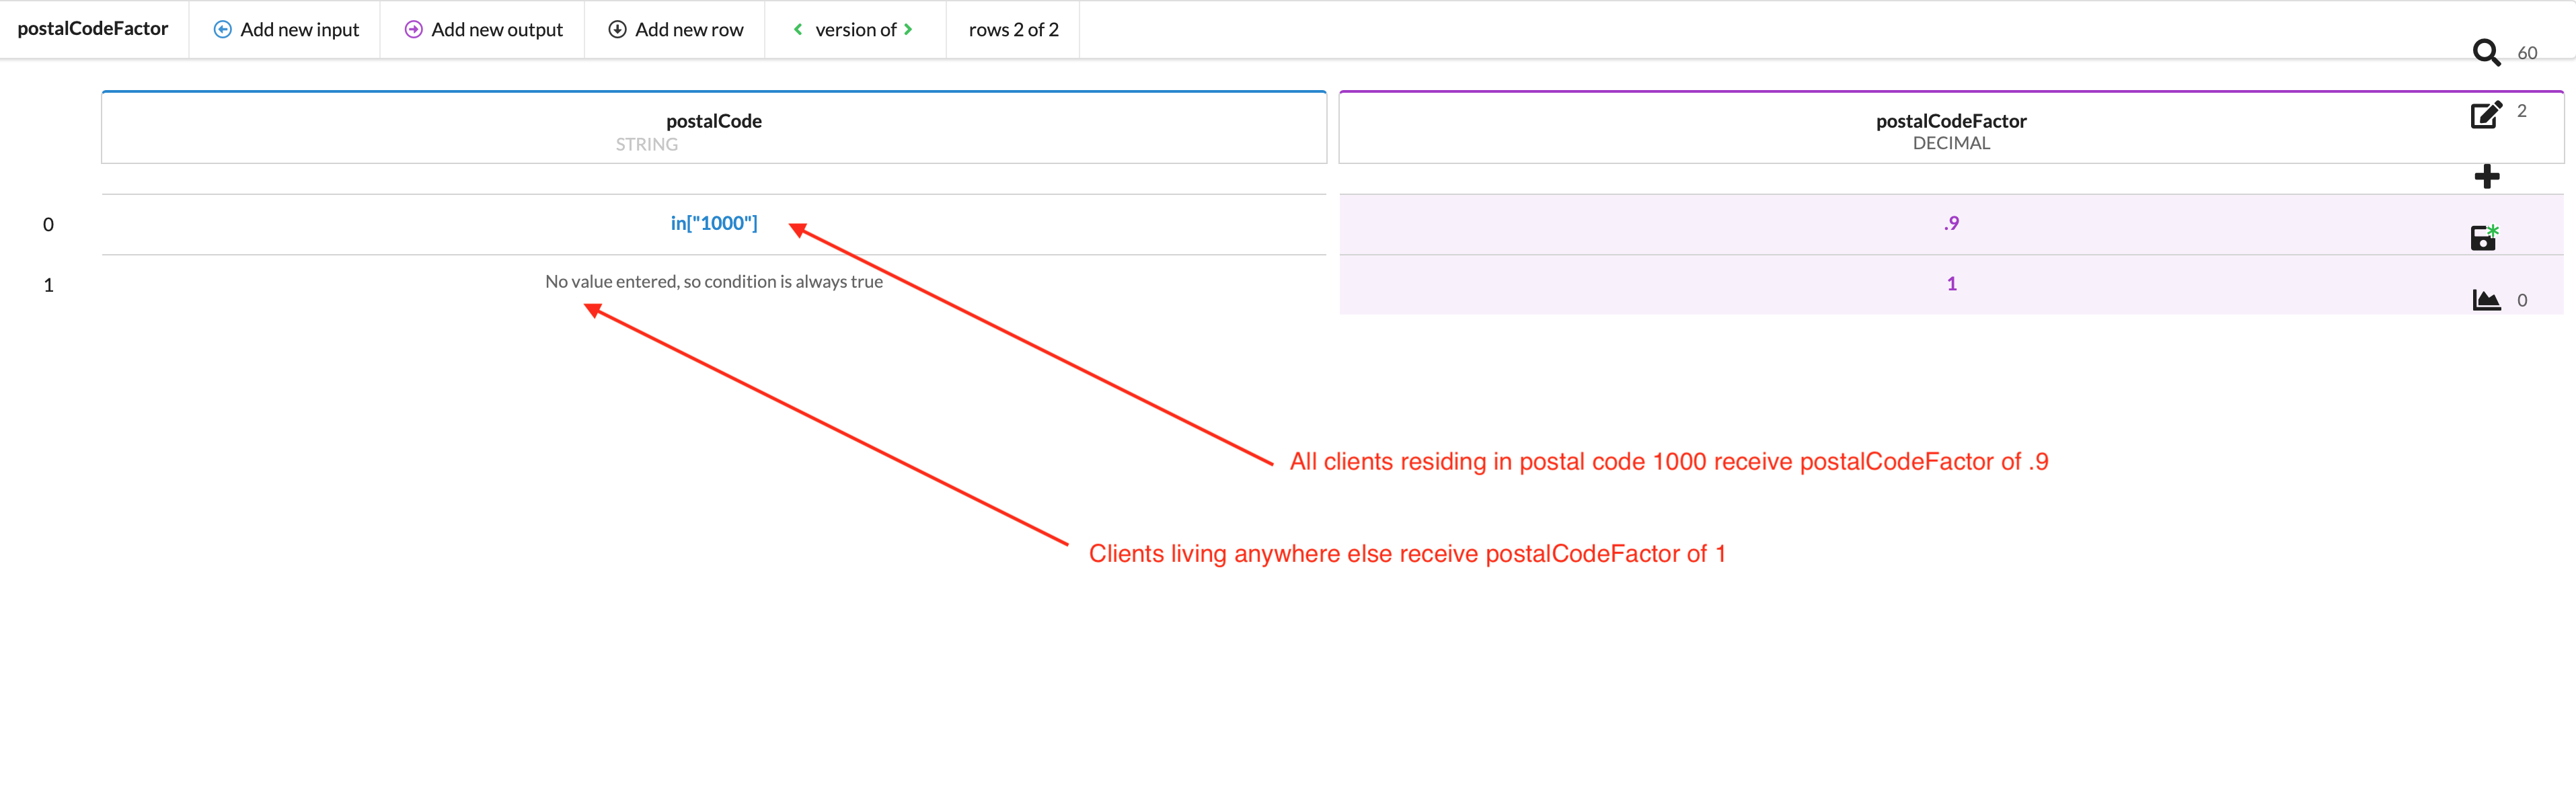
Change hit policy to FIRST
More information on hit policy
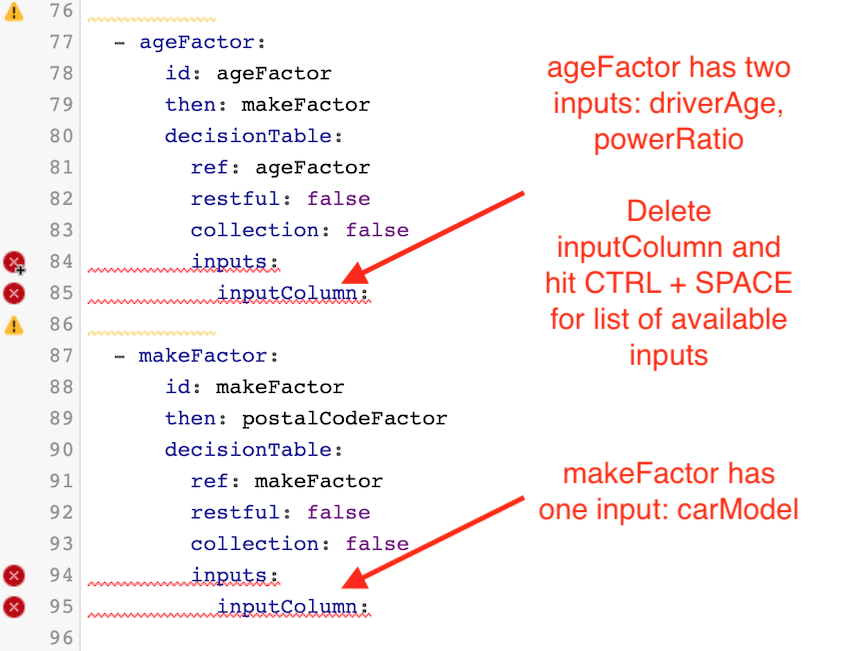
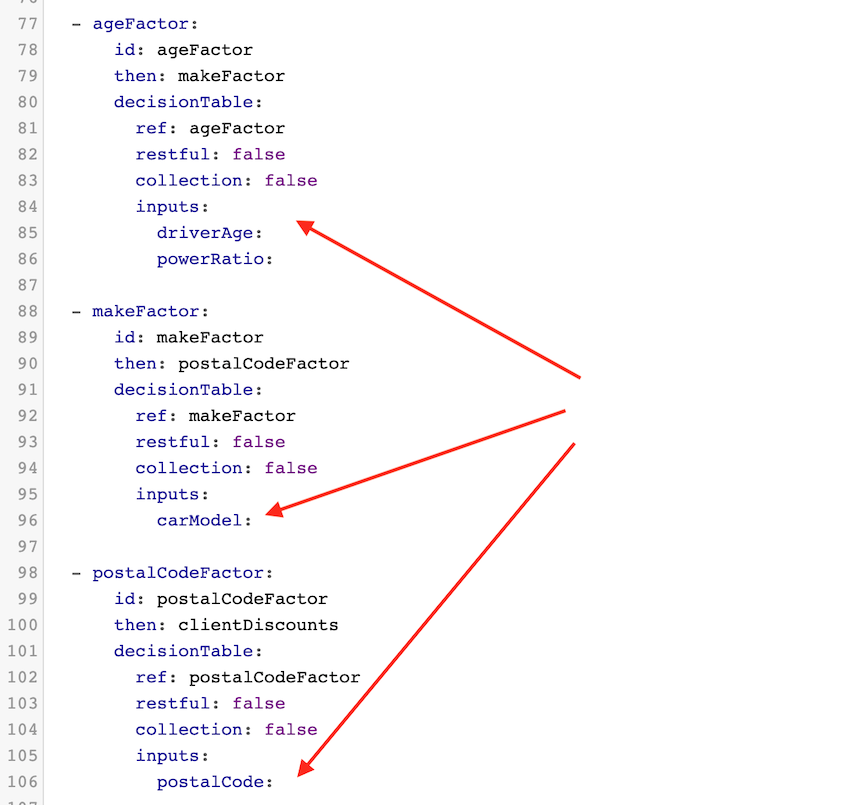
Now that these three decision tables have been created, navigate back to the flow editor to fix the errors. To repair the errors, you will need to set the inputs for each task. If you cannot remember the names of the inputs, delete the default input under the task (for example, “inputColumn”) and hit CTRL + SPACE to bring up a list of available input IDs.
Before fixing errors
After fixing errors
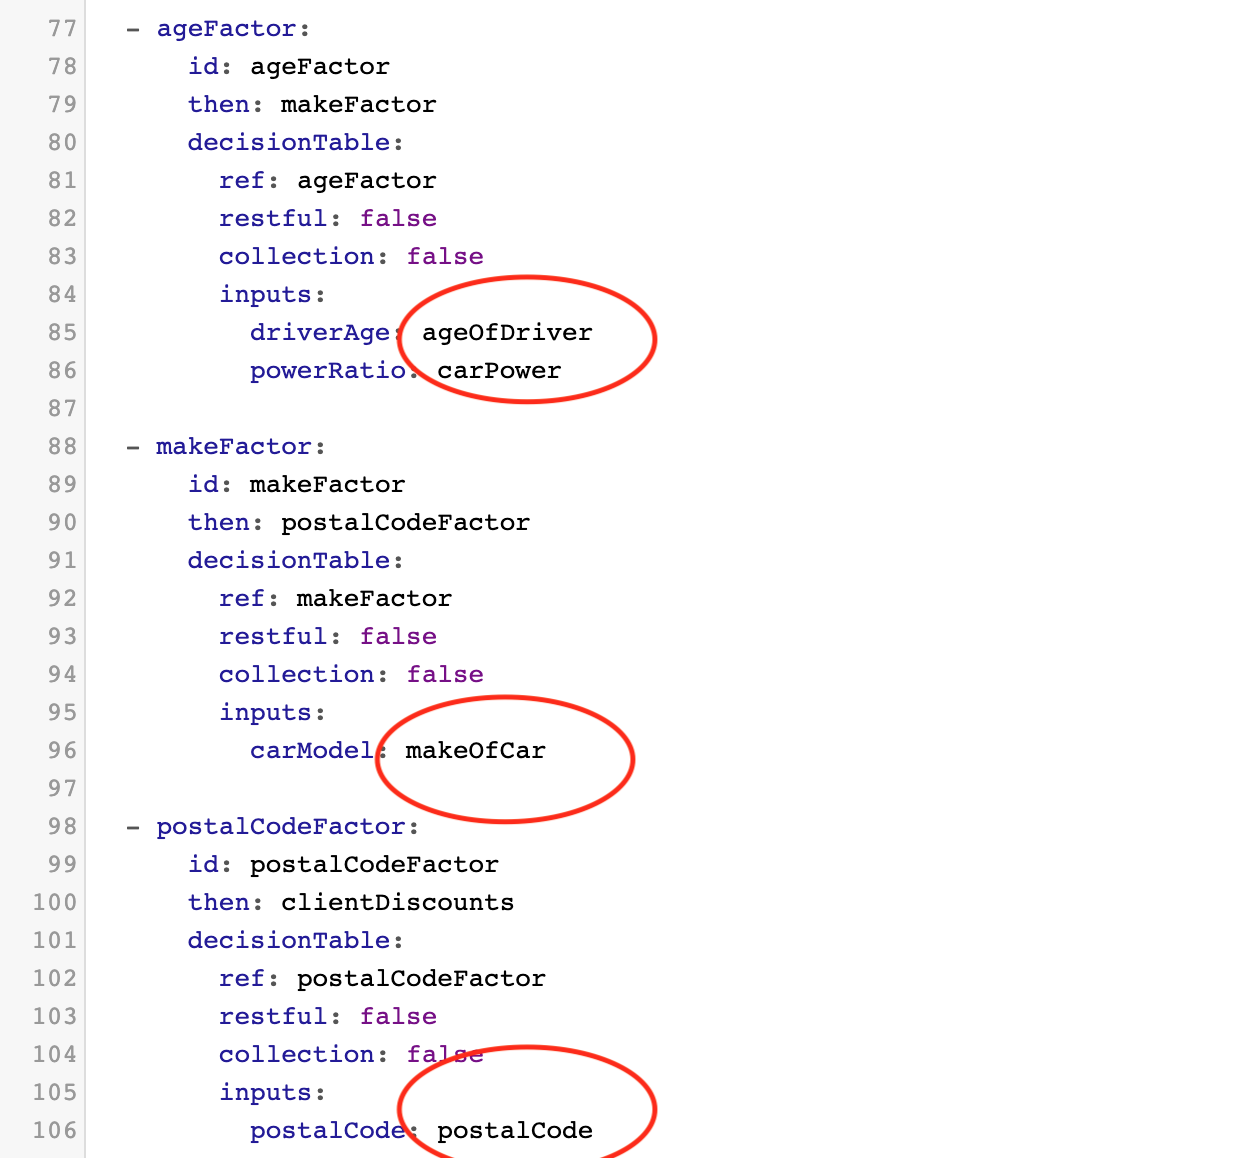
The decision table tasks now list their expected inputs, but these inputs are not mapped yet. Place your cursor on the line after an input and hit CTRL + SPACE to bring up a list of possible inputs and choose the appropriate ones. When you have done this for all inputs, you should see the following:
On the next page, we will create our final decision tables and service task, and then we can test our flow for the final time.