Final steps
At this stage, your flow graphic looks like this:

There are three more assets to add:
- Decision table called “clientDiscounts” to evaulate client discounts based either on age (if new client) or segment (if existing client)
- Decision table called “basePrices” to assign a small, medium, or large base price to a new client
- Service task called “calculateOffer” to evaluate all the data in the flow and calculate a final offer
Create a decision table called clientDiscounts and link it with the flow
This table will have the following elements:
- Three input columns: clientSegment, newClient, age
- clientSegment is type STRING
- newClient is type BOOLEAN
- age is type INTEGER
- One output column: baseBonus
- baseBonus is type DECIMAL
Remember to set hit policy to FIRST.
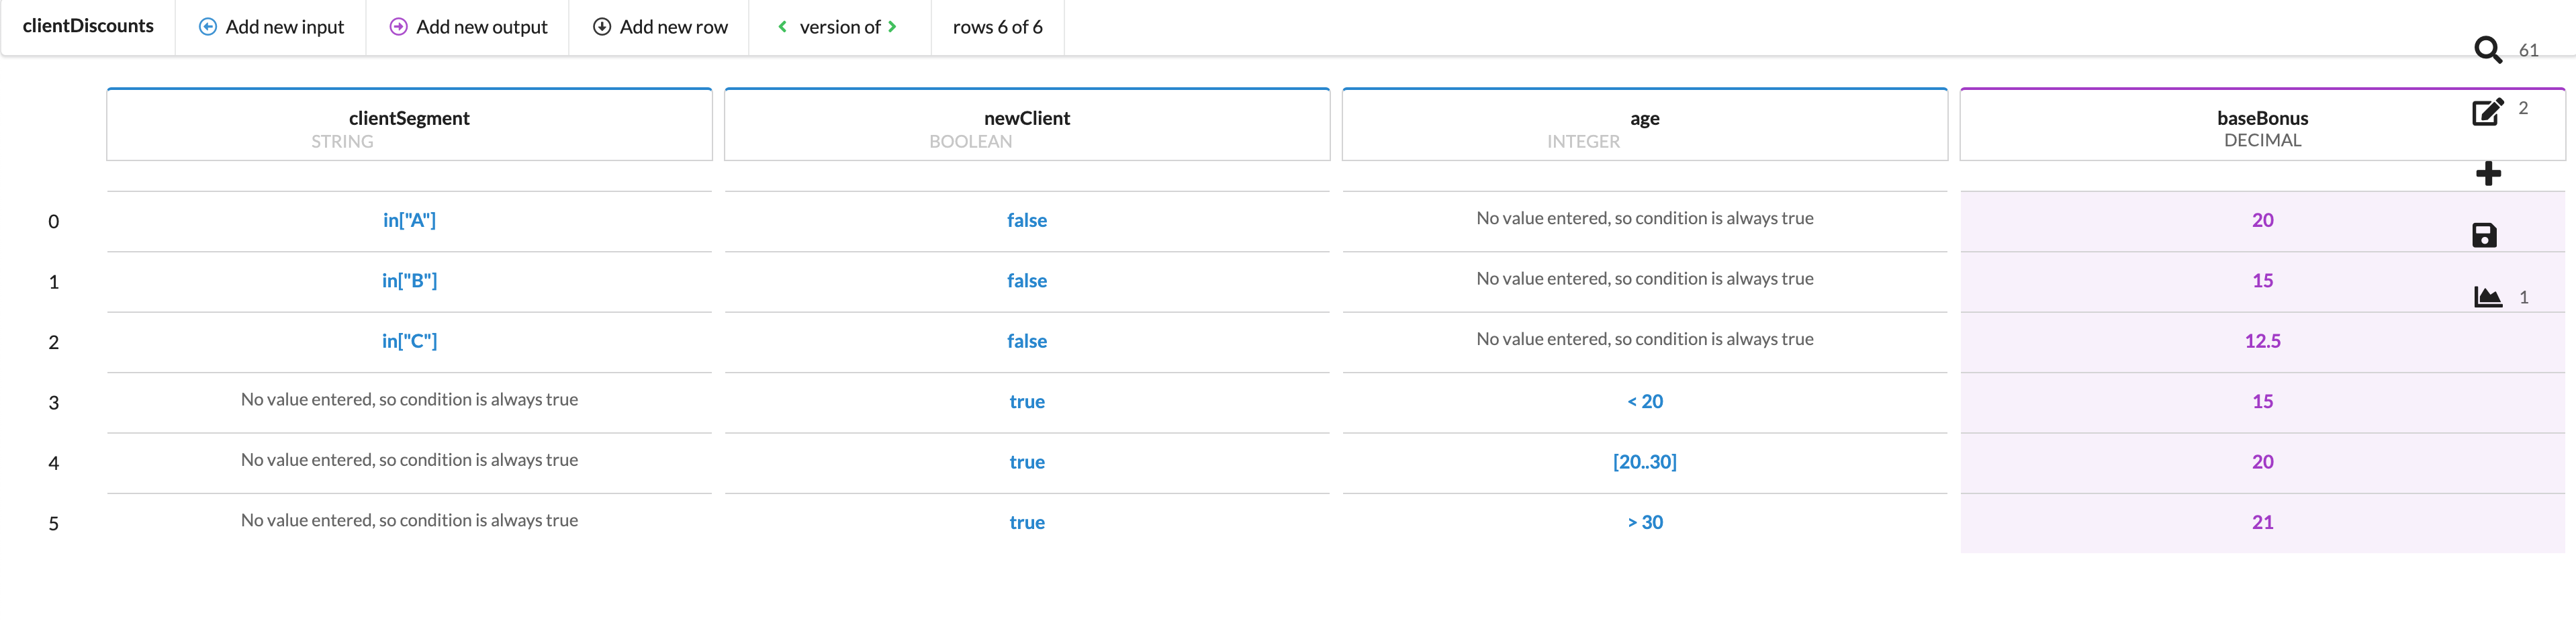
To simplify this table, think of it as a boolean expression read from left to right. Taking row 0, for example, when read out loud, it would be this: “If clientSegment is A, new client is FALSE, and nothing is entered for age, then the base bonus will be 20.0.
In the case of row 4: “If clientSegment has nothing entered, new client is TRUE, and new client's age is between 20 and 30, then the base bonus will be 20.0.
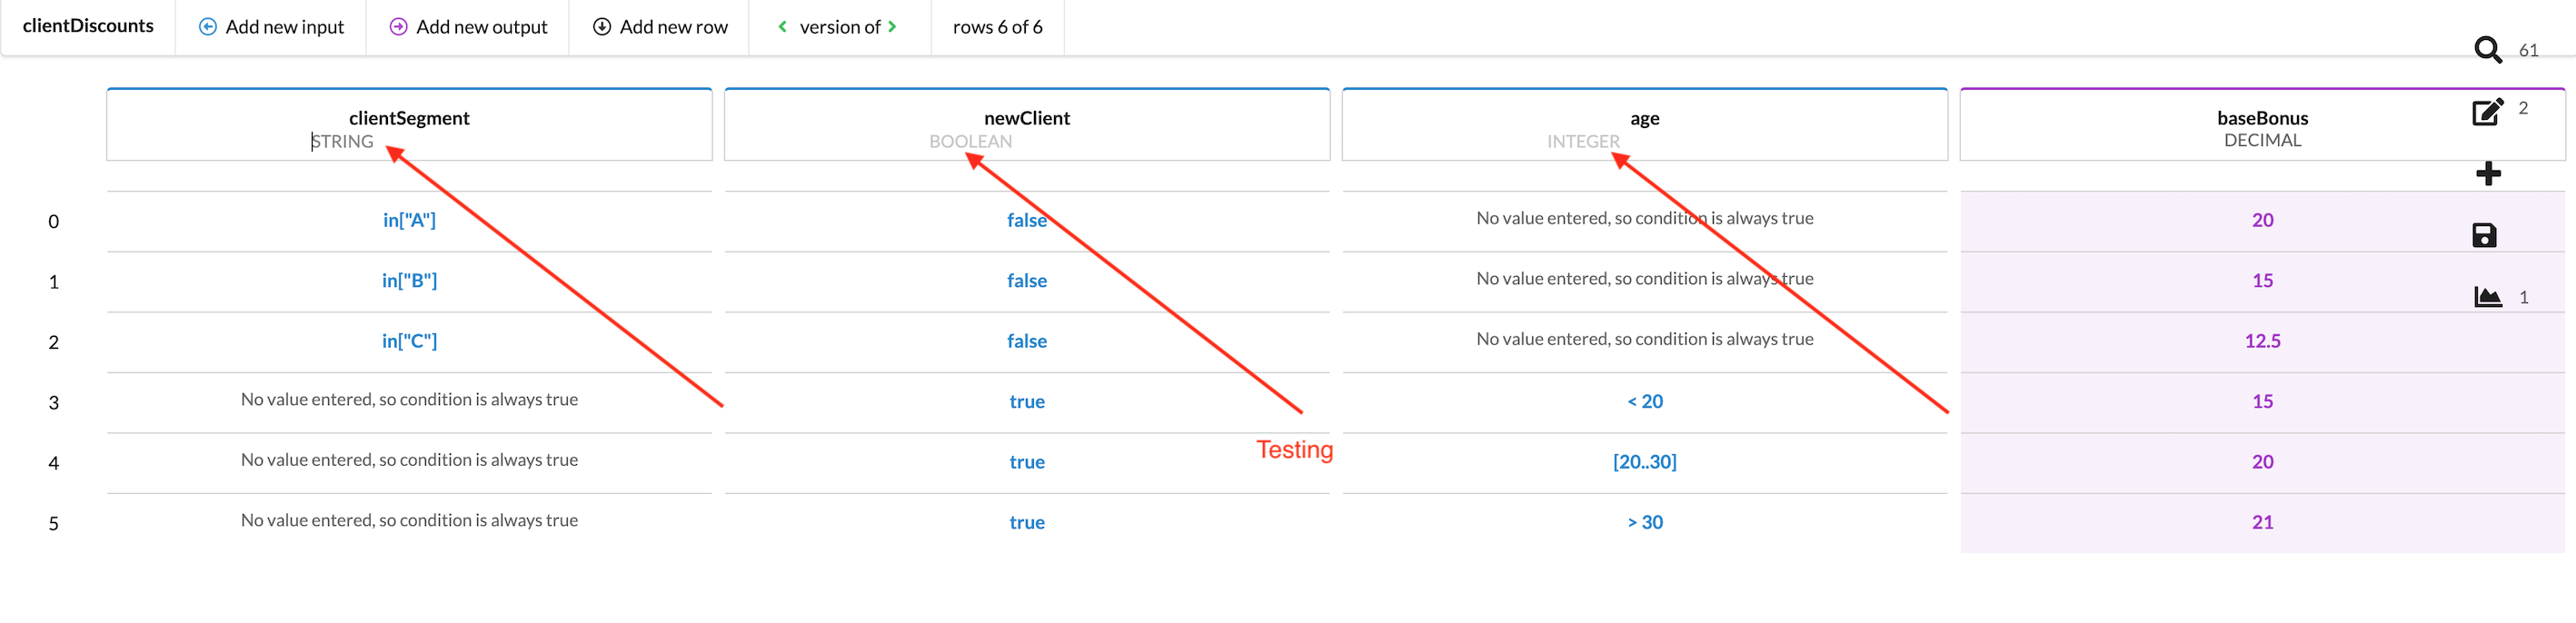
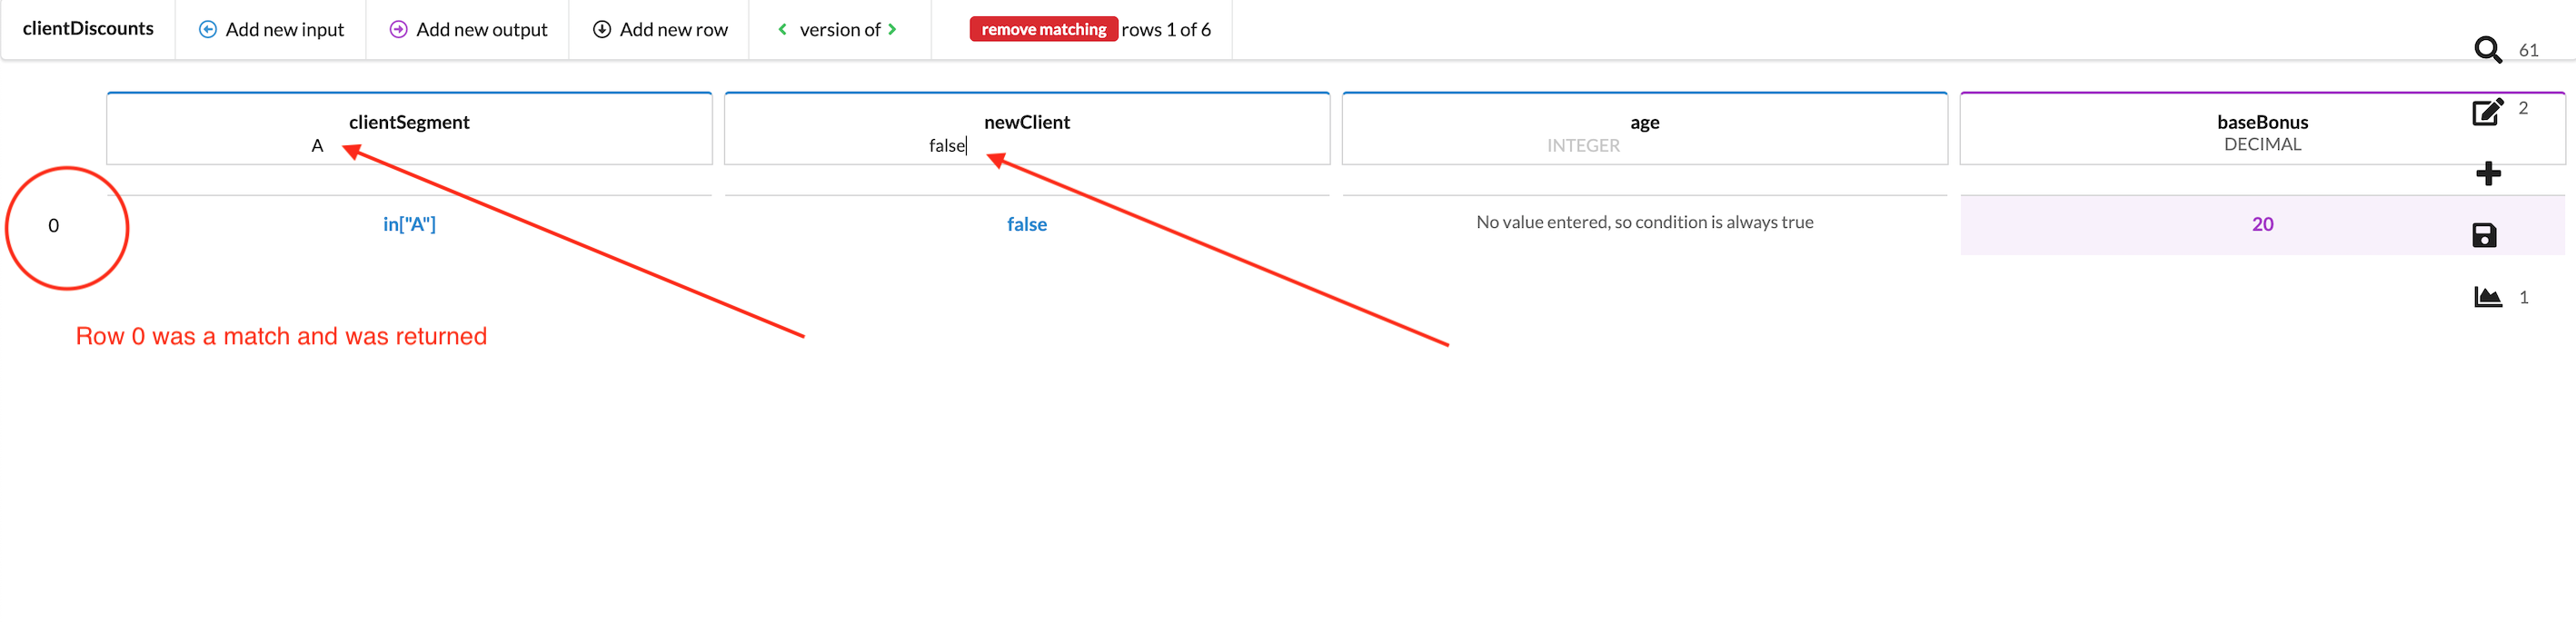
To test this table, you need to enter a value in EACH input column's testing field if it is required there. If the input column's value is “no value entered, so condition is always true”, you don't need to put a value there. See example below:
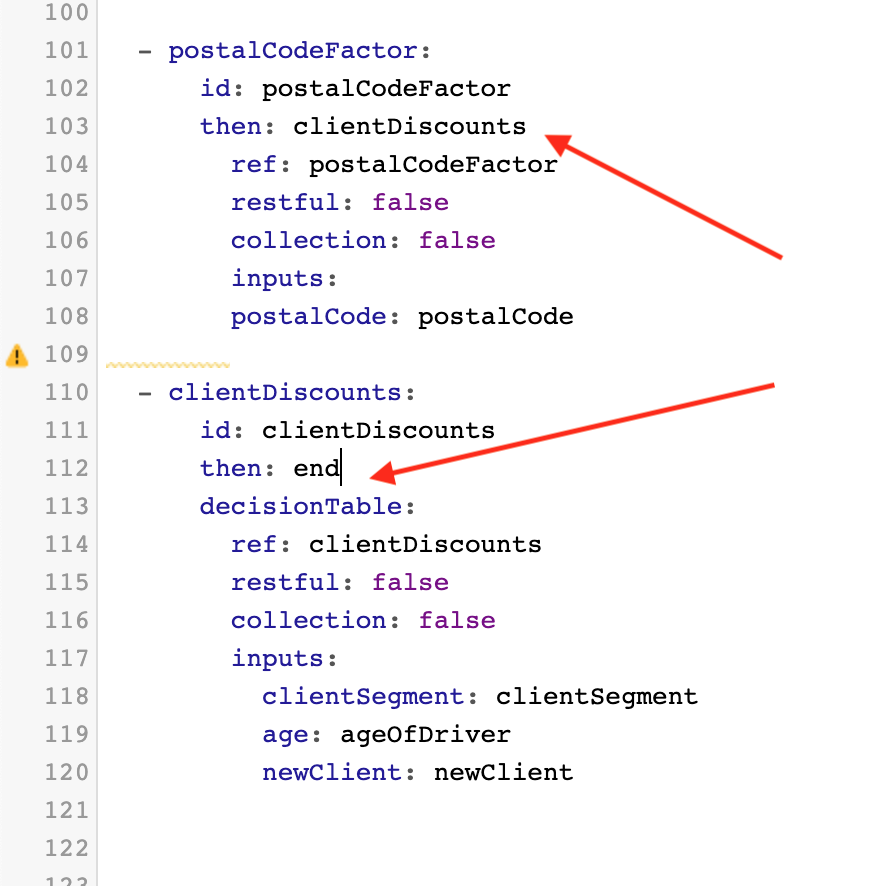
Next on the flow side, fill in the then: values. Set then: in clientDiscounts to then: end.
Because this clientDiscounts task will come after postalCodeFactor, set then: in postalCodeFactor to then: clientDiscounts. You should see the following:
Create a decision table called basePrices and link it with the flow
This decision table will have the following elements:
- One input column (newClient)
- newClient is type BOOLEAN
- Three output columns (s_basePrice, m_basePrice, l_basePrice)
- All outputs are of type DECIMAL
Remember to set hit policy to FIRST.
Create a service task called calculateOffer and test the flow
- Create the final service task, calculateOffer, at the end of the flow.
- Change
then:on the decision table basePrices tothen: calculateOffer. - Change
then:on the service task calculateOffer tothen: end. - These two final tasks are now linked. However, service task calculateOffer has no functionality. Double click the calculateOffer bubble on the flow diagram to bring up the Java code editor.
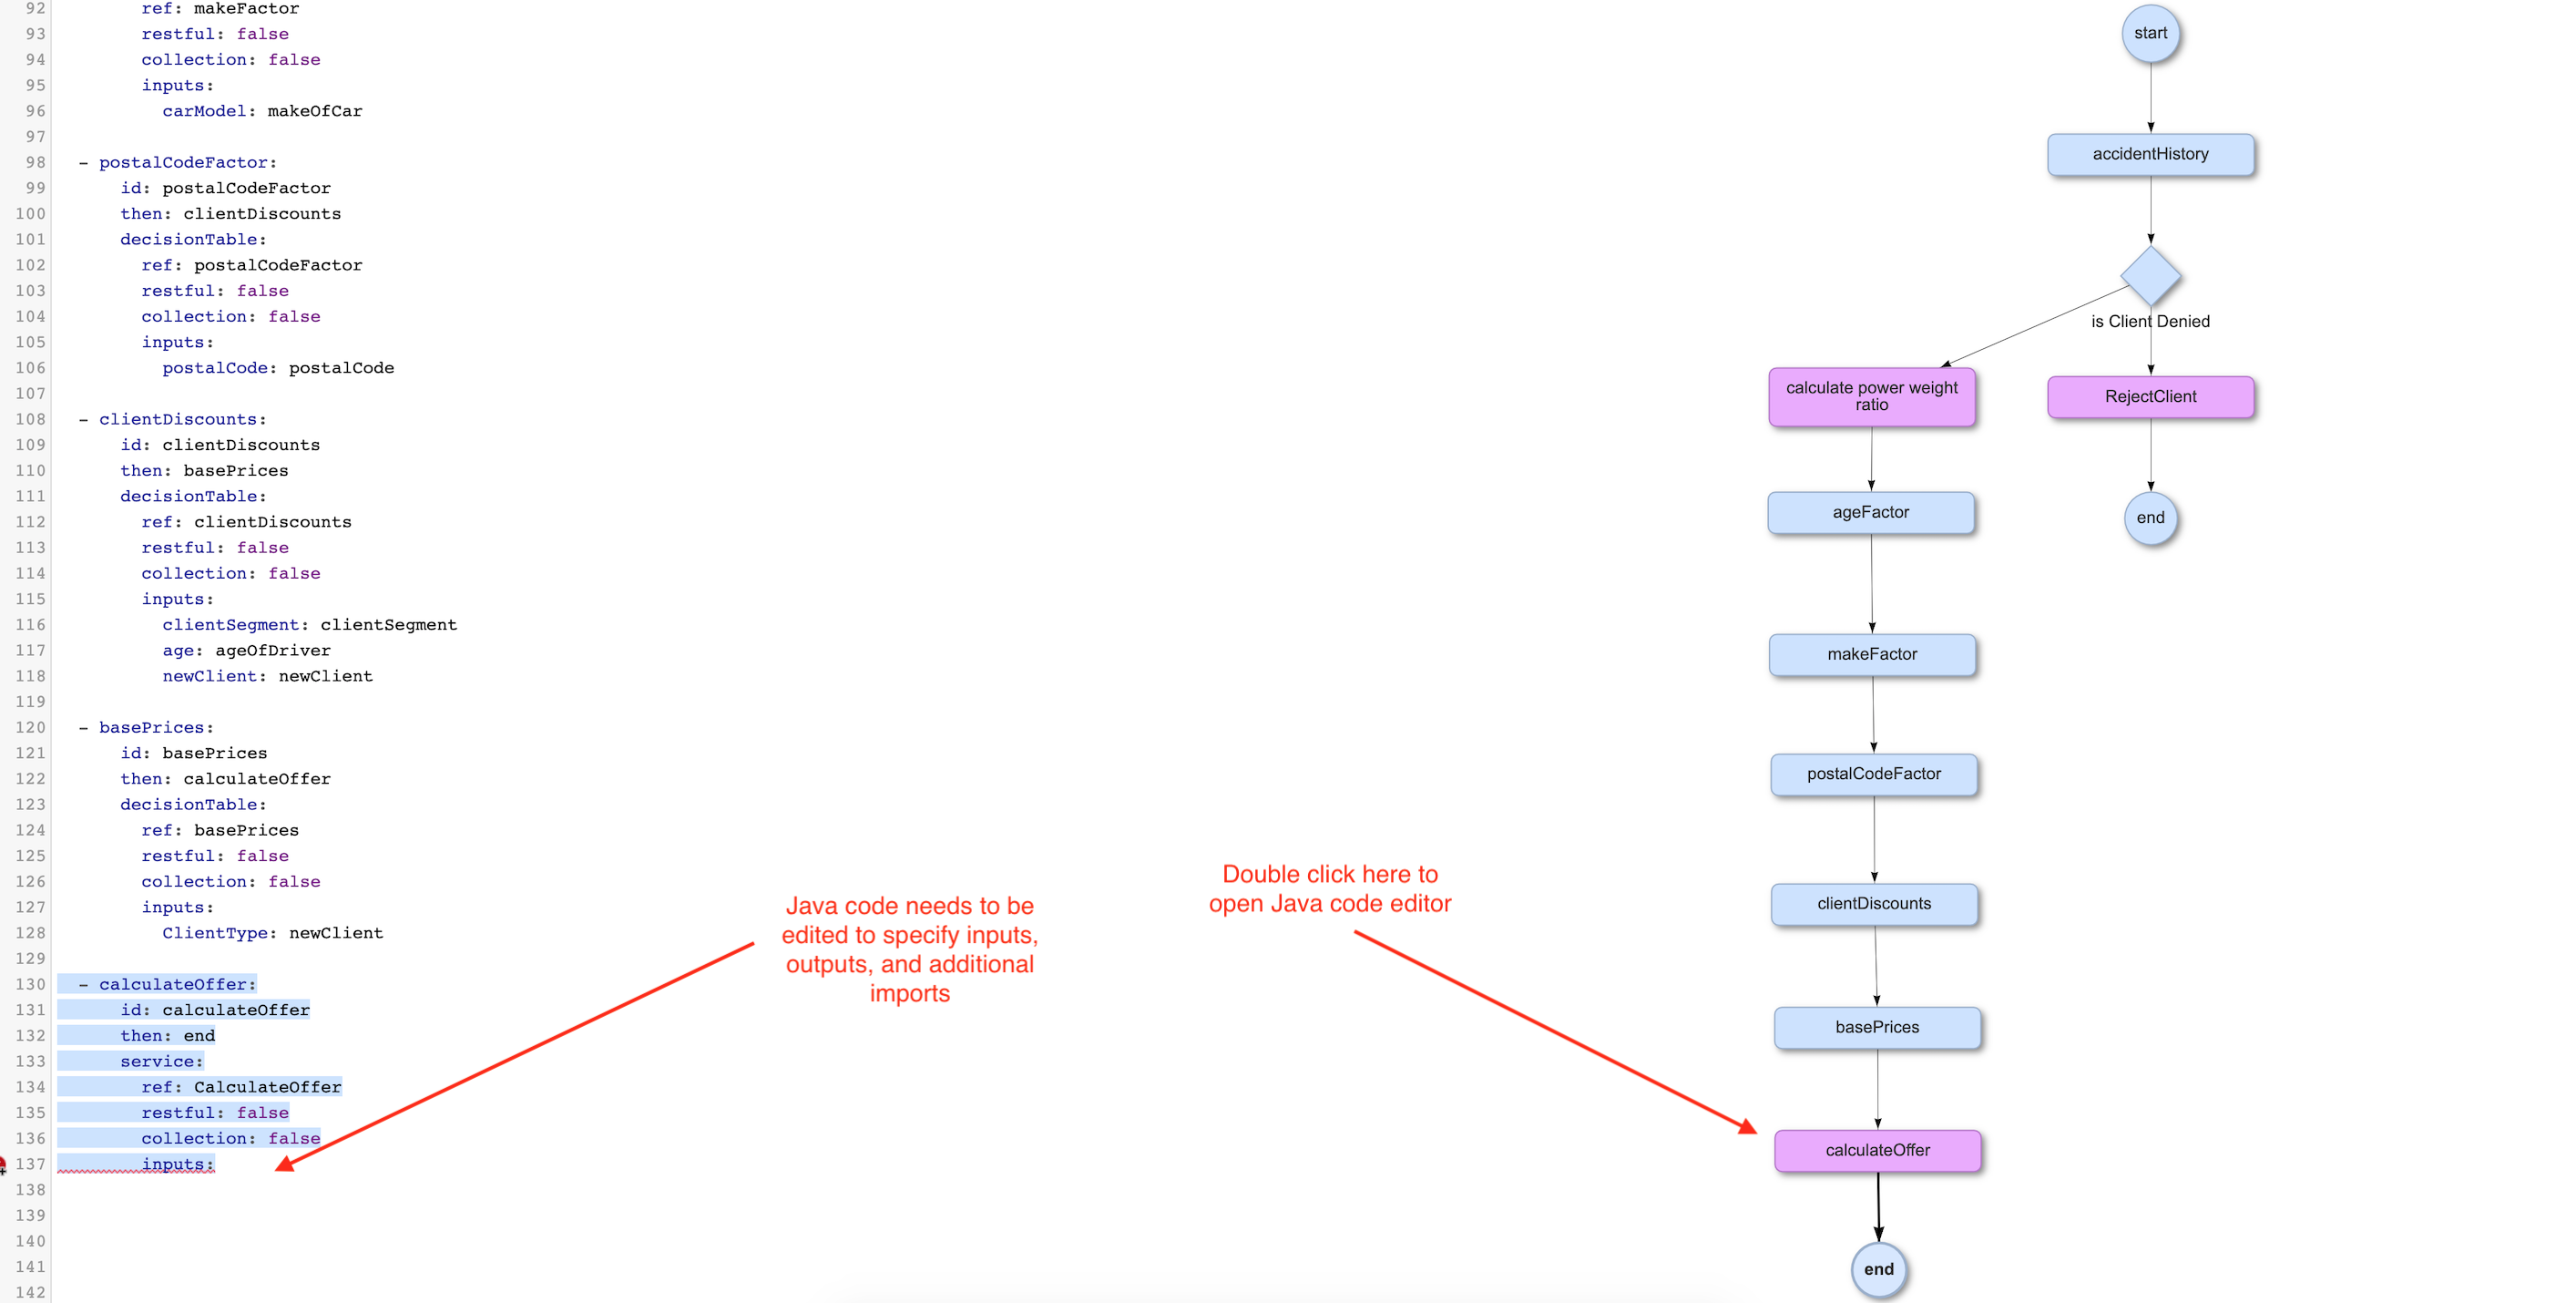
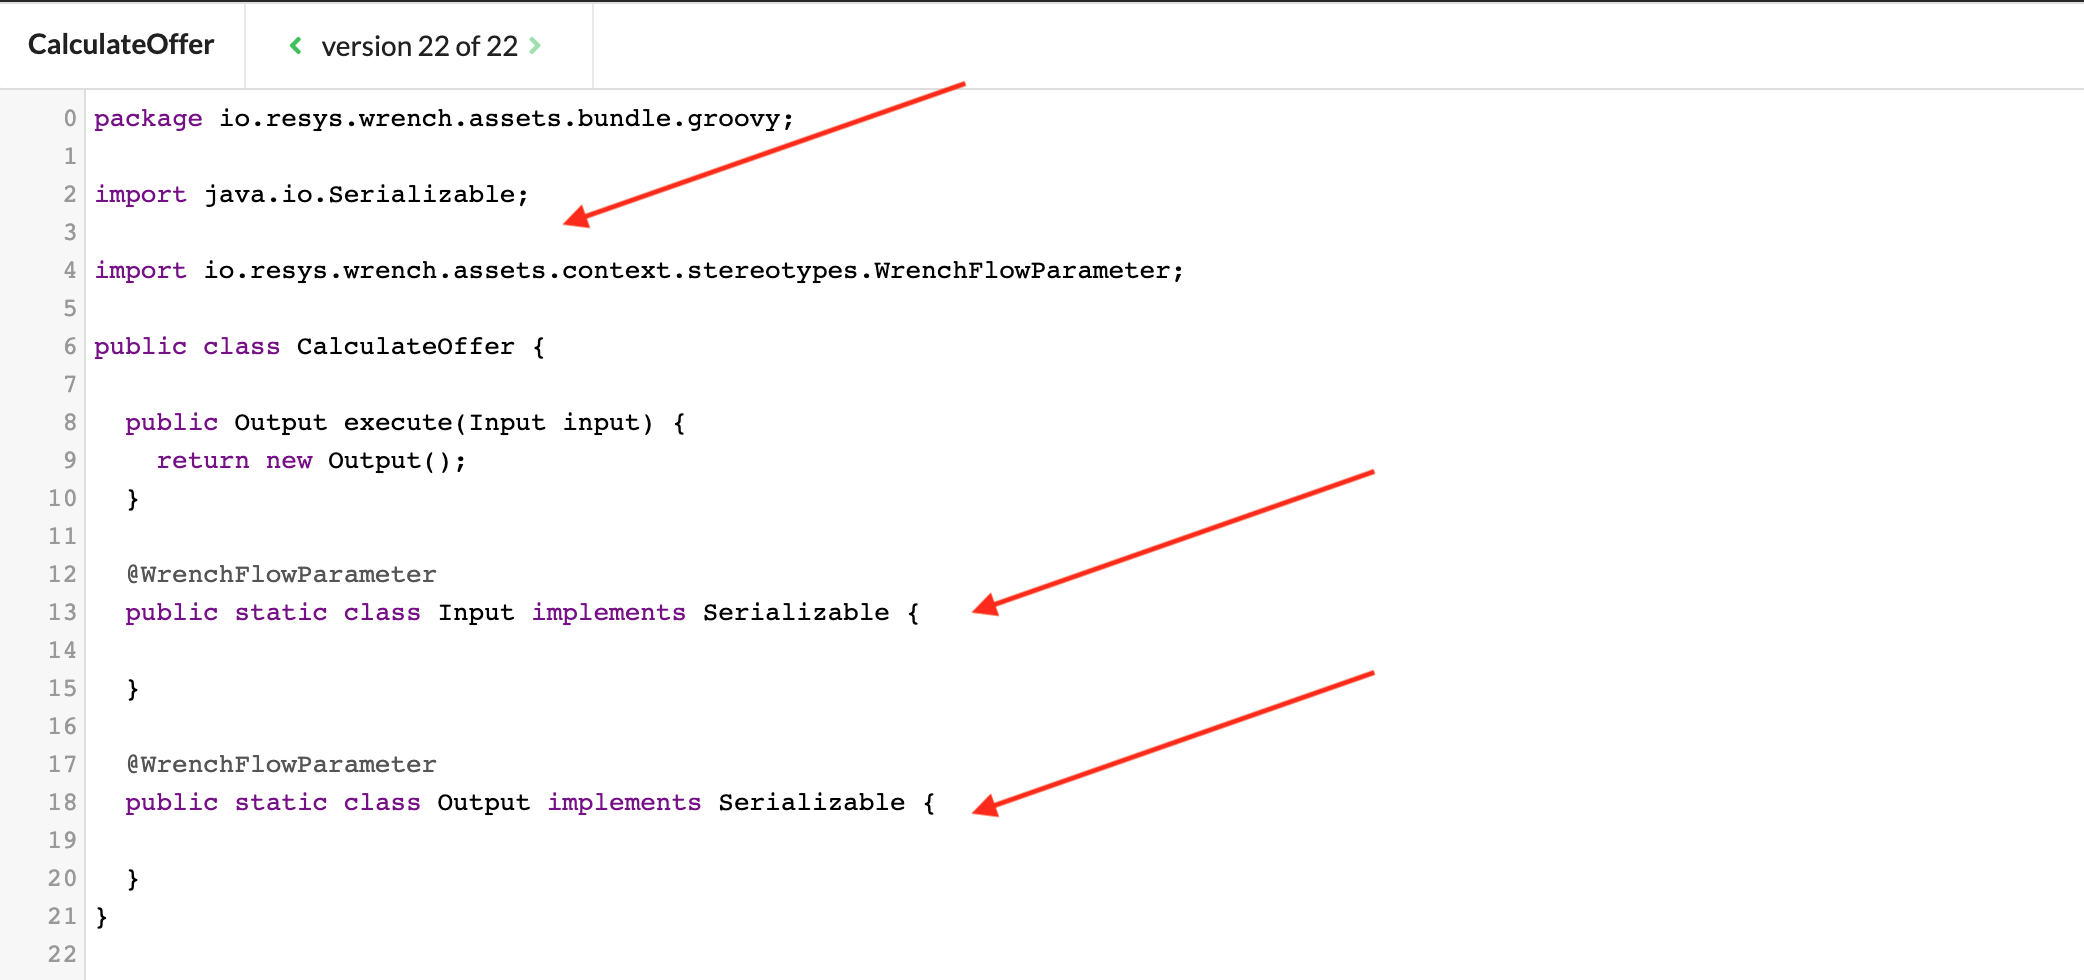
Upon entering the code editor, you can see that this task has no functionality, which you must now add via Java.
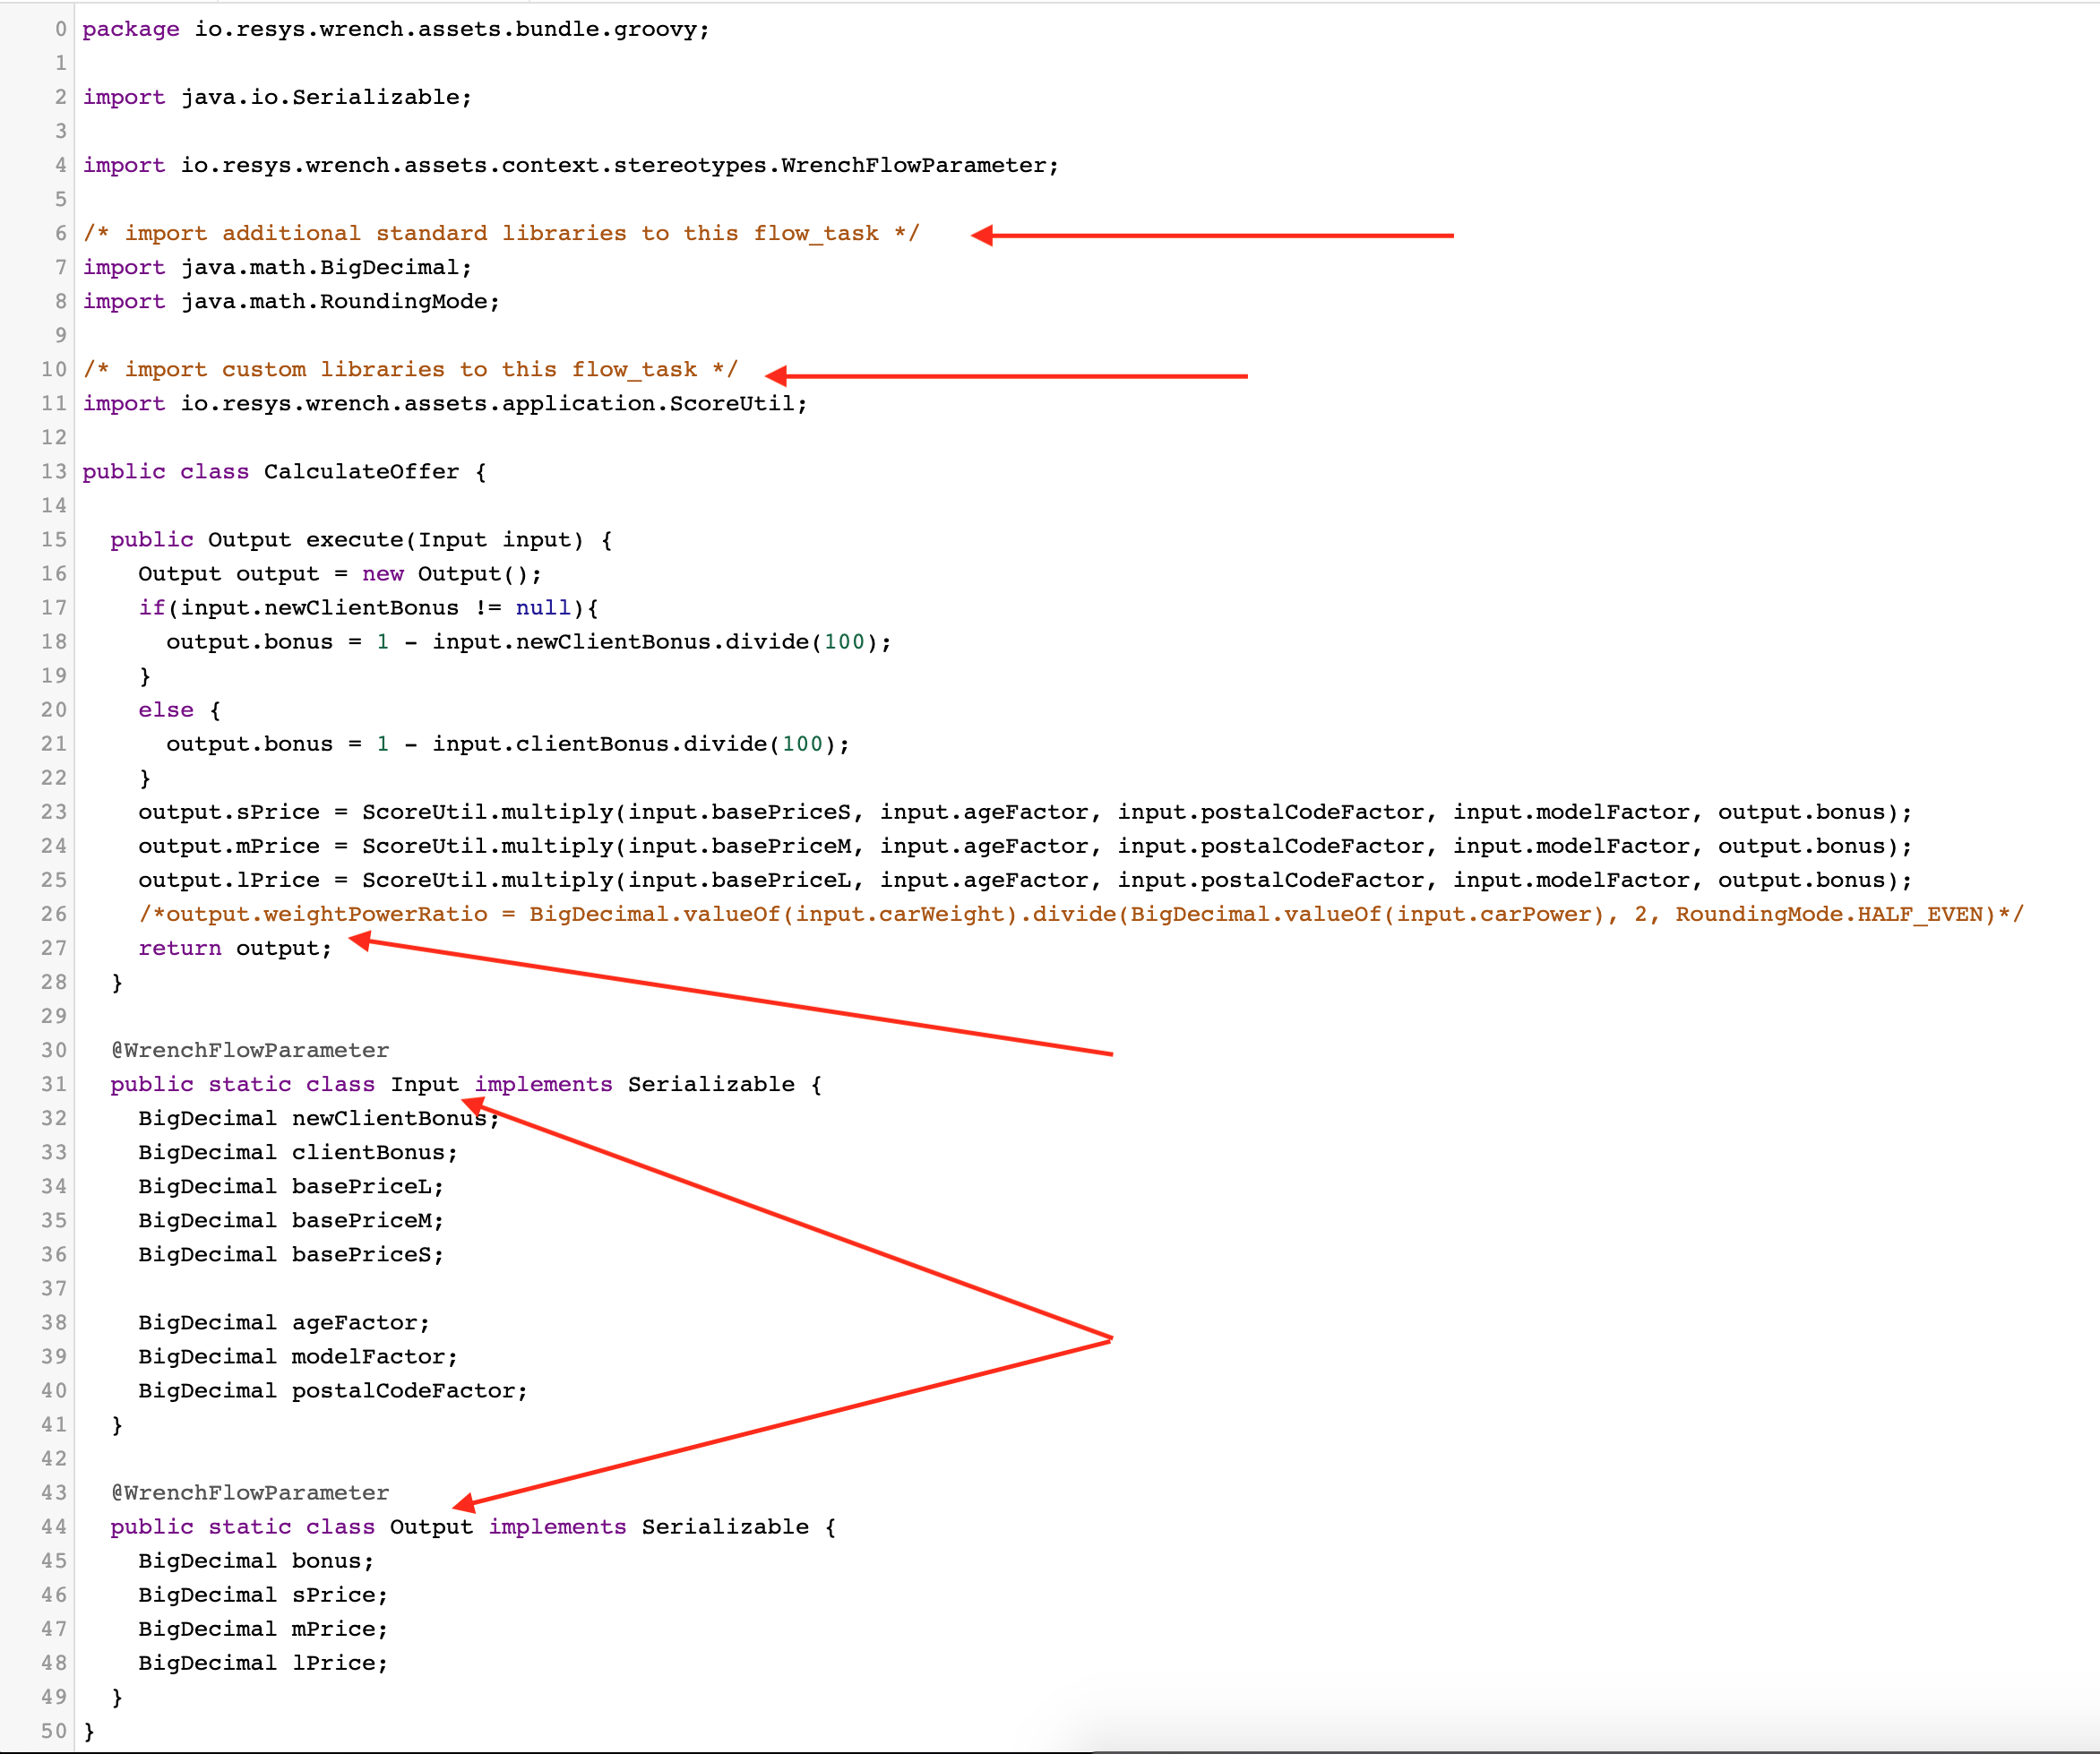
You will need to import additional standard libraries java.math.BigDecimal and java.math.RoundingMode.
In addition, you will need to import an additional custom library: io.resys.wrench.assets.application.ScoreUtil.
You will also need to set your inputs and outputs. See the screenshot and code block below for reference:
Before: Default service task
After: Imports, inputs, and outputs specified
Code example
package io.resys.wrench.assets.bundle.groovy;

import java.io.Serializable;

import io.resys.wrench.assets.context.stereotypes.WrenchFlowParameter;

/* import additional standard libraries to this flow_task */
import java.math.BigDecimal;
import java.math.RoundingMode;

/* import custom libraries to this flow_task */
import io.resys.wrench.assets.application.ScoreUtil;

public class CalculateOffer {

  public Output execute(Input input) {
    Output output = new Output();
    if(input.newClientBonus != null){
      output.bonus = 1 - input.newClientBonus.divide(100);
    }
    else {
      output.bonus = 1 - input.clientBonus.divide(100);
    }
    output.sPrice = ScoreUtil.multiply(input.basePriceS, input.ageFactor, input.postalCodeFactor, input.modelFactor, output.bonus);
    output.mPrice = ScoreUtil.multiply(input.basePriceM, input.ageFactor, input.postalCodeFactor, input.modelFactor, output.bonus);
    output.lPrice = ScoreUtil.multiply(input.basePriceL, input.ageFactor, input.postalCodeFactor, input.modelFactor, output.bonus);
    /*output.weightPowerRatio = BigDecimal.valueOf(input.carWeight).divide(BigDecimal.valueOf(input.carPower), 2, RoundingMode.HALF_EVEN)*/
    return output;
  }

  @WrenchFlowParameter
  public static class Input implements Serializable {
    BigDecimal newClientBonus;
    BigDecimal clientBonus;
    BigDecimal basePriceL;
    BigDecimal basePriceM;
    BigDecimal basePriceS;

    BigDecimal ageFactor;
    BigDecimal modelFactor;
    BigDecimal postalCodeFactor;
  }

  @WrenchFlowParameter
  public static class Output implements Serializable {
    BigDecimal bonus;
    BigDecimal sPrice;
    BigDecimal mPrice;
    BigDecimal lPrice;
  }
}
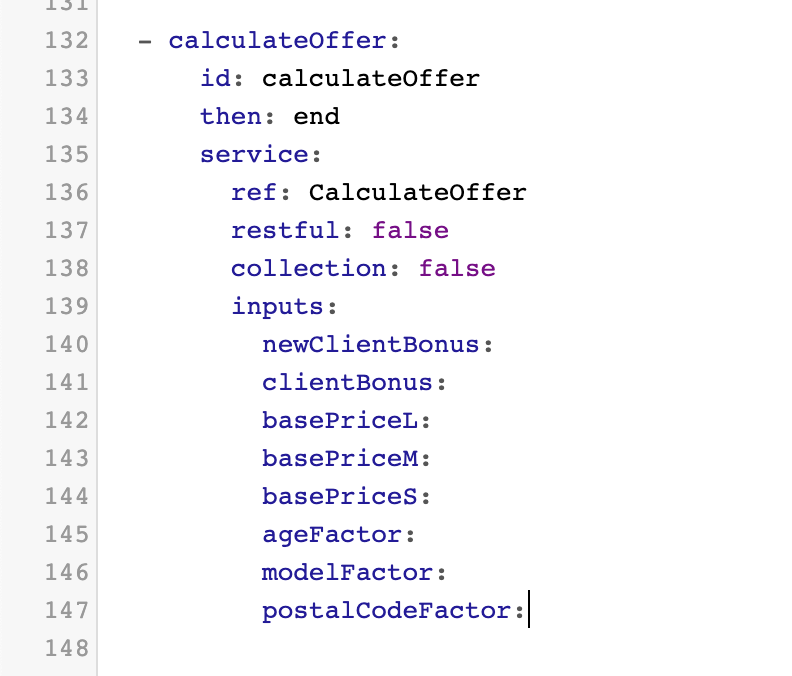
Save changes and return to the flow editor. You should now see the following:
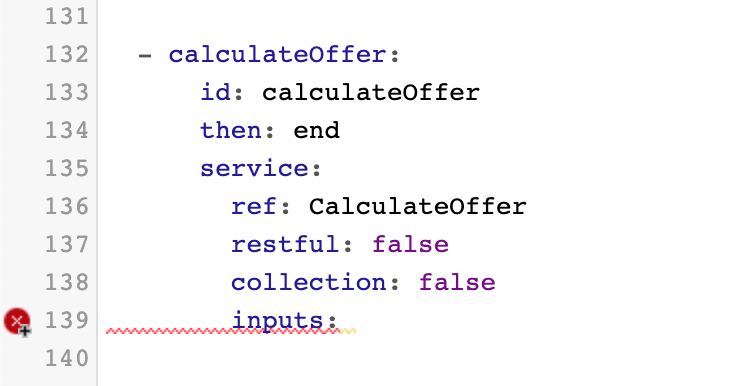
Delete the inputs keyword completely. Then, use CTRL + SPACE to re-add the inputs keyword.
The inputs specified in the service task will automatically appear under inputs.
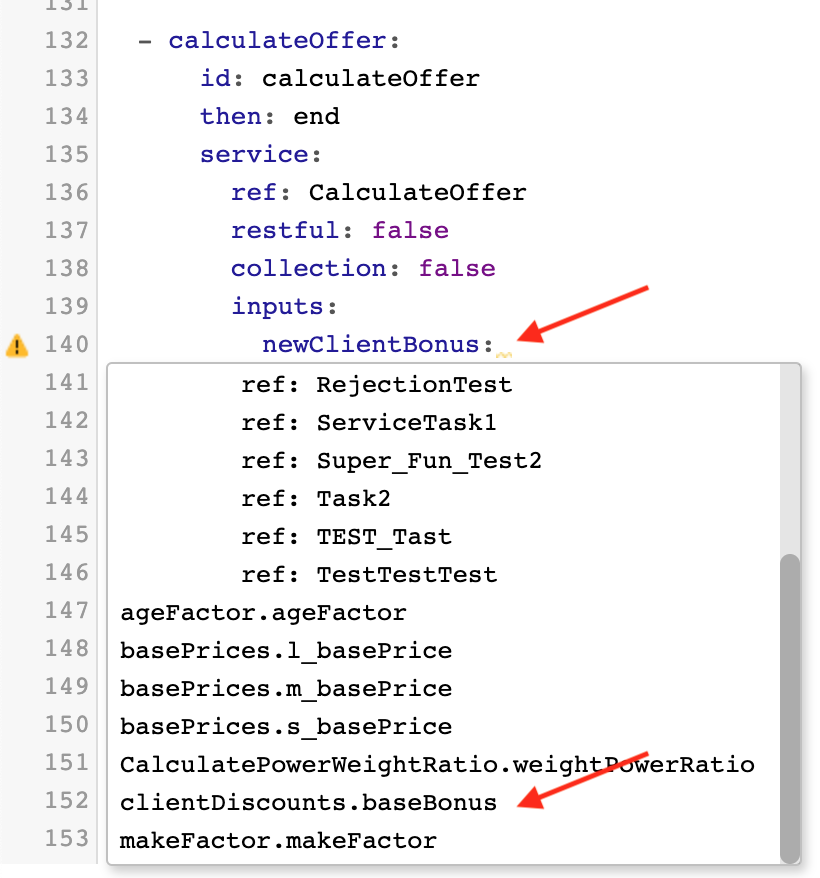
Now, map the inputs. Use CTRL + SPACE to bring up the “insert” dropdown and choose the appropriate options.
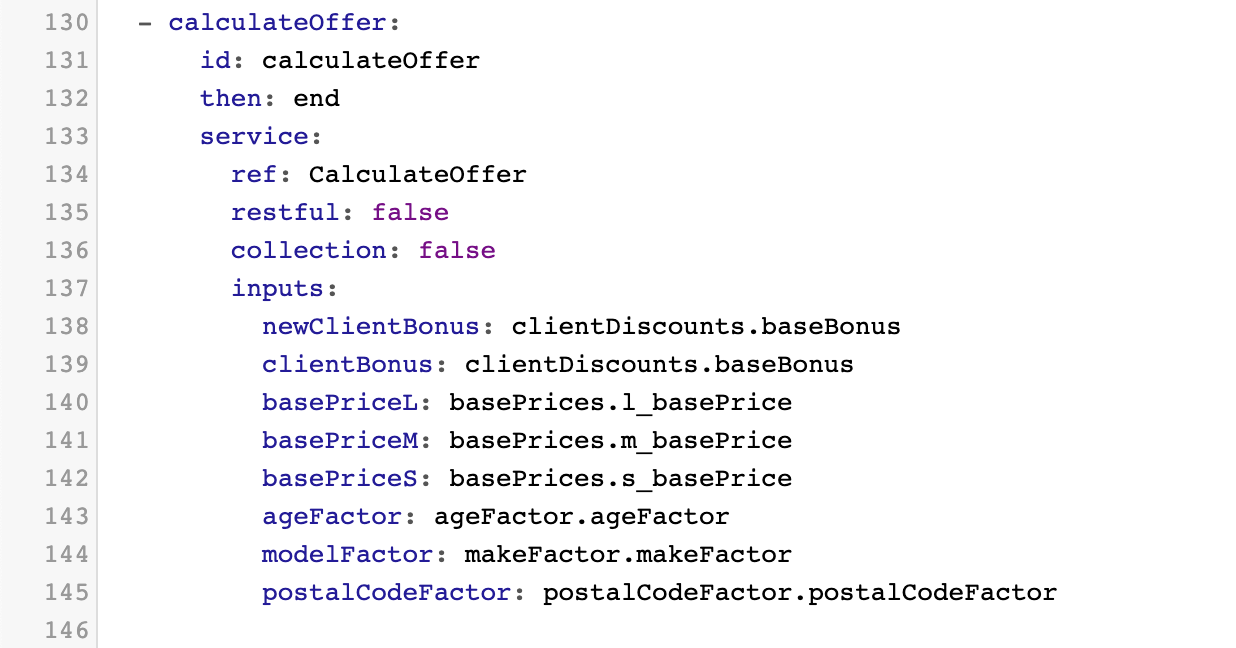
When finished, you should see this:
Test your flow
It is now time to test your flow. Click on Preview at the top of the screen to test inputs and view the outputs.
You will see this window. Note that the debug values are already filled in as you specified under each input.

We will now test the debug inputs and view the outputs:
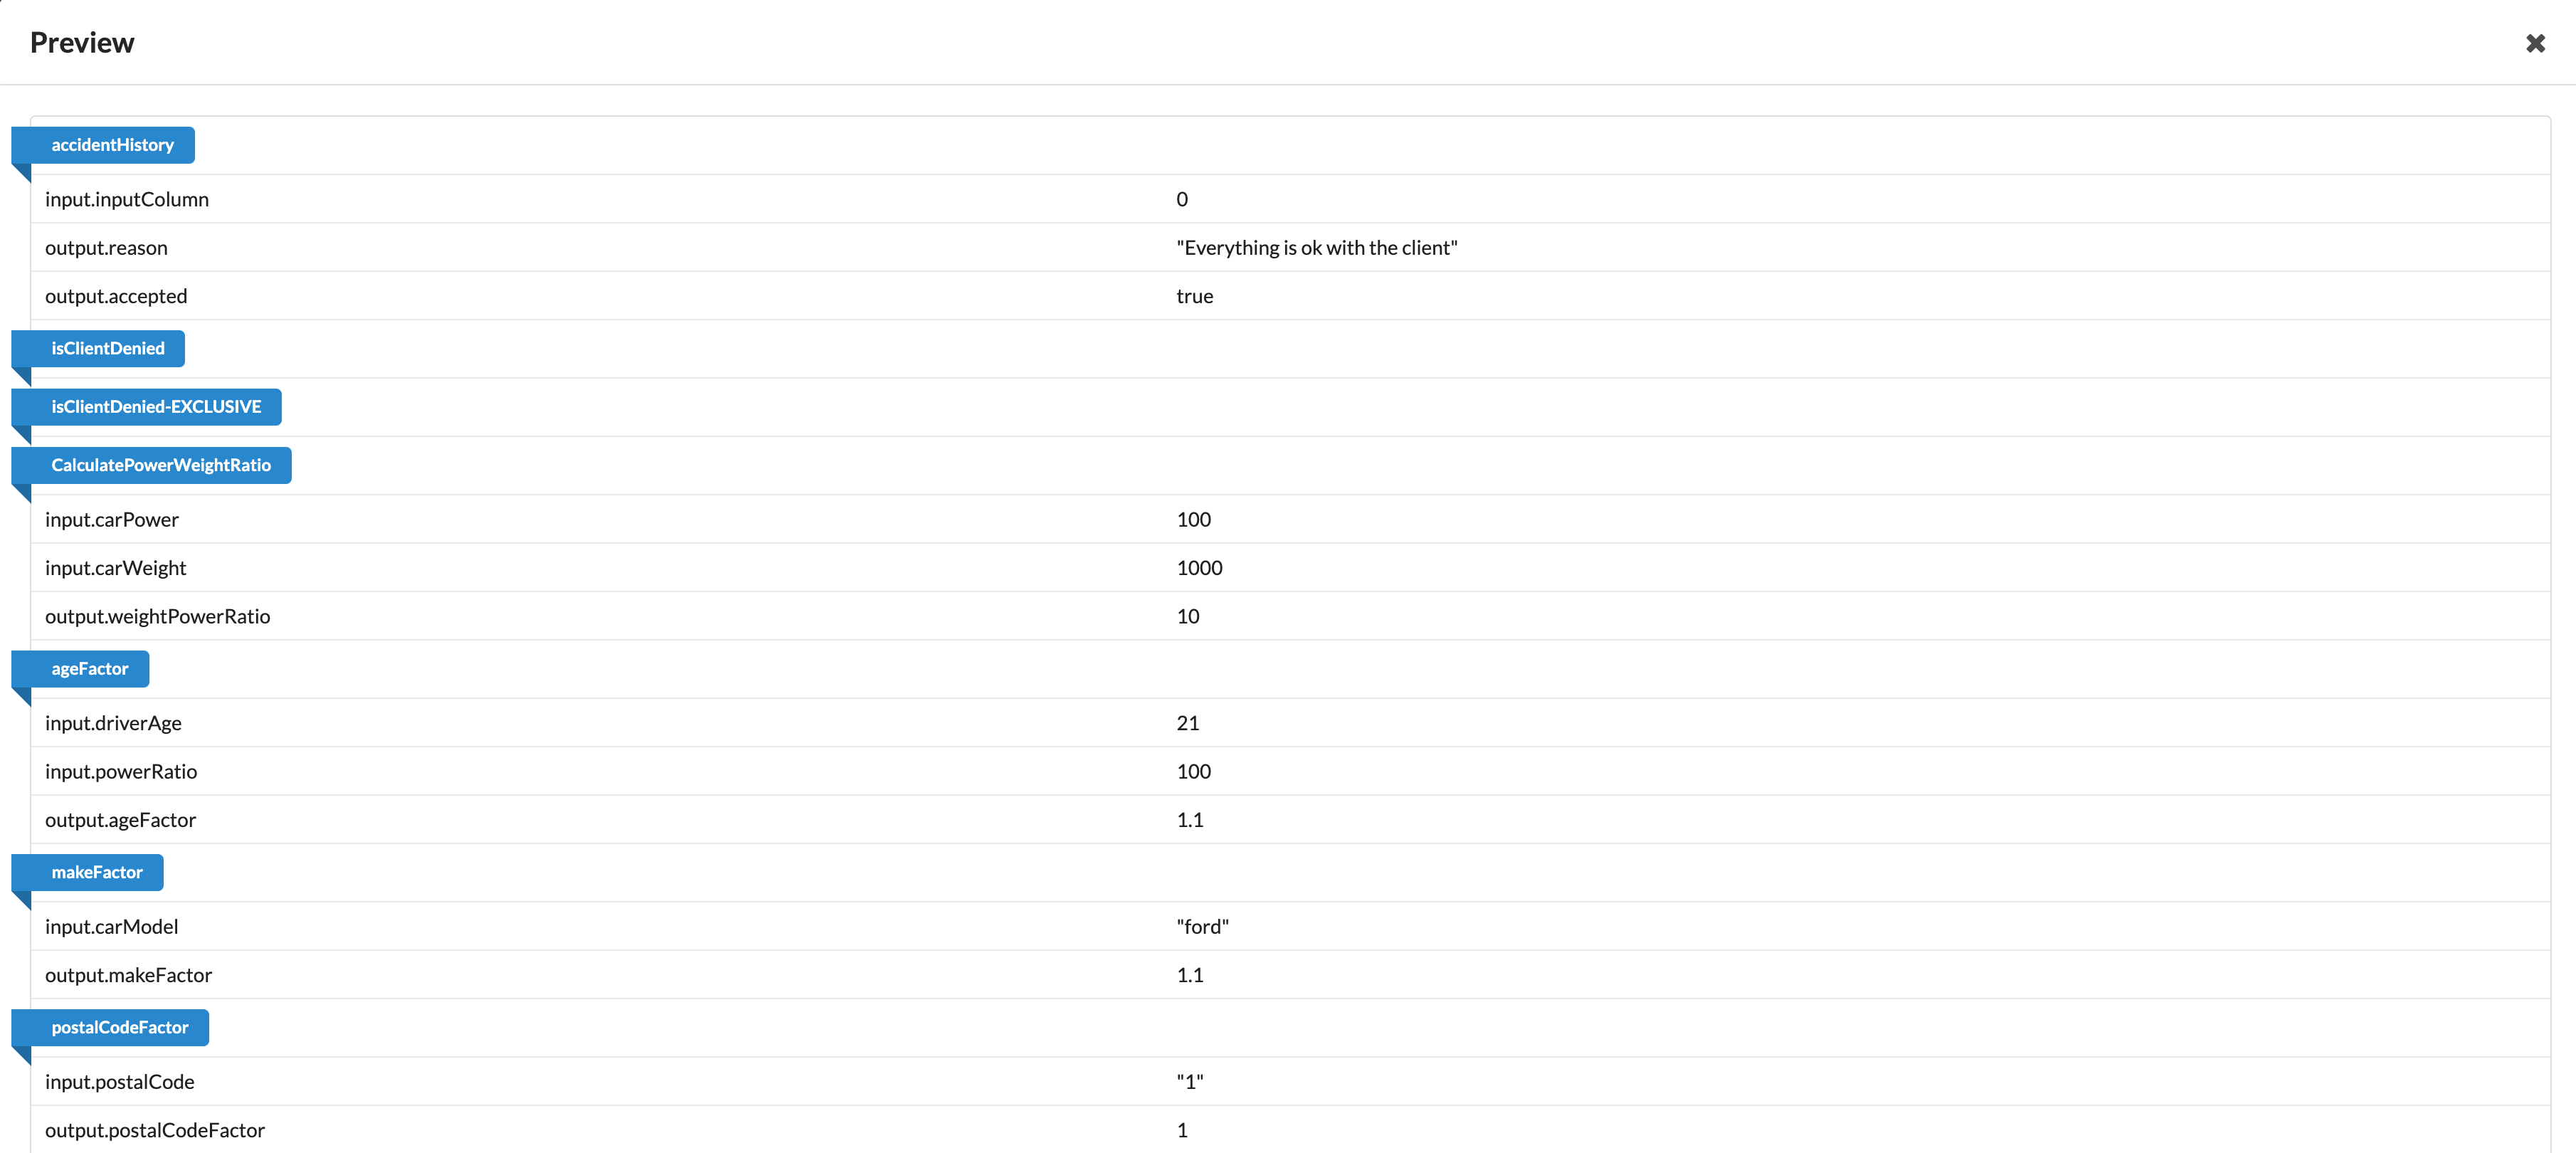
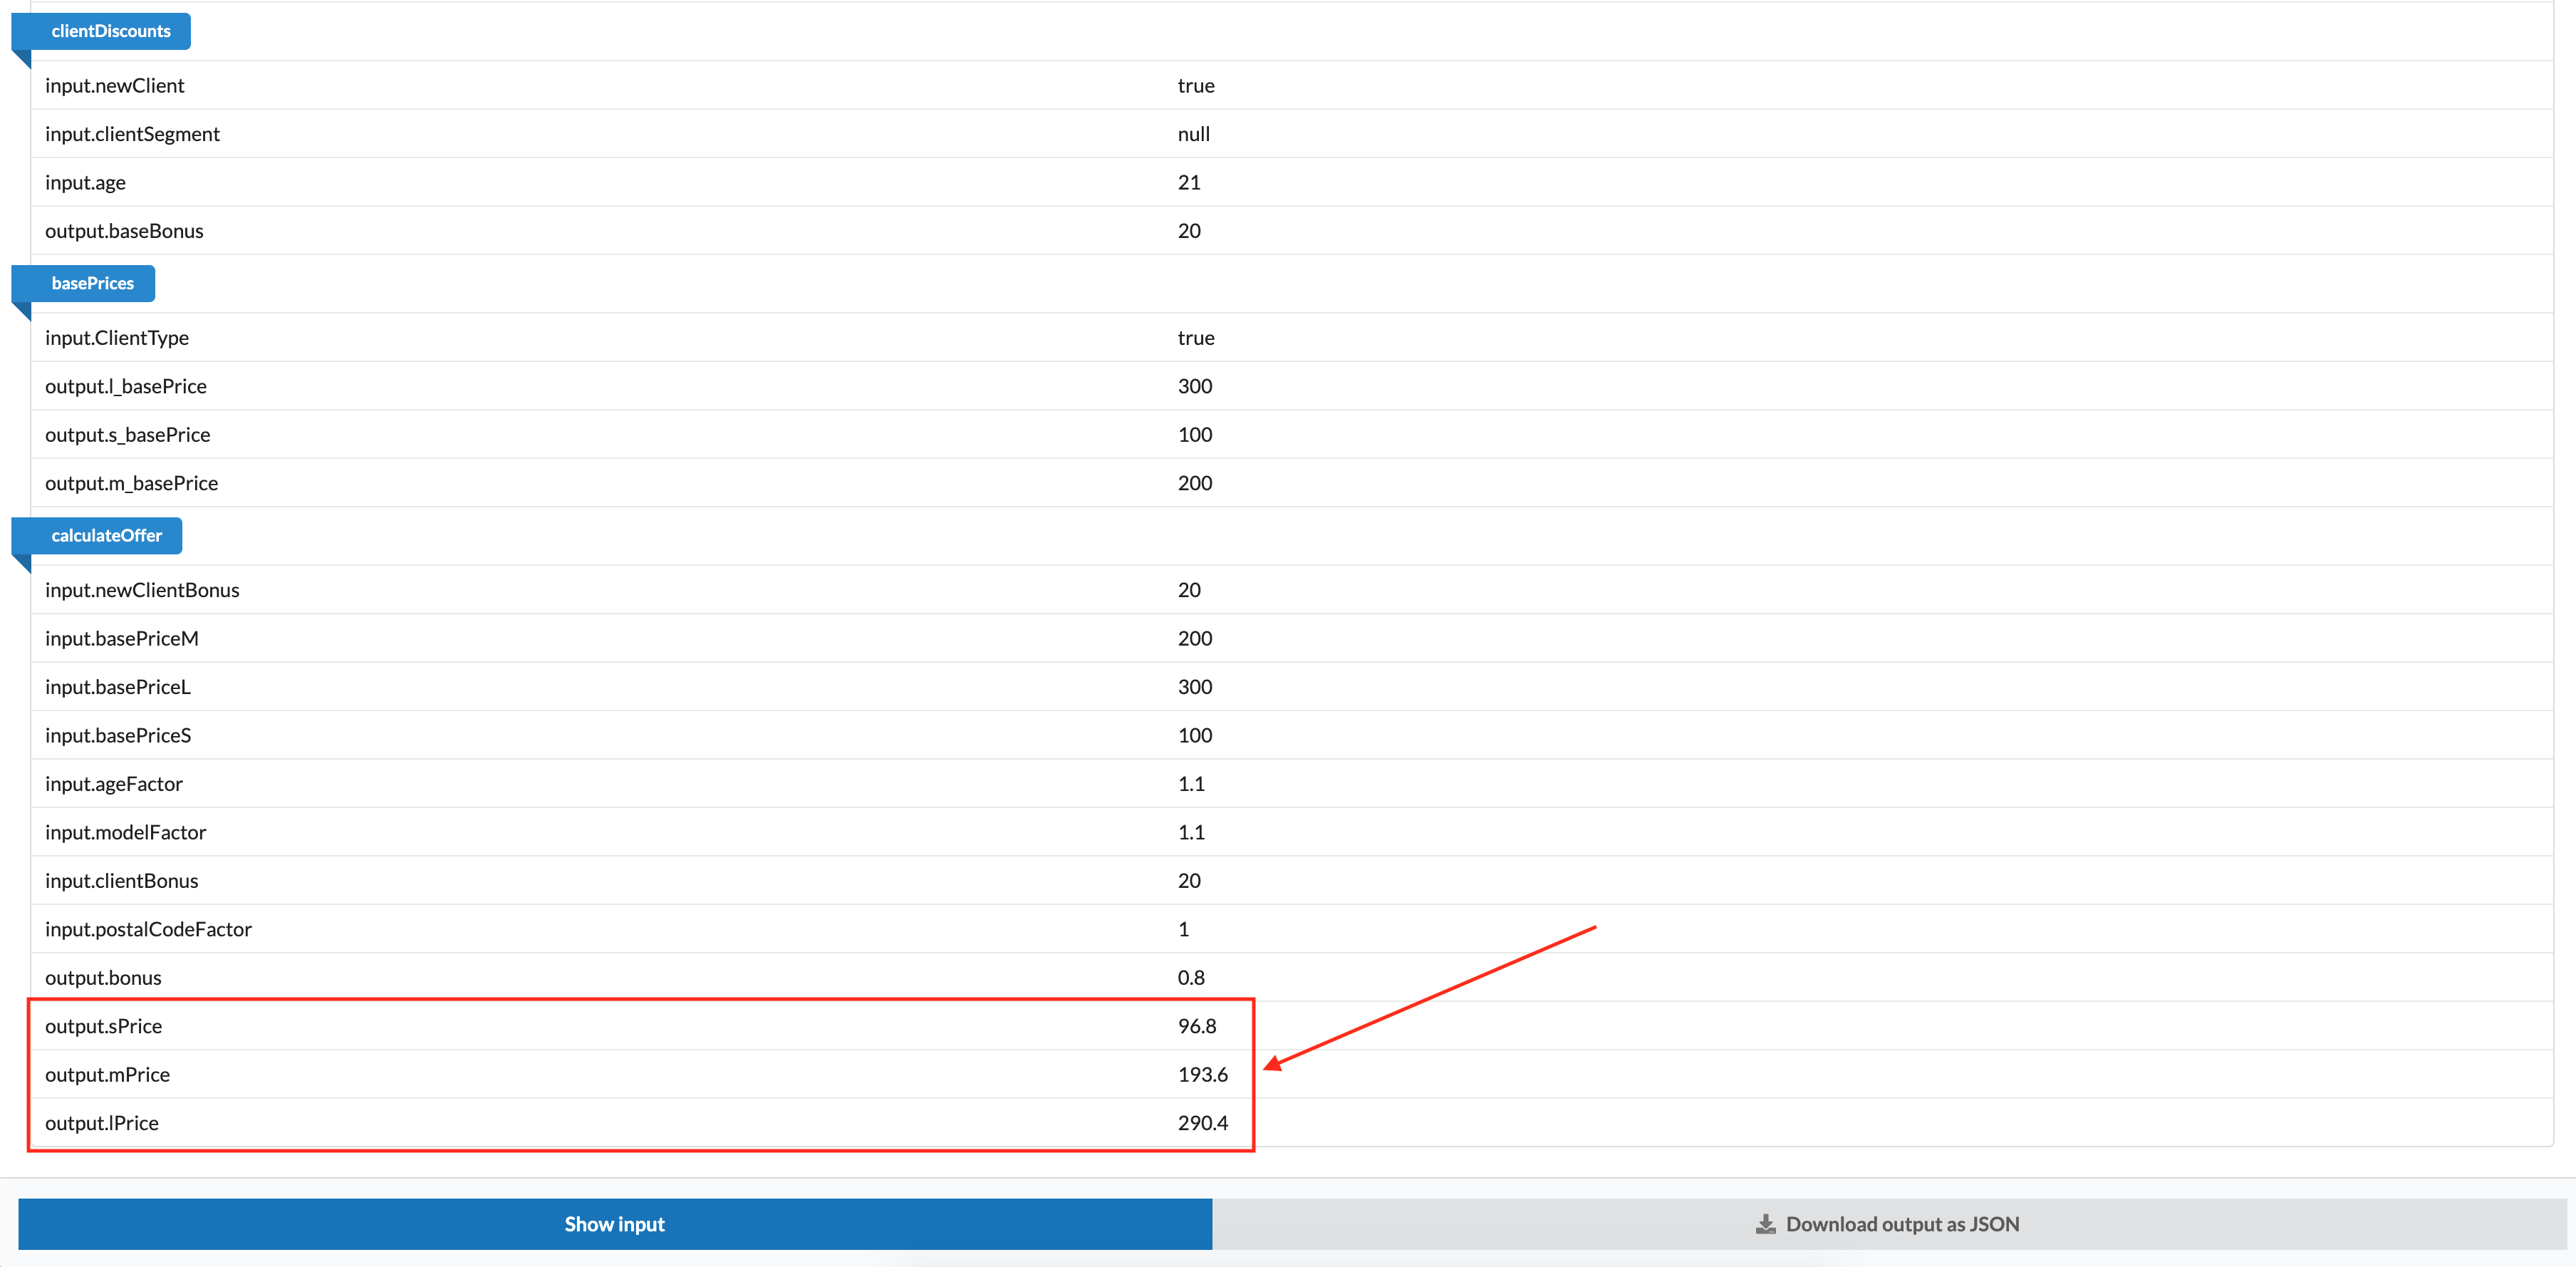
We can now see our output: Three basic pricing offers (small, medium, and large package) for a new client, 21 years of age, 0 accidents, lives at a certain postal code, and who drives a Ford which weighs 1000kg and has a power factor of 100.
Congratulations! You have now completed a basic microservice with theWrench! When creating your own flow, you can always feel free to play with the inputs and code editor without having any effect on a flow already in production. So, please feel free to make any changes you require, at any time in the creation process, to create the perfect flow for your needs.