Create the first service tasks and test the flow
Now that we have a switch in place, we need to create the service tasks to which it is connected. Then can we do our first flow test.
First, we will create our service task called rejectClient. The purpose of this task is to direct the flow to the end based on the output of the decision table “accidentHistory”. If accidentHistory's output is NOT “accepted”, the flow moves to the service task “rejectClient”, which in turn, directs the flow to end.
To create this task, position your cursor on any empty line under isClientDenied (for example, line 57), and use the keyboard shortcut to insert a new service task. Give it the ID “rejectClient”.
Delete the input section, as it is not needed.
Change the default value for then. Enter then: end. This will tell the this task to go directly to the end of the flow.
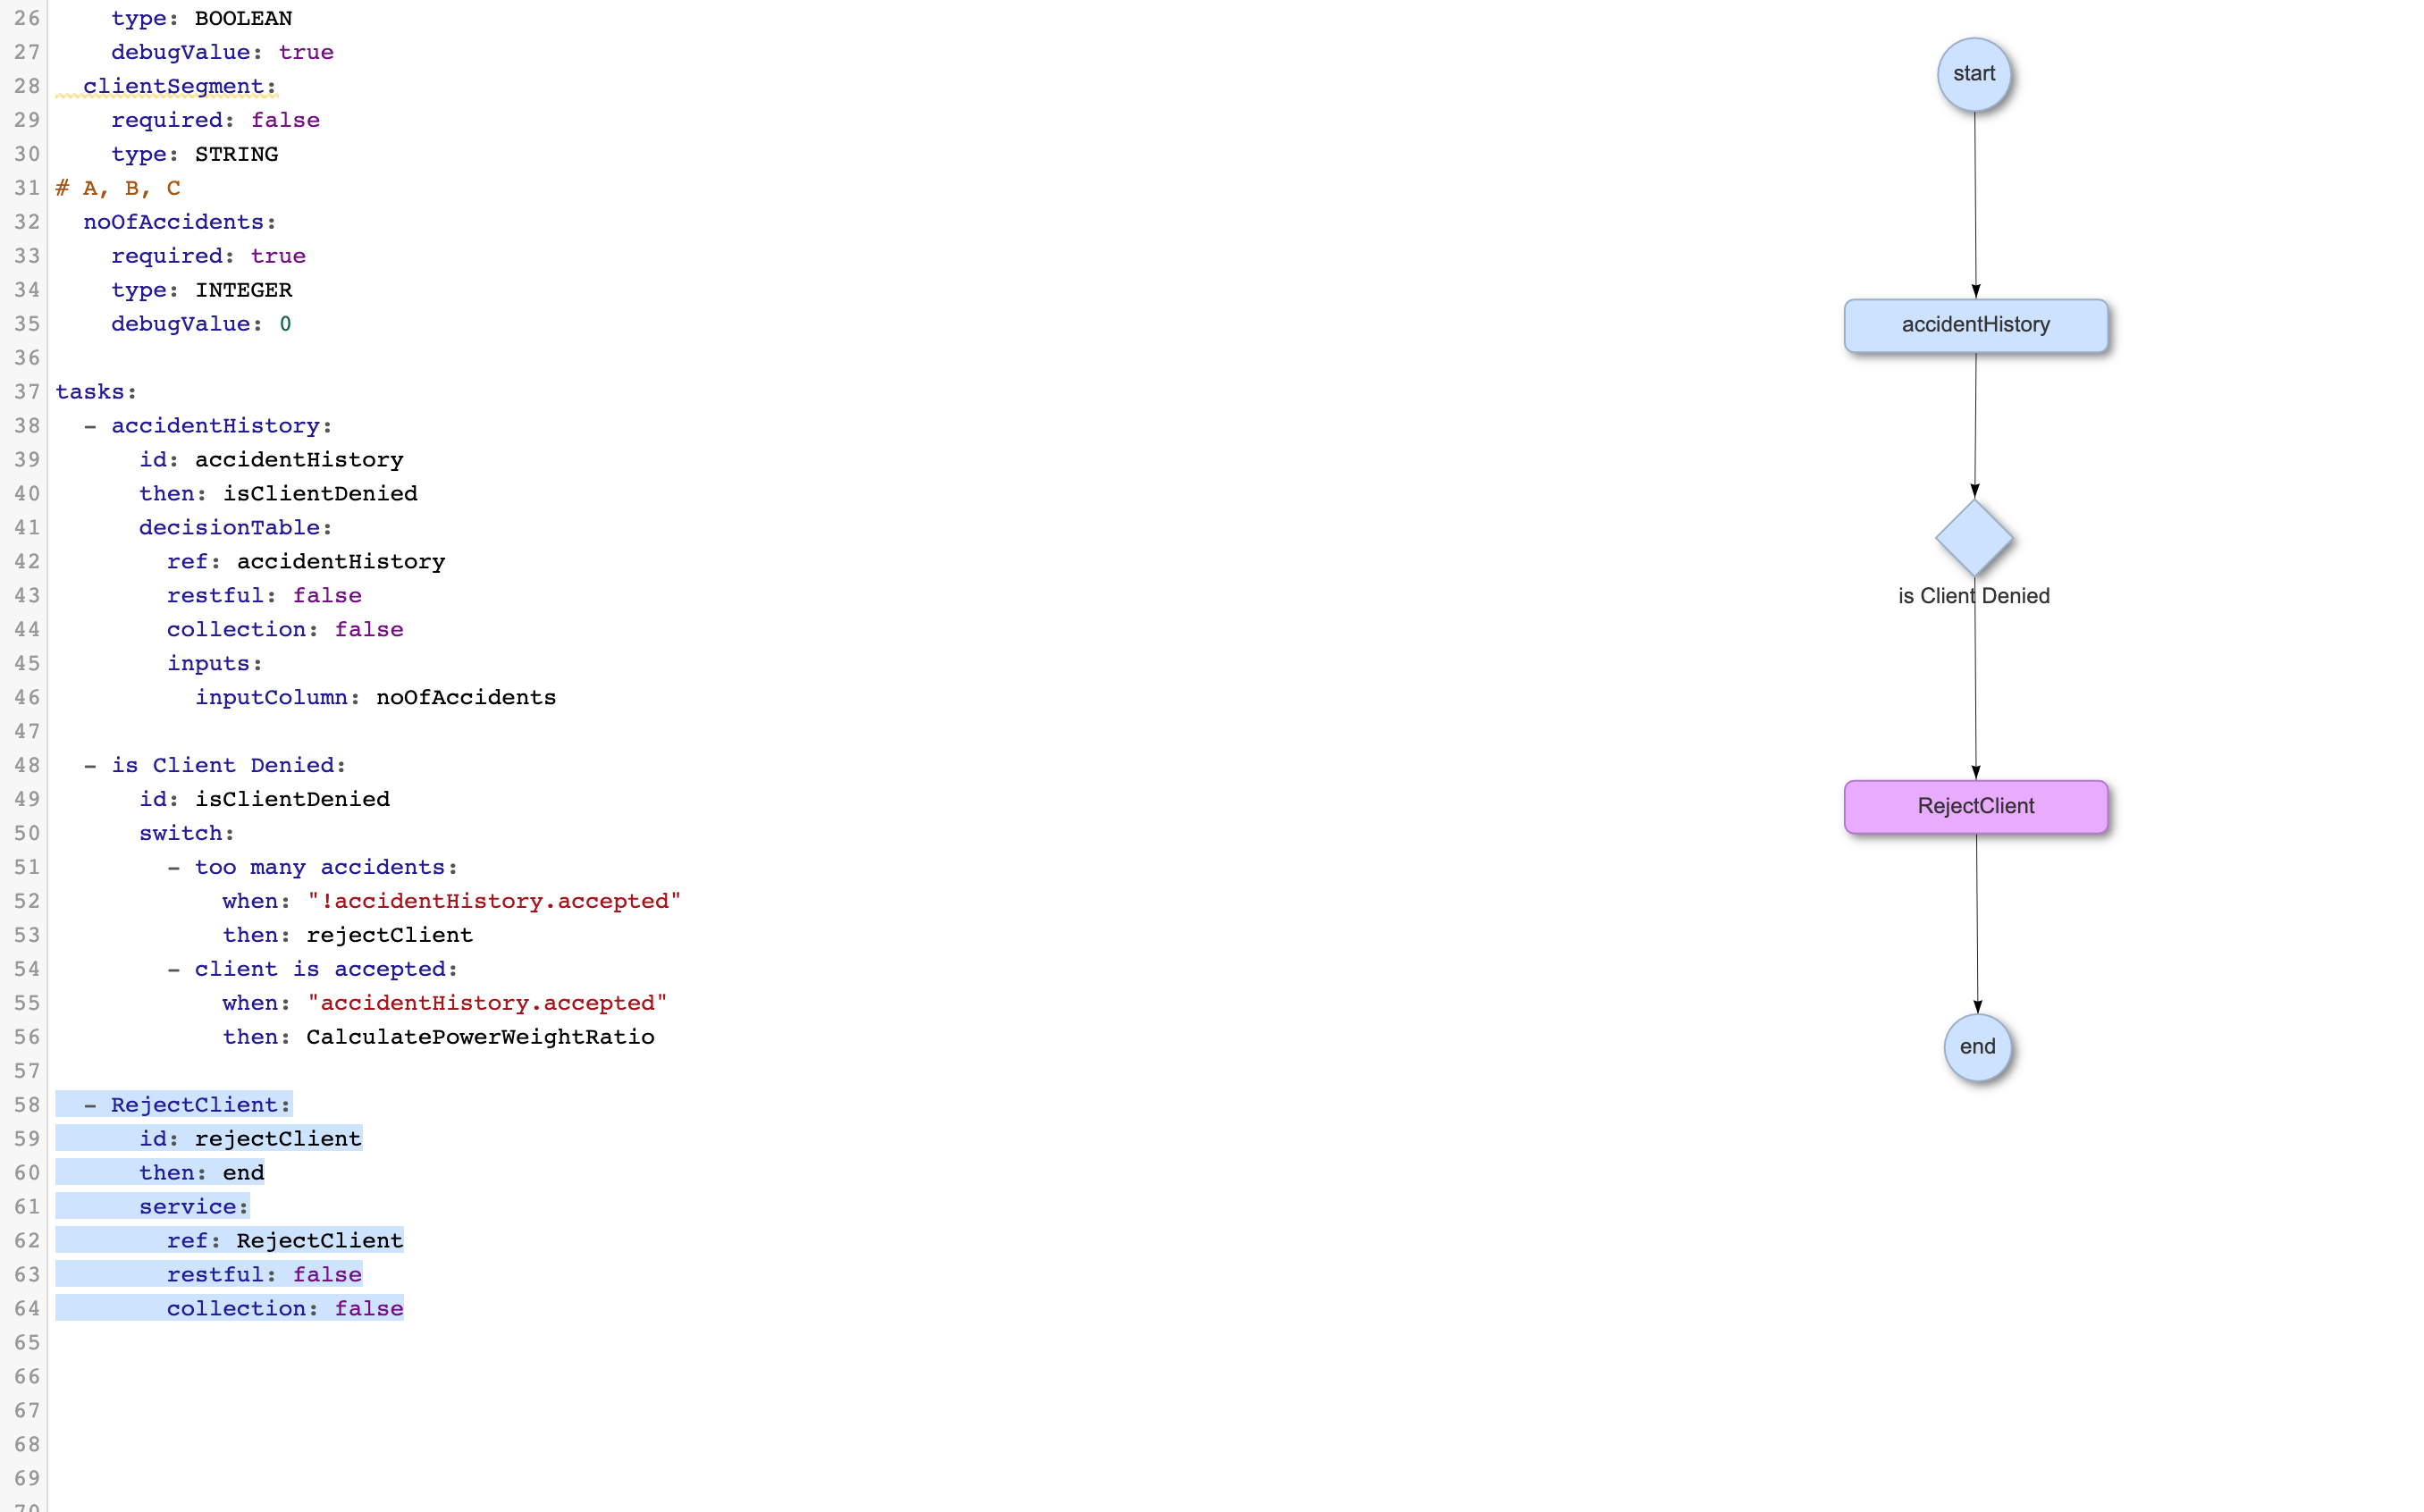
You should see this:

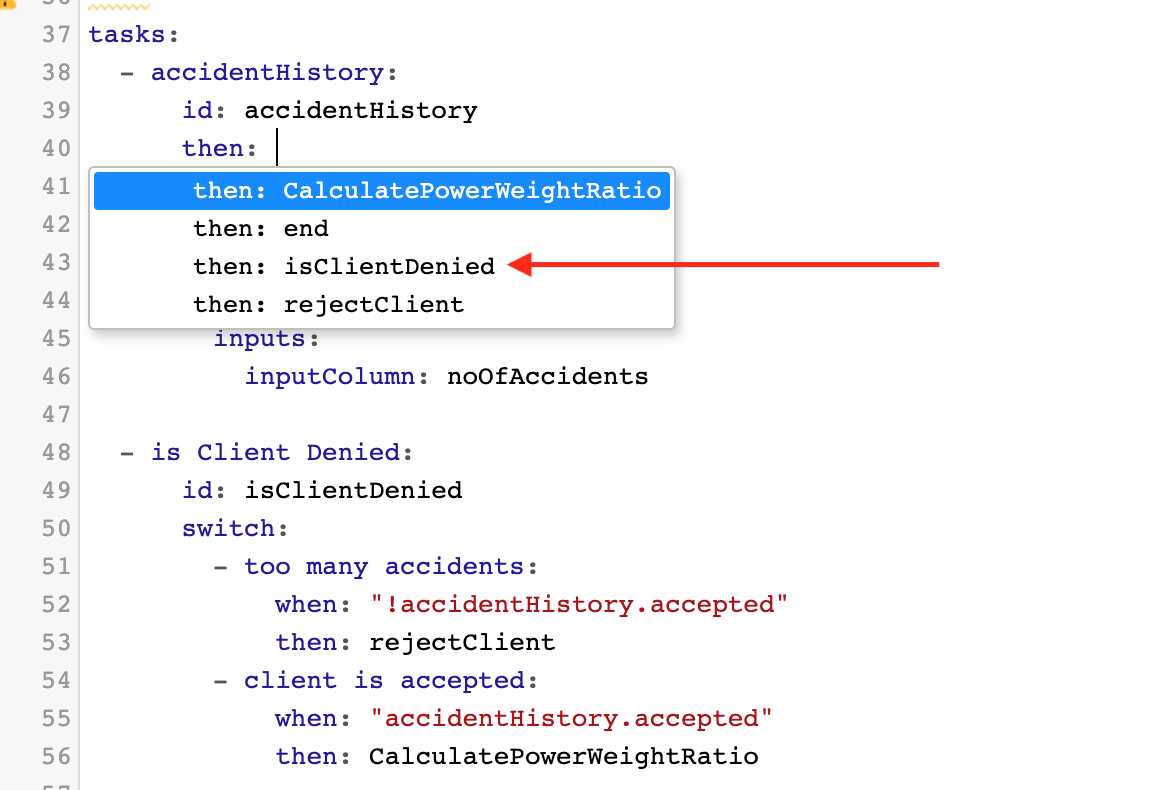
Still, you can see that the switch does not appear on the flow diagram. This is because previously, we set the flow to end after the first task we created: accidentHistory. We need to set the flow to continue on to rejectClient. Under the task accidentHistory, simply replace then: end with then: isClientDenied. You can either type in the ID or you can hit CTRL + SPACE to bring up a dropdown of all available values.
Once this has been done, you will be able to see the switch task on the flow diagram. Note that the switch does not branch because we have not yet created both branches.
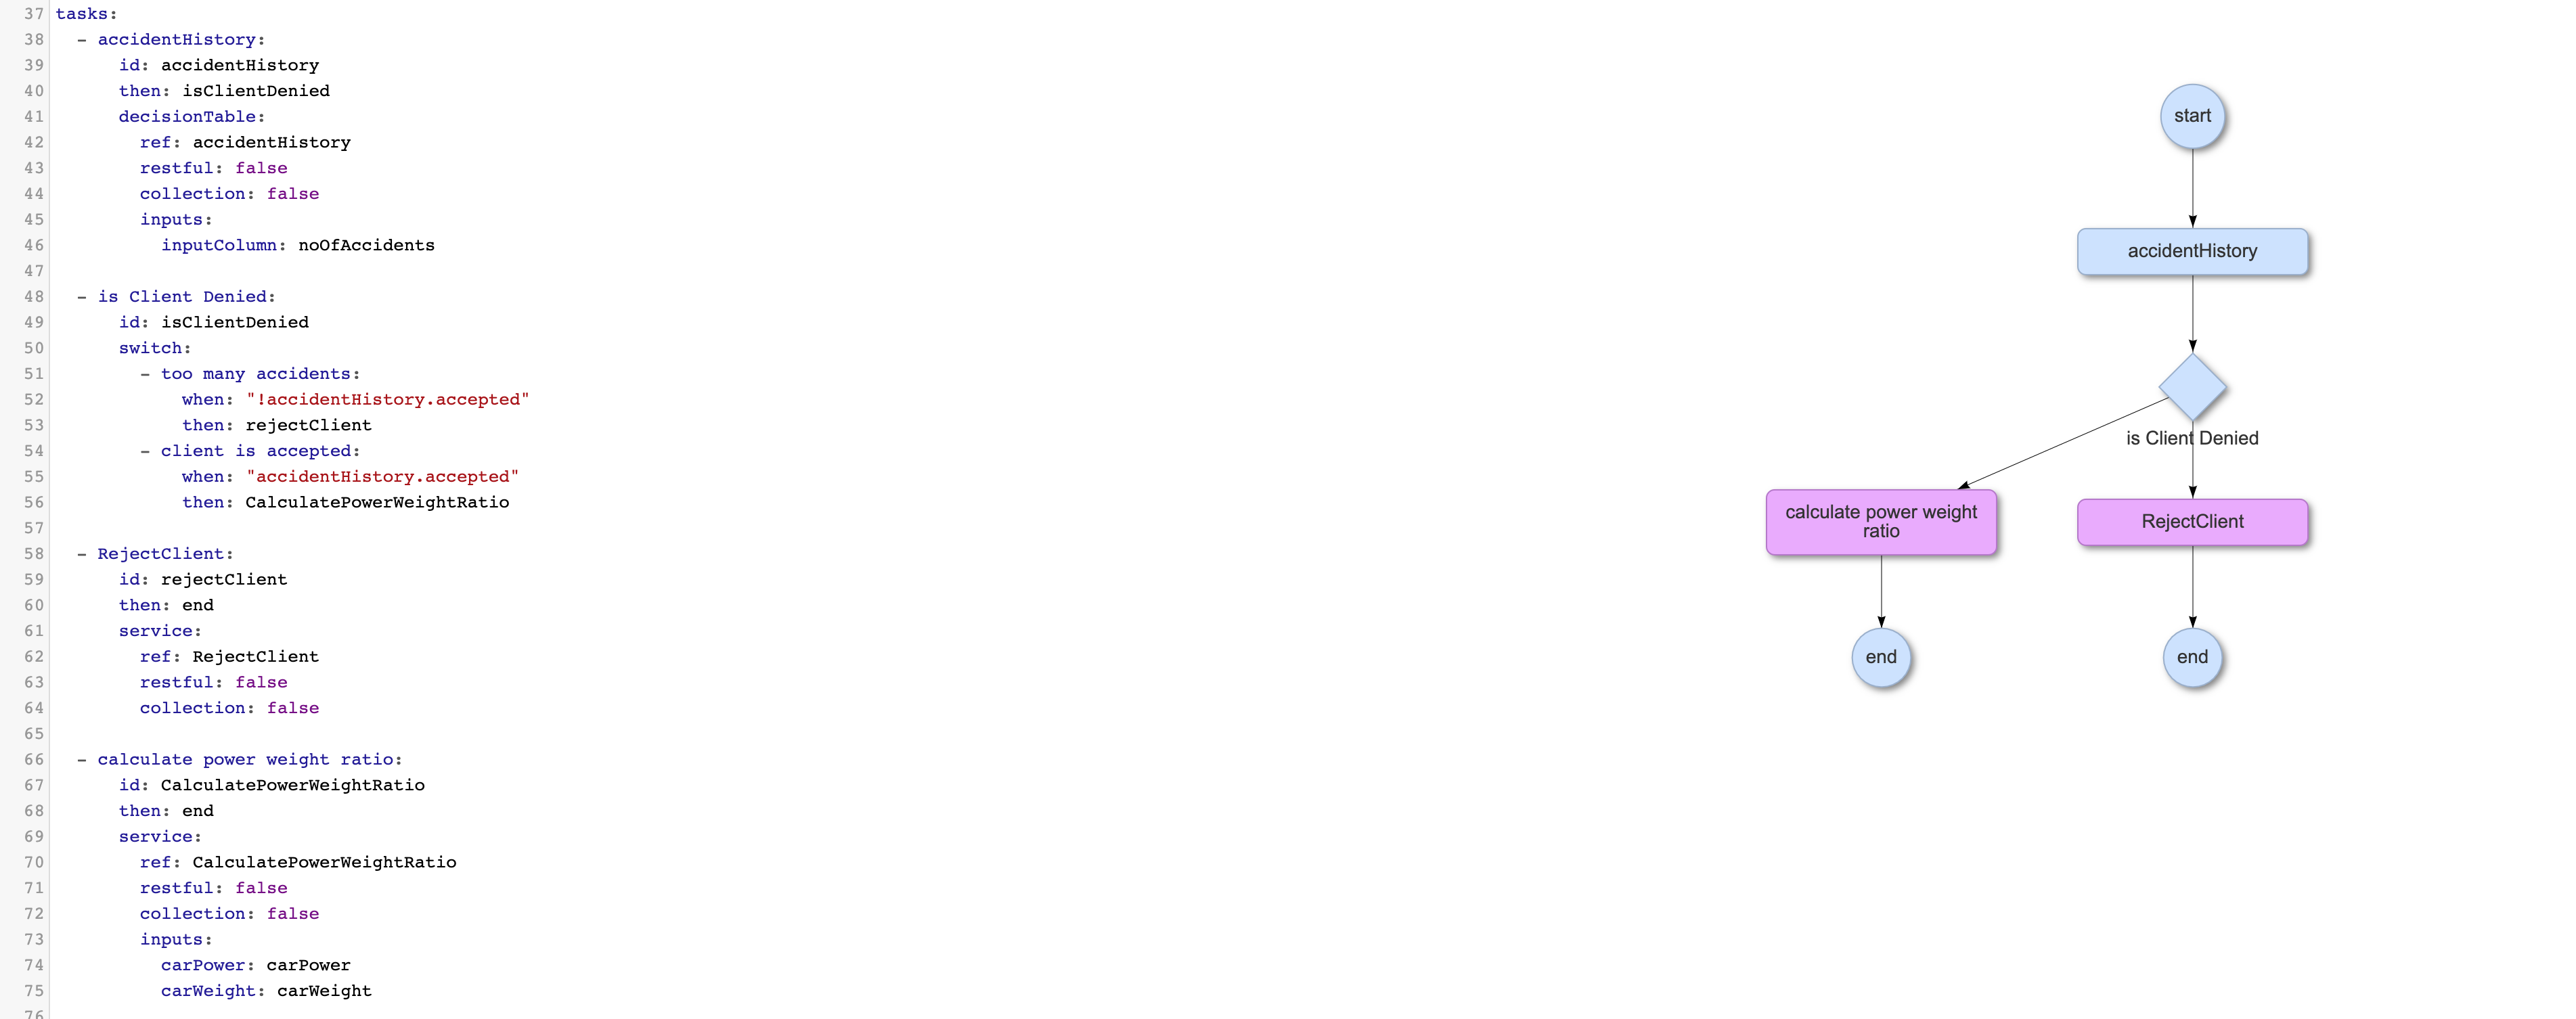
Next, we will create the second service task: calculatePowerWeightRatio. This task will be run if the output from the decision table “accidentHistory” is “accepted”. This task will handle the inputs carWeight and carPower that we specified at the beginning of this guide, performing mathematical operations on them to produce a car's power-to-weight-ratio, which will have an impact on the final price offer for the client.
On any empty line under the service task rejectClient, create a new service task and give it the ID CalculatePowerWeightRatio. Assign it two inputs: carWeight and carPower. Set next: to next: end. You should now see the following:
It is important to note that the calculatePowerWeightRatio has had its Java code edited to produce this output. To see and edit the code via theWrench Composer, double click on the calculatePowerWeightRatio bubble on the flow diagram to bring up the code editor.
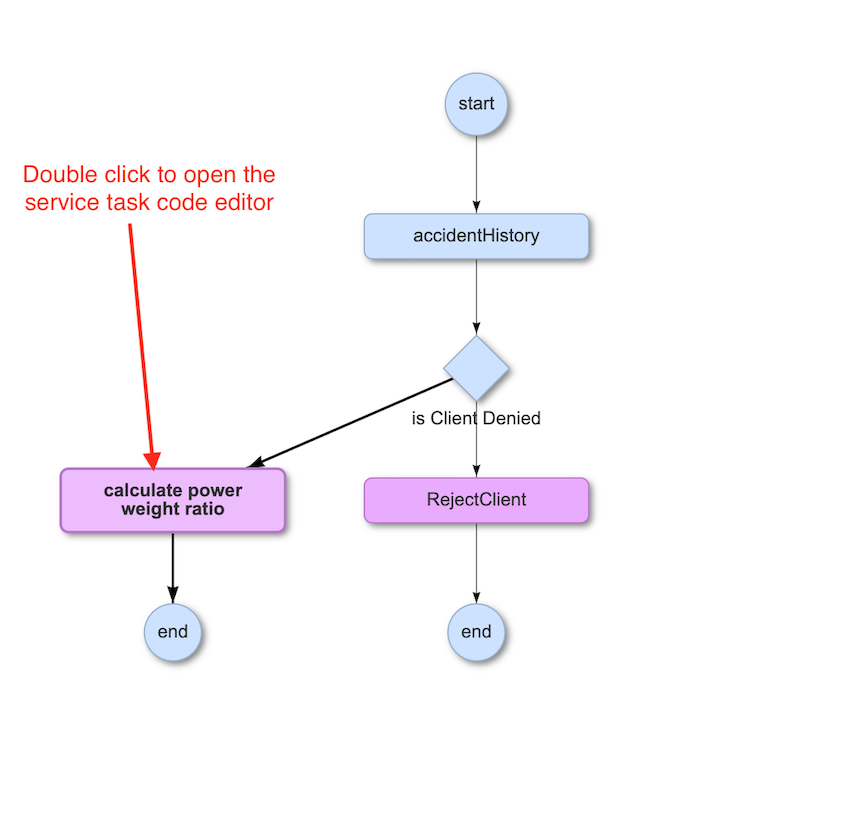
This is a screenshot of the code behind this task. Note that you can edit the code to do whatever you need.
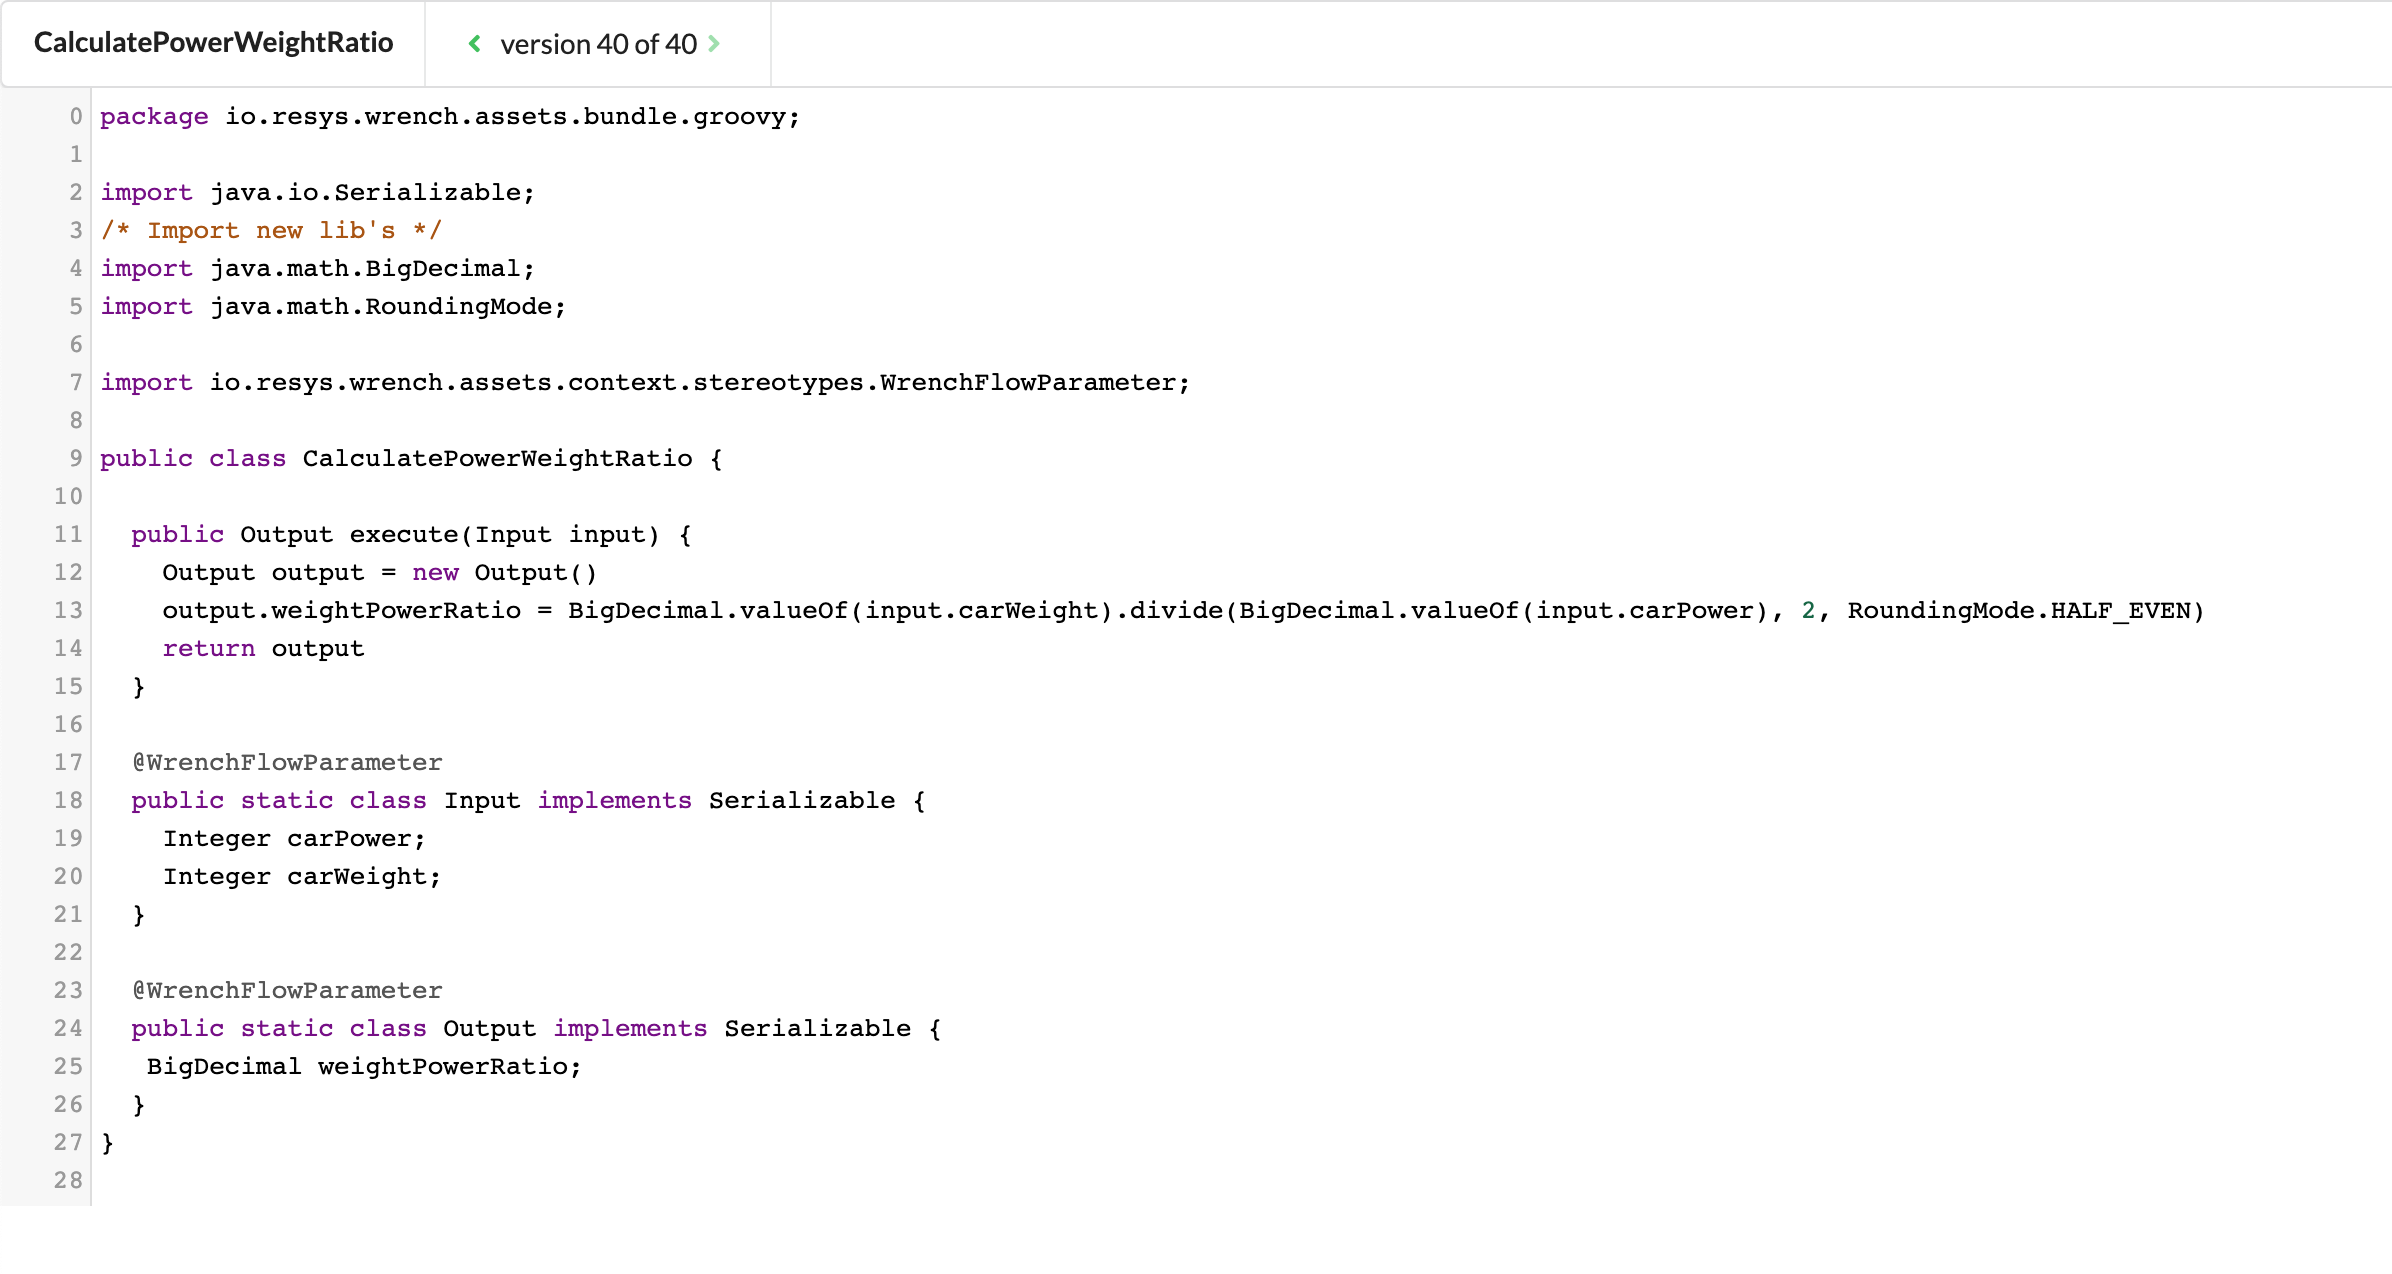
Code example
package io.resys.wrench.assets.bundle.groovy;

import java.io.Serializable;
/* Import new lib's */
import java.math.BigDecimal;
import java.math.RoundingMode;

import io.resys.wrench.assets.context.stereotypes.WrenchFlowParameter;

public class CalculatePowerWeightRatio {

  public Output execute(Input input) {
    Output output = new Output()
    output.weightPowerRatio = BigDecimal.valueOf(input.carWeight).divide(BigDecimal.valueOf(input.carPower), 2, RoundingMode.HALF_EVEN)
    return output
  }

  @WrenchFlowParameter
  public static class Input implements Serializable {
    Integer carPower;
    Integer carWeight;
  }

  @WrenchFlowParameter
  public static class Output implements Serializable {
   BigDecimal weightPowerRatio;
  }
}
First flow test
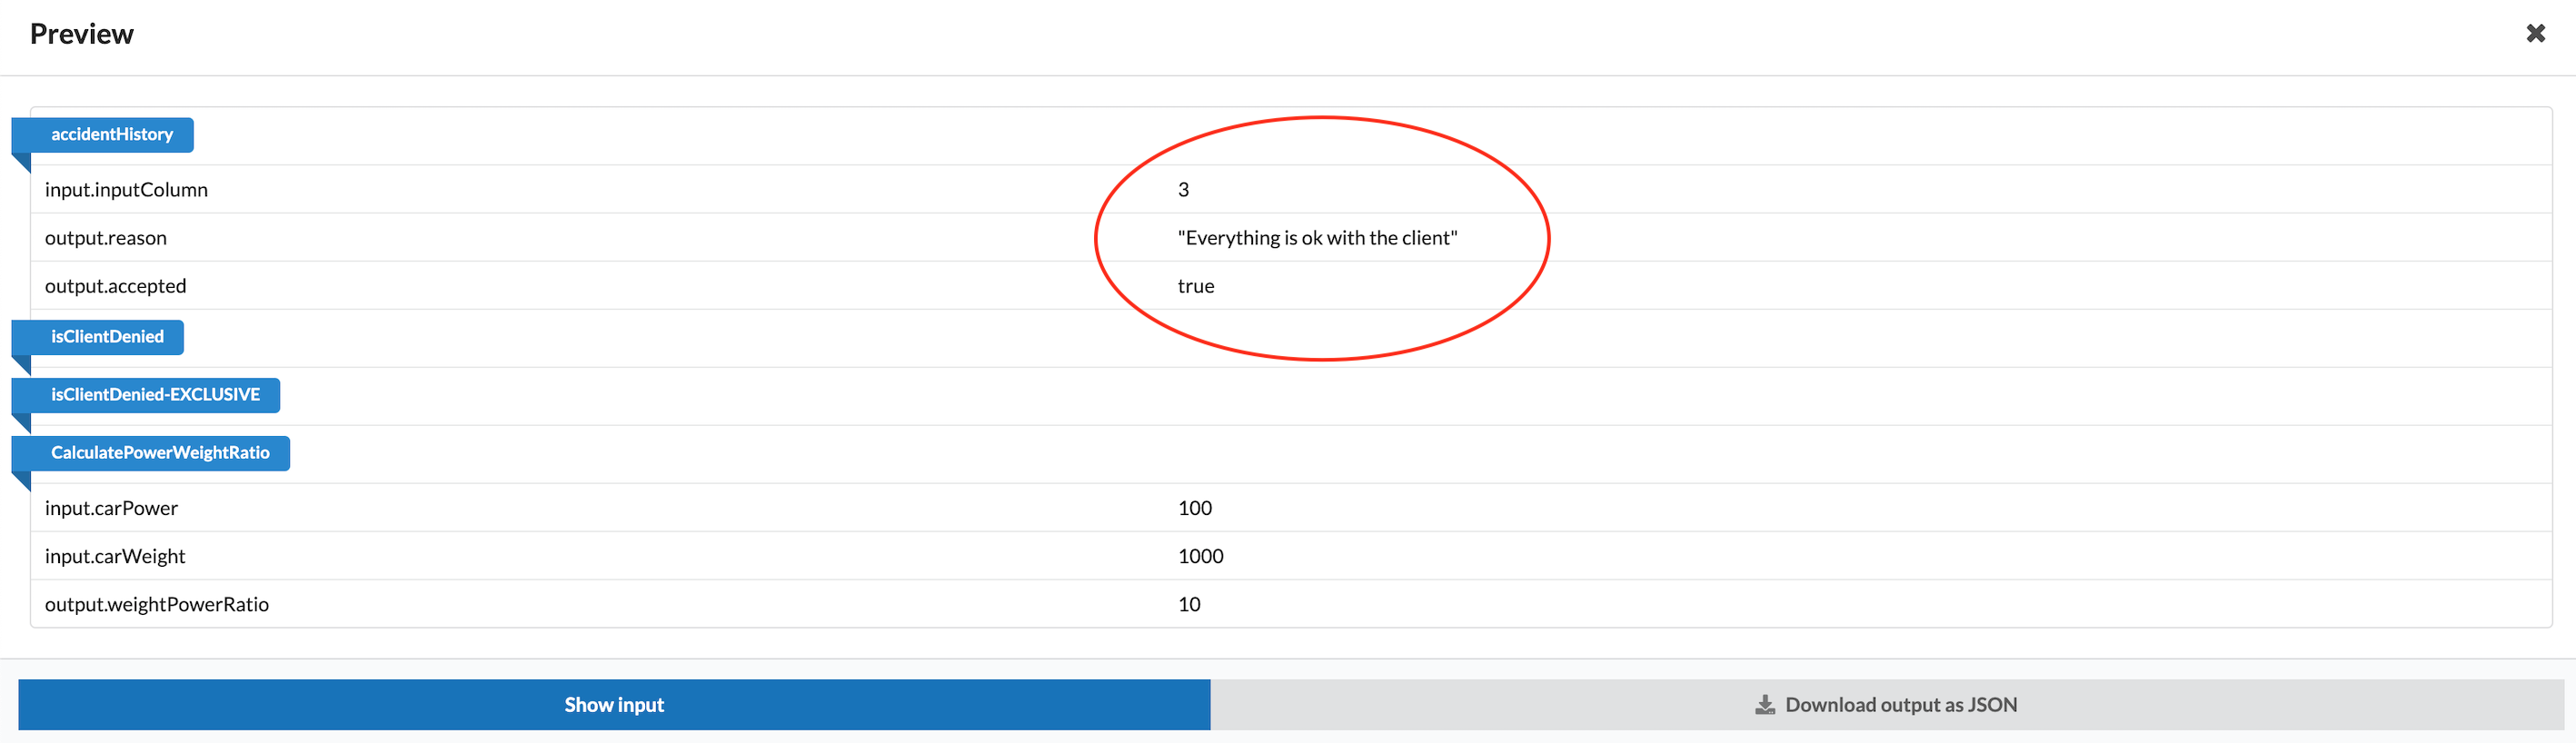
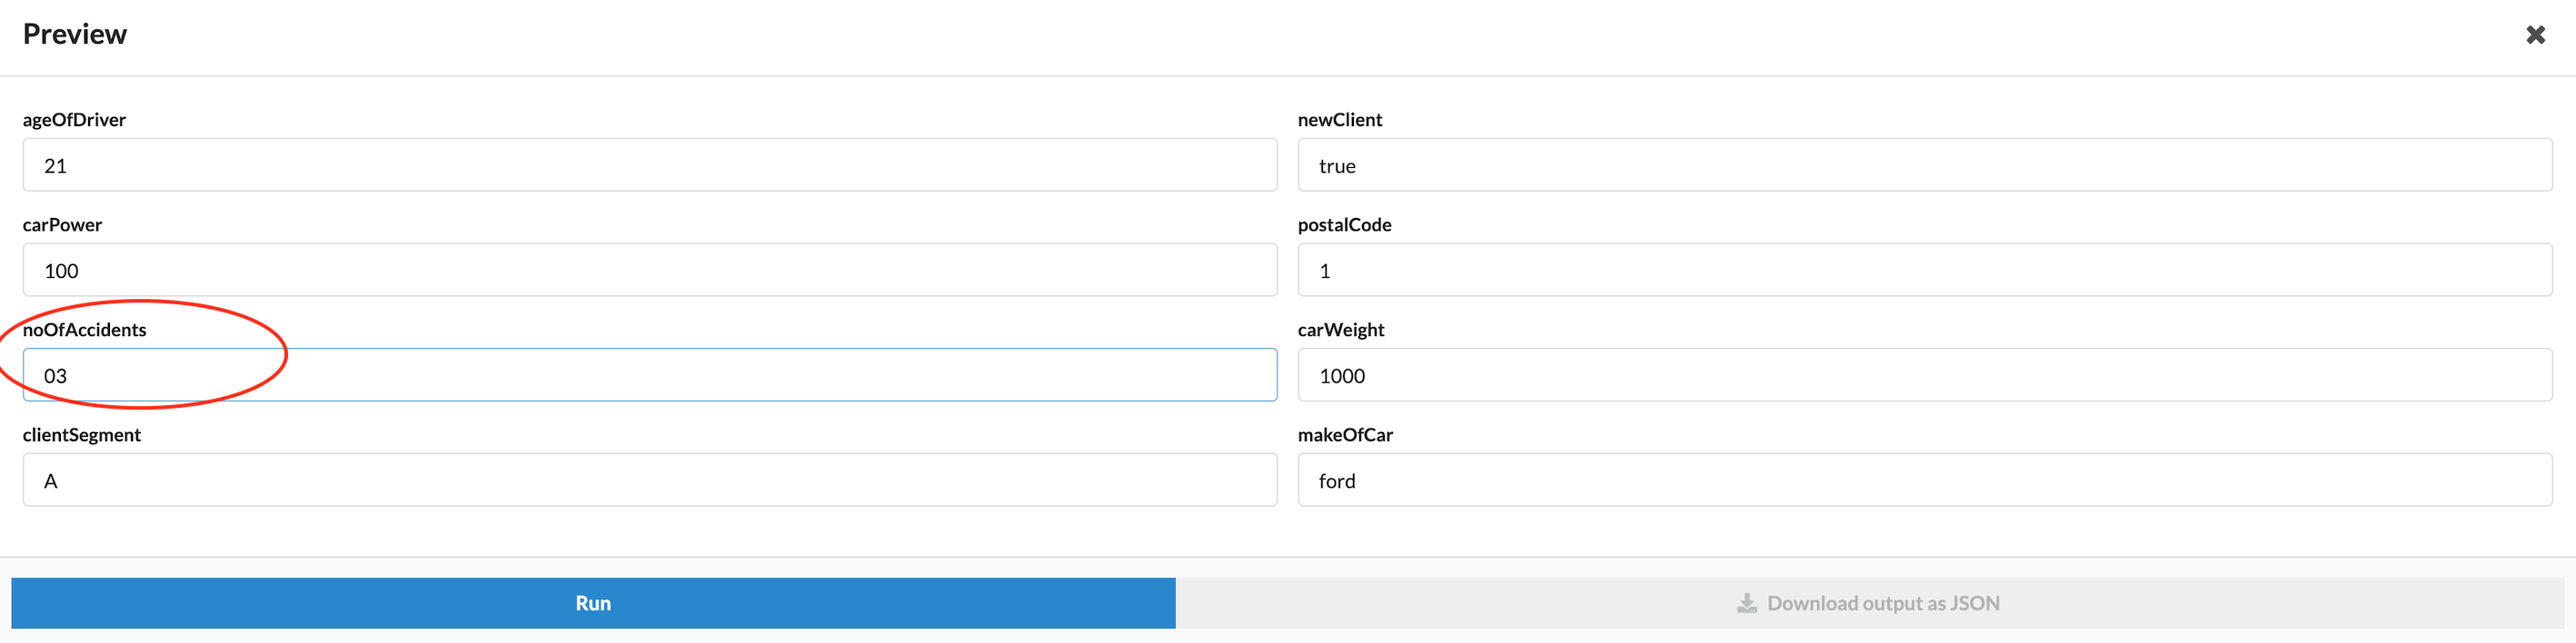
Everything is now in place to do our first test. Testing is done via the Preview functionality located at the top of the editor window. Click there and test your inputs.
For this example, we entered “noOfAccidents” as 3, which produces the expected result of “accepted=true”.
Entering the input
Test results / Outputs